This is the multi-page printable view of this section. Click here to print.

Return to the regular view of this page.

Logging in to Kianda

If your organisation already has a login, go to your given Kianda login page. The Kianda platform runs in the cloud, so you only need a web browser to use it and can use any mobile device to log in.

When you log in, you will have access to the Kianda workspace where you can build end-to-end business processes, connect to data sources and view the results in real-time data dashboards.
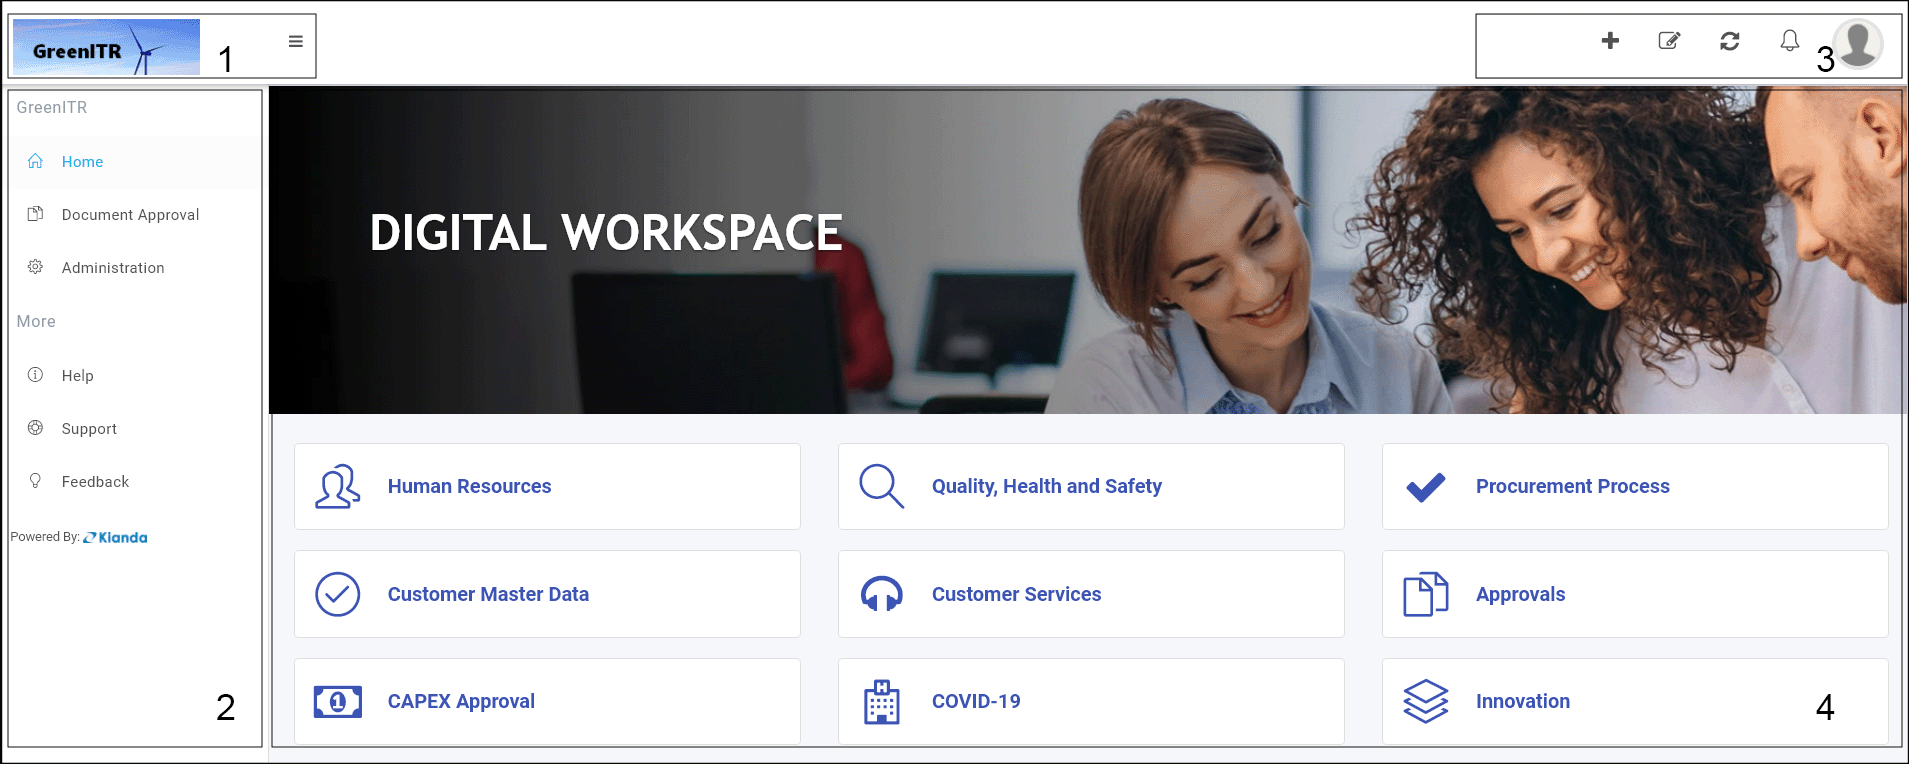
Kianda workspace

User interface

The layout of the Kianda workspace is as follows:

  1. Company logo - the top left-hand corner is reserved for uploading company logos. If you click on the Collapse navigation button Collapse navigation button you will see the collapsed version of the company logo and collapsed side menu, giving you more real estate in the central view panel.
  2. Side menu - Beneath the logo is the left-hand pane, the side menu, containing all of the key functions you need to create and manage your business processes. From this menu you will start creating processes. In this left side menu, under More, there are links to get Help, Support, and give Feedback and under Administration you can choose Developer to develop your own widgets (see Developer for more details).
  3. Quick Action menu - the top right-hand menu bar contains shortcuts to keep you updated and allows you to add dashboard pages.
  4. Main view - the central view panel is the main view for any of the functions chosen from the side menu. Here you can view and edit processes and dashboards.

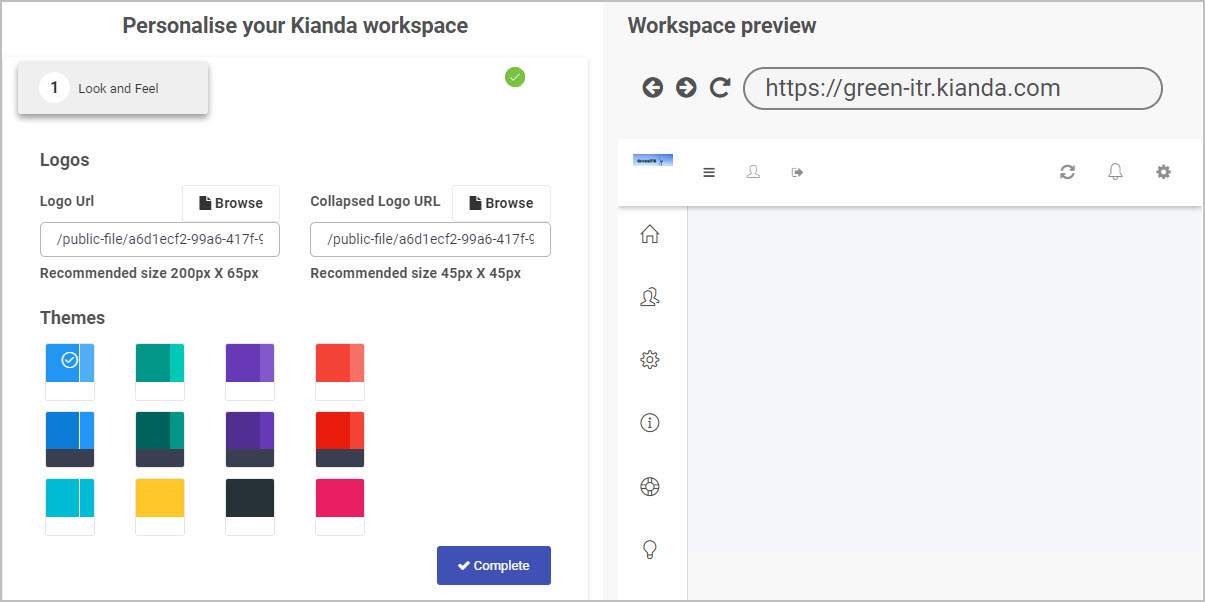
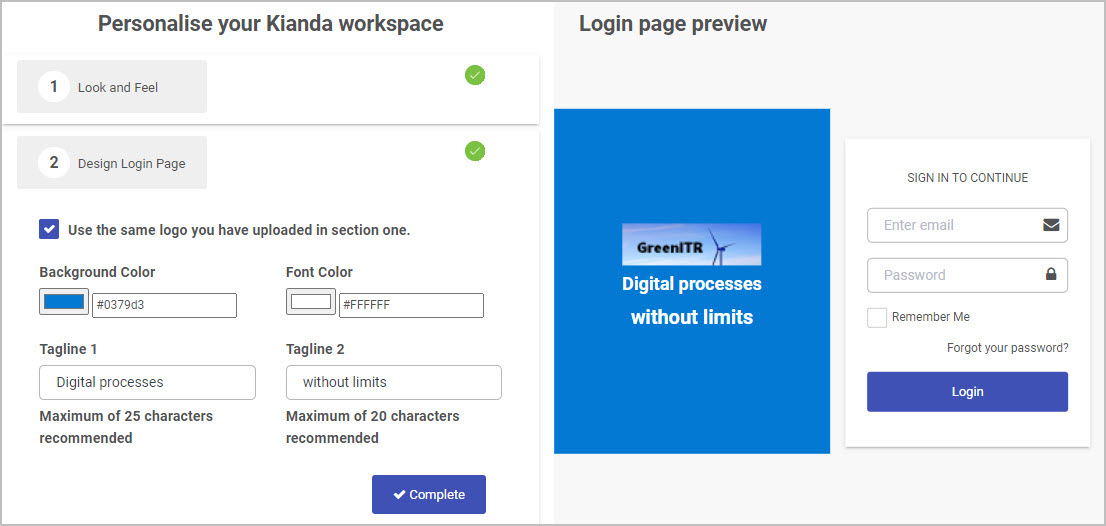
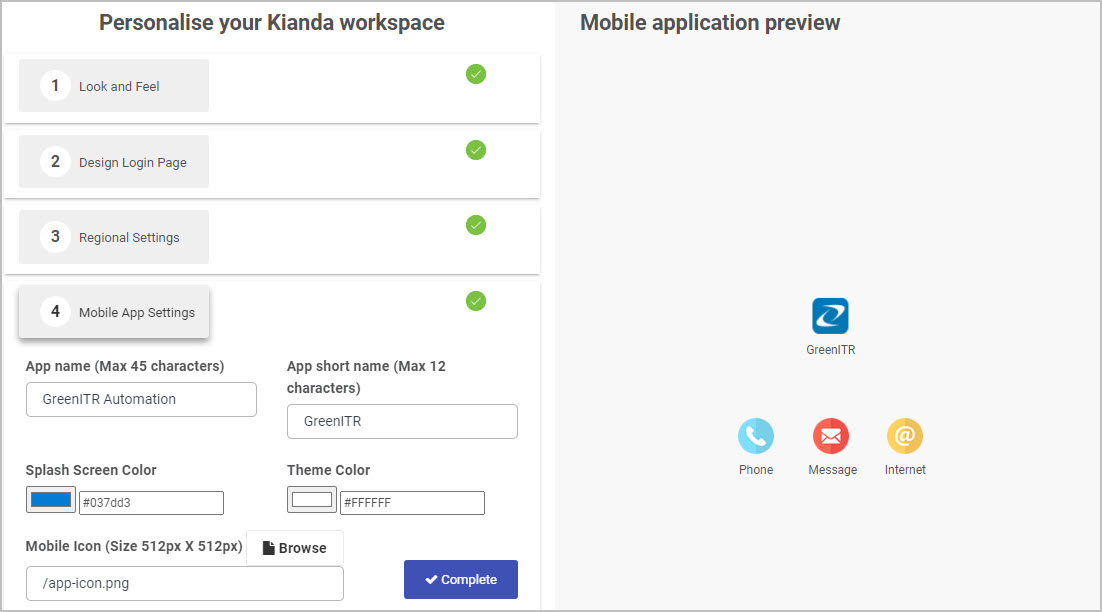
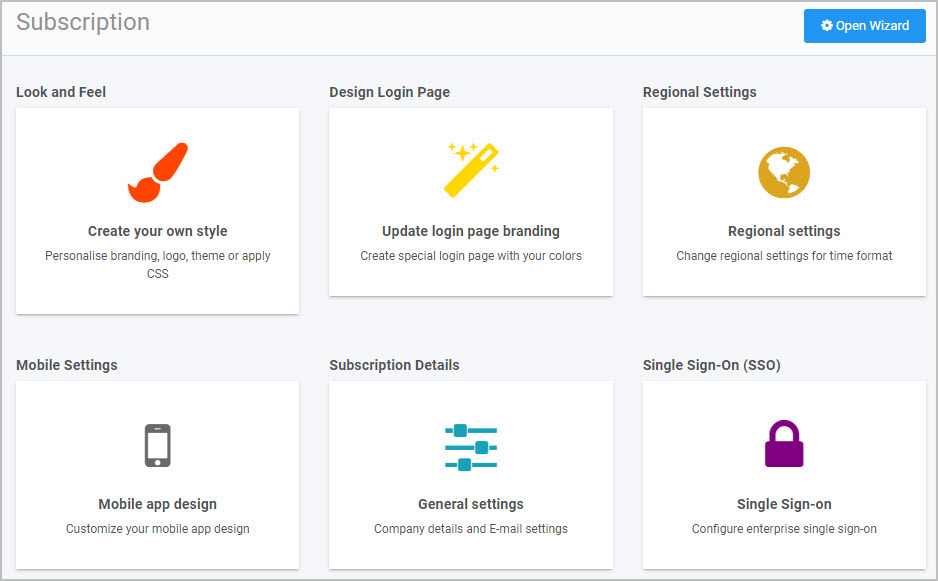
Go to Personalise your workspace to find out how to change the look and feel of your workspace and to set regional settings.

What’s next Idea icon

Learn how to create your first Kianda process, then follow these simple steps:

1 Plan your process

2 Design and build your process

3 Publish your process

If you have coding experience and want to delve straight into how you can use Kianda to create your own widgets, go to Developer to learn more.

User tip Target icon

Take a look at our series of short How to videos designed to help you.

1 - Personalise your workspace

When you log in to Kianda for the first time, a wizard opens allowing you to change the look and feel of your workspace, and to manage regional and mobile app settings. There are four sections within the wizard.

We will now go through each of these four sections of the wizard for a sample company called ‘GreenITR’.

Look and feel

  1. Click on Browse to upload your company logos, for both a full logo and collapsed size logo.

    Note: Recommended size for a full-size logo is 200 x 65px and 45 x 45px for a collapsed logo.

  2. Click on a colour scheme under Themes and preview the results under Workspace preview on the right.

    Personalise your workspace look and feel

    Look and feel

  3. Click on Complete when done.

Design Login page

  1. Click on Browse to upload a logo or check the checkbox above the Logo URL to use the same one as used in the Look and Feel section.
  2. Under Background and Font, type in the hex value for your chosen colour, or click on the colour box and use the eyedropper or slider to choose your chosen colour, or type in RGB values.

Design your Login page

Design login page

  1. Click into the fields under Tagline 1 and Tagline 2 to type in the words or phrases that will appear on your login page, previewed on the right.
  2. Click on Complete when done.

Regional settings

  1. Click on Regional settings and choose an appropriate setting from the dropdown list.
  2. Click on Time zone and choose an appropriate time zone from the dropdown list.

Change Regional Settings

Regional settings

  1. Click on Complete when done.

Mobile App settings

  1. In the Mobile App Settings section, you can customise how the Kianda workspace will appear as a mobile app. Type in a name under App name and App short name
  2. Under Splash Screen and Theme, type in the hex value for your chosen colour or click on the colour box and use the eyedropper or slider to choose your chosen colour, or type in RGB values.

Change Mobile App Settings

Mobile App settings

  1. Click on Browse to upload an icon for your mobile app.

    Note: Mobile icon size is 512 x 512 px.

  2. Click on Complete when done.

  3. Click on You are ready to go to close the wizard.

    You can change your settings again at any time by going to the Left side menu > Subscription and clicking on a particular area of interest or click on Open Wizard.

Subscription page

Subscription settings

What’s next Idea icon

Go to Create your first Kianda process to start creating your first process.