What is Low-Code Development?
Low-code development offers software developers a shortcut to create something new and beneficial for their organisation. Rather than having to think about every single line of code, as a developer you can take advantage of Kianda’s Developer section to create your own custom widgets from predefined field, rule and dashboard code.
You can also quickly use Kianda Developer to add webhooks, providing an efficient way to push GET requests to other applications in real-time as the Kianda process runs and avoiding the need to poll for data.
Kianda uses EmberJS to build widgets, and in particular the Handlebars templating library, to power the application’s user interface. See templating basics to get started.
EmberJS templating basics
With Handlebars you can quickly build web applications that are made up of different components. Handlebar templates contain static HTML and dynamic content inside Handlebars expressions, which are summoned with double curly braces: {{ }}
Dynamic content inside a Handlebars expression is rendered with data-binding. This means if you update a property, your usage of that property in a template will be automatically updated to the latest value.
Helpers
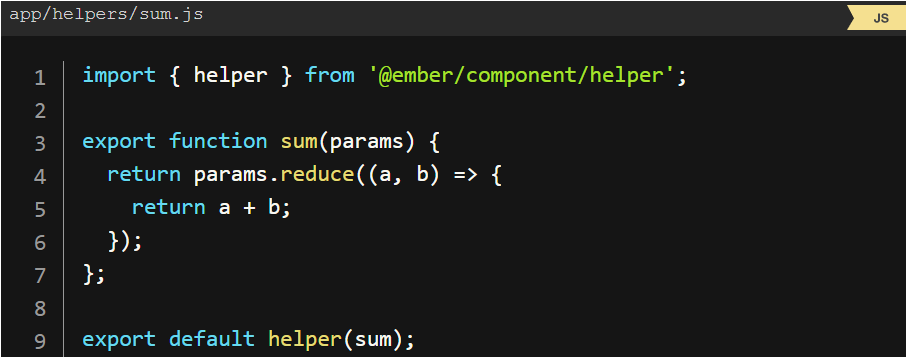
Ember gives the ability to write your helpers, to bring a minimum of logic into Ember templating. For example, let’s say you would like the ability to add a few numbers together, without needing to define a computed property everywhere you would like to do so.
Helper example
Conditionals
Statements like if and unless are implemented as built-in helpers. Helpers can be invoked three ways; inline invocation, nested invocation and block invocation. For more details, go to: https://guides.emberjs.com/v2.18.0/templates/conditionals/.
How to get started as a Kianda low-code developer
Kianda Developer is a user-friendly interface that allows you to create custom widgets in a few minutes. A custom widget could be a ‘Field’, ‘Rule’ or ‘Dashboard widget’. This video goes through an example of how to create a custom field widget.
Creating a custom field widget
To create custom widgets:
-
Go to the Side menu > Administration > Developer
-
Click on Add widget.
-
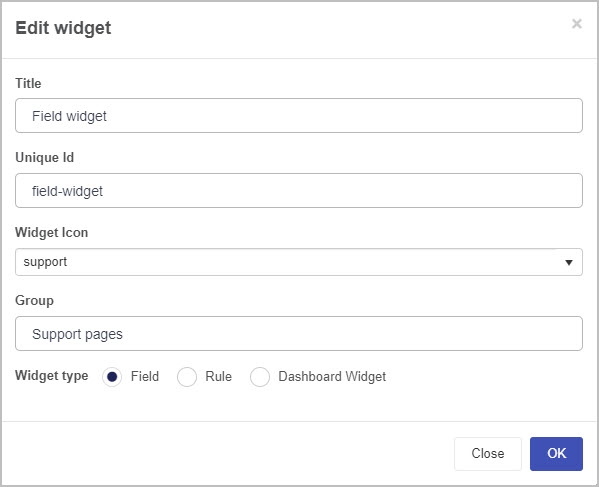
Fill out the Edit widget dialog box - that is Title, Unique Id (which is autofilled from the title), Widget Icon, where you can select from hundreds of icons, Group where you can specify what widget folder you would like the new widget to be added to, and then Widget type. There are 3 options: Field, Rule or Dashboard widget - click on each link for more details.
-
Click on OK when complete.
-
Widgets created are visible in the main widget view. From here, you can edit a widget by clicking on the Edit button
 (Pen icon), delete a widget by clicking on the Bin/Trash button
  and restore earlier versions of a widget by clicking on the Version restore button
  .
.Widget view
-
Webhooks can be created to send a message to a specific URL by clicking on the Webhooks button. Click the link for more information.
Field widget
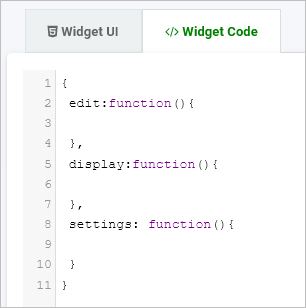
When you create a custom field widget, the Widget UI and Widget Code tabs are displayed. These two screenshots show the default code for ‘Widget UI’ and ‘Widget Code’.
The ‘Widget UI’ defines the HTML, handlers, expressions and more.
Field widget UI

The ‘Widget Code’ defines the logic and functions.
Field widget code
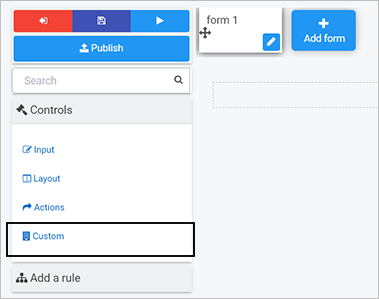
Custom field widgets you create will be available for use in Kianda Designer by going to Side menu > Administration > Designer > click on an existing process or Add new to add a new process (then click on a form to edit it), and see the Custom fields added under Controls.
Rule widget
When you create a custom rule widget, the Widget UI and Widget Code tabs are displayed. These two screenshots show the default code for ‘Widget UI’ and ‘Widget Code’. The ‘Widget UI’ defines the HTML, handlers, expressions and values for rules.
Rule widget UI
Rule widget code
The ‘Widget Code’ defines the logic, functions and variable routines.
Dashboard widget
When you create a custom dashboard widget, the Widget UI and Widget Code tabs are displayed. These two screenshots show the default code for ‘Widget UI’ and ‘Widget Code’.
The ‘Widget UI’ defines the widget configuration view, used for editing and the widget runtime view, or view mode.
Dashboard widget UI
Dashboard widget code
Webhooks
To create webhooks:
-
Click on the Webhooks button from the main widget view to add a webhook.
-
Use the slider to turn on Enable Created Callback, Enable Updated Callback, Enable Deleted Callback and type in the URL in each case to respond to process instance create, update and deleted events.
For example, choosing Enable Created Callback will enable a URL callback every time a process instance is updated. This results in a HTTP GET request with parameters instanceID={instanceID}, processName={processName} and eventType=created being issued to the give URL.
Note: Callback has a timeout of 10 seconds.
-
Click on the Help button
 for clarification.
 -
Click on OK when done.
What’s next 
If you want to use Kianda for no-code development, follow these simple steps:


Feedback
Was this page helpful?
Glad to hear it! Please tell us how we can improve.
Sorry to hear that. Please tell us how we can improve.