Custom dashboard development
Introduction
There are currently 7 predefined dashboard widgets available to use to create illustrative and responsive pages to show how your processes are performing at a glance. These widgets are:
Click on the relevant links to find out more about each area. However if customised dashboards have been created, they are available to those with the Administration role to use in dashboard management in Kianda. Customised dashboards are available in the drop-down list for widgets when creating or editing dashboard pages.
Custom dashboards are created by Administrators or Developers who have coding experience to use Kianda’s low-code development feature, Kianda Developer.
How to get started
If you are an experienced developer with an Administrator or Developer role, see Users & Groups, you can create a new dashboard widget within Kianda by doing the following:
-
Navigate to Administration in the left-hand side menu, and click on Developer. This will bring you to the Developer resources page. Dashboard widgets are of type ‘Widget’ in this list.
Widget view

-
Click on New widget to create a new rule widget.
-
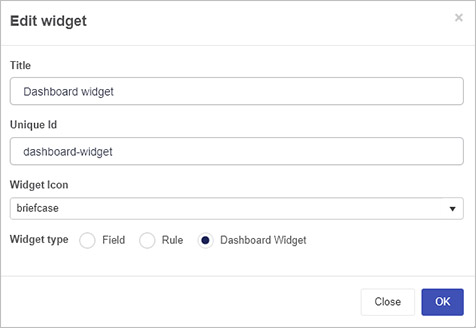
Fill out the Edit widget dialog box - that is Title, Unique Id (which is autofilled from the title), Widget Icon, where you can select from hundreds of icons, and then Widget type.
-
Click on OK when complete.
-
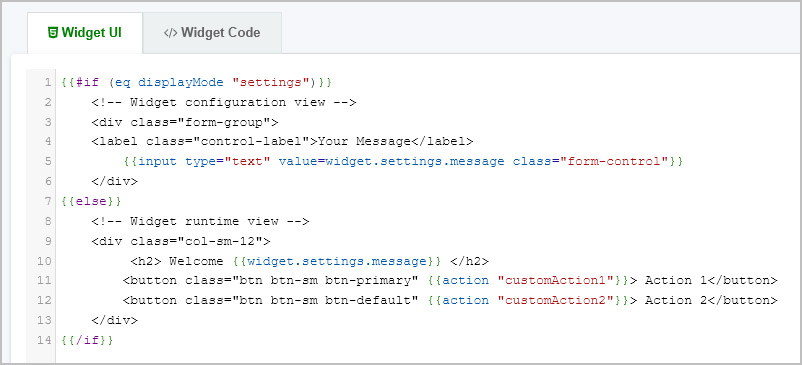
When you create a custom field widget, the Widget UI and Widget Code tabs are displayed. These two screenshots show the default code for ‘Widget UI’ and ‘Widget Code’.
The ‘Widget UI’ defines the HTML, handlers, expressions and more.
Dashboard widget UI
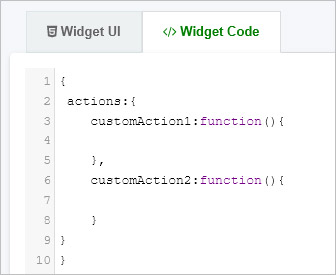
The ‘Widget Code’ defines the logic and functions.
Dashboard widget code
-
Widgets created are visible in the main widget view. From here, you can edit a widget by clicking on the Edit button
 (Pen icon), delete a widget by clicking on the Bin/Trash button
  and restore earlier versions of a widget by clicking on the Version restore button
  .
. -
Custom rule widgets you create will be available for use in dashboard pages for Administrators by going to Side menu > Home > and click on the Create a new page to create a new dashboard page, or click on an existing dashboard in the left-hand pane.
-
Click on the Edit current page button
 to make the widget menu appear.
 -
The newly created custom dashboard widget will be available in the drop-down menu by clicking on the down arrow.

-
Then click on the new widget design name to implement the widget, starting with editing the widget and then change settings, see Edit dashboard page settings for more information on general settings.
What’s next 
To continue with low-code development, you can view Templating basics. If you would like to learn more about low-code go to the Low-code development page and from there navigate to other pages on low-code practices.
To create other widgets go to Custom field widget and Custom rule widget pages to find out more.
Go to the link on Dashboards to learn more about dashboard pages.
Feedback
Was this page helpful?
Glad to hear it! Please tell us how we can improve.
Sorry to hear that. Please tell us how we can improve.