Overview of low-code
Introduction
Kianda’s low code development environment provides developers with a graphical user interface to quickly create customised applications that can be used in automated processes. Kianda Developer allows you to quickly build reusable widgets allowing you to extend the functionality of the system. You can define the functionality or module that you want to define and deliver that module for inclusion in an application design, without the need to invent all the code from scratch. For example you could create a custom control that allows you to display images in a particular way, see Custom field development.
Kianda Developer can be utilised to implement HTTP requests and API calls to allow for real-time data interactions, click on the links to get more details.
Why choose low-code development?
Providing you have some software development and/or coding knowledge, low-code development can allow you to implement customised Kianda widgets to meet user-specific needs such as creating custom ‘Field’, ‘Rule’ or ‘Dashboard widget’ elements.
There are 16 predefined fields and 60 rules available for non-developers to use in a no-code form design GUI. However if these do not suit, then Kianda’s low-code development solution provides near limitless room for process expansion. As the Kianda platform offers access to any data source (including real-time synchronisation of the data) and integration with many other software tools and applications, the implementation of low-code can provide your business processes with extreme scalability and room for improvement.
You can also build upon pre-defined field, rule. data connector and dashboard code to offer the developer a shortcut in creating something new and beneficial for the organisation. For example, you can see a rule widget user interface being designed below, using HTML, handlers, expressions and more.

How to implement low-code development
If you are an experienced developer with an Administrator or Developer role (see Users & Groups), you can create a new custom widget within Kianda by doing the following:
-
Navigate to Administration > Developer > New widget to begin creating a new custom widget.
-
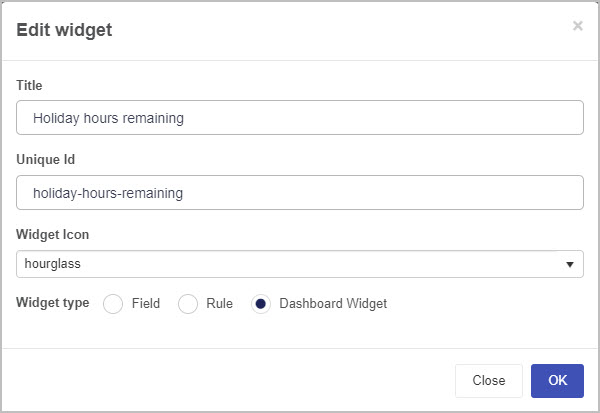
Under Edit widget, you must fill out the following:
-
Title – the name of your new custom widget
-
Unique Id – the unique identifier used within the code to refer to this widget. It should be noted that this field is filled out automatically based on the entered Title, however it can be edited.
-
Widget Icon – the icon image that the custom widget will be associated with
-
Widget type – choose from Field, Rule, and Dashboard Widget
-
-
From here the following tabs are available:
-
Widget UI – a coding environment that allows you to define the widget user interface. The widget UI uses HTML and Handlebars templating language, that uses curly brackets {{}}. Go to Templating basics for more information on Handlesbars.
{{#if (eq displayMode "settings")}}
    <div class="form-group">
        <label class="control-label">QR Code result field</label>
        {{field-picker includes='["fields/field-text", "fields/field-textbox"]' required=true process=process value=field.settings.resultField}}
    </div>
For example in the sample code above, the condition is set so that a static HTML label ‘
QR code result field’ captured in a form binds to a Kianda componentfield-picker. Thefield-pickercomponent shows a tree view at runtime that allows a user to pick a particular field from the form design. -
Widget Code – a coding environment that allows you to define the logic and functions behind the custom widget. The widget code uses JavaScript.
display:function(){
    var field = this.get('field');
    var process = this.get('field.process');
    var warningMessage = process.findFieldByName(this.get("field.settings.warningMessage.name")); //Retrieve the warning message field
	warningMessage.set("visible", false); //Set warning messsage field to invisible as we are in display mode
 }
For example in the sample code above, the function gets a field and a process from the component and retrieves the value held in a form warning message field and sets this to invisible in display mode.
-
-
When you are finished editing, click on the OK button
 to save the changes made. The newly created custom widget can be displayed in the view widget pane.
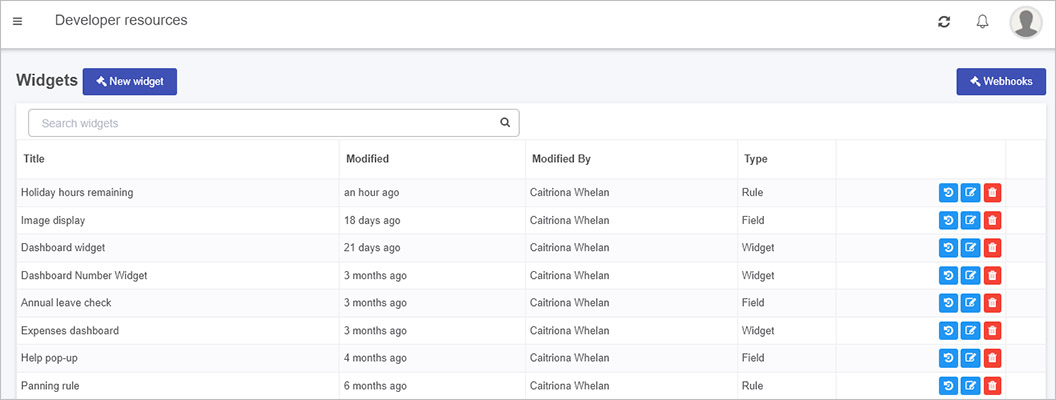
-
In the main view you can see who modified the widget and when and the type of widget created, such as field or rule. You can also:
- use the version history button
 to view and manage version
 - use the edit button
 to edit the name and details of the widget
 - use the delete button
 to delete the widget. Clicking on this button which cause a pop-up to appear asking you to confirm the deletion by clicking on OK or cancel by clicking on Cancel.
- use the version history button
Depending on the type of newly created custom widget, they can be accessed by:
-
Field widget - navigate to Administration > Designer > Your Process > Controls. Under Custom, your field widget will be displayed and is now ready for use. To learn more about field widgets, see Custom field development.
-
Rule widget - navigate to Administration > Designer > Your Process > Add a rule. Under Custom, your rule widget will be displayed and is now ready for use. To learn more about rule widgets, see Custom rule development.
-
Dashboard widget - navigate to Dashboard > Your Dashboard > Edit current page button
 . From there, click the drop-down list button and you will have access to the created custom dashboard widgets.
To learn more about dashboard widgets, see Custom dashboard development.
What’s next 
To continue with low-code development, you can view Templating basics. If you would like to learn more about ‘no-code versus low-code’ in general, see What is no-code? and What is low-code?.
To read more how to create the different widget types go to:
- Custom field development to read about field widgets
- Custom rule development to read about rule widgets
- Custom dashboard development to read about dashboard widgets
Feedback
Was this page helpful?
Glad to hear it! Please tell us how we can improve.
Sorry to hear that. Please tell us how we can improve.