Webhooks
Introduction
Kianda Developer includes a webhooks function. A webhook or web callback allows information to be pushed from Kianda to your applications in real time when process instances are created, deleted or updated. This provides an efficient way to execute event reactions, thereby eliminating the need to continuously poll for data. The information that is posted includes variables like the process name and instance ID.
The Kianda webhooks function allows you to configure URLs that can respond to process instance creation, deletion and update events. When these events happen, the webhook will then make a HTTP request to your application/service, including variables like the process instance name, querying the provided URL, so your application can be updated.
Note: Callback has a timeout of 10 seconds.
How to get started
You must have an Administrator or Developer role see Users & Groups for more details on roles. Then to get started with webhooks:
-
Navigate to Administration in the left-hand side menu, and click on Developer. This will bring you to the Developer resources page.
Developer resources page
-
Click on Webhooks to create a process instance callback.
-
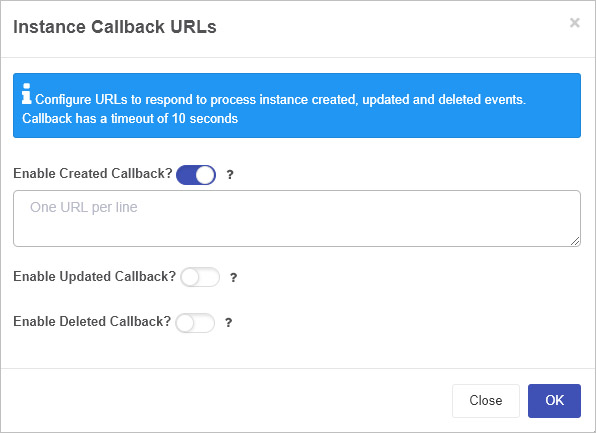
The Instance Callback URLs dialog box appears.
-
Use the slider to turn on the relevant callback:
- Enable Created Callback - this will enable a URL callback every time a process instance is created. This results in a HTTP GET request with parameters
instanceID={instanceID}, processName={processName}andeventType=createdbeing issued to the given URL. - Enable Updated Callback - this will enable a URL callback every time a process instance is updated. This results in a HTTP GET request with parameters
instanceID={instanceID}, processName={processName}andeventType=updatedbeing issued to the given URL. - Enable Deleted Callback - this will enable a URL callback every time a process instance is deleted. This results in a HTTP GET request with parameters
instanceID={instanceID}, processName={processName}andeventType=deletedbeing issued to the given URL.
- Enable Created Callback - this will enable a URL callback every time a process instance is created. This results in a HTTP GET request with parameters
-
In each case type in the URL to respond to process instance create, update and deleted events. Note that in each case, you can add more than one function, but use only one URL per line, using enter/return key to move to the next line. This will allow you to update multiple services using the callback operation above.
-
Click on the Help button
 for clarification.
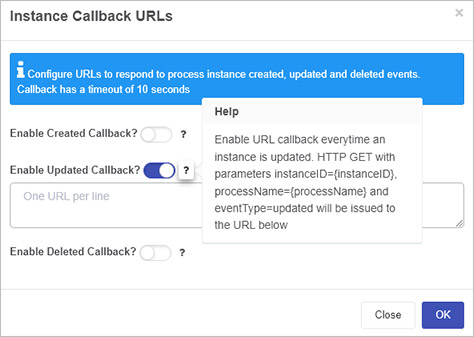
-
Click on OK when done or click on Close at any stage to close the dialog box.
What’s next 
To continue with low-code development, you can view Templating basics. If you would like to learn more about ‘no-code versus low-code’ in general, see What is no-code? and What is low-code?.
To return to the main Low-code development page, click on the link.
Feedback
Was this page helpful?
Glad to hear it! Please tell us how we can improve.
Sorry to hear that. Please tell us how we can improve.