Data sources
Introduction
The Data sources function is available to administrators and those users with the role Manage datasources. Data sources is found in the left-hand side pane, or on the top right toolbar depending on the chosen orientation, under Administration. The data sources function allows you to connect your processes to external data sources like SharePoint, Salesforce or SAP.
Connecting your data sources in this way allows real-time scalability, so as your organisation and data grows, the processes created in Kianda will continue to operate with these data sources, providing sustainable, flexible growth.
Kianda comes with 19 predefined data connectors allowing you to connect to these data sources. These are listed below:
- Active Directory
- DocuSign
- Dropbox
- Dynamics CRM
- File system
- FTP
- GlobalPayments
- Google Drive
- MySQL
- Office 365
- Oracle database
- PowerShell
- Salesforce
- SAP
- SharePoint
- SOAP Service
- SQL Server
- REST Service
If you are a developer and want to connect to a datasource that is not included in the predefined set, you can use SOAP or REST to create your own API for data transfer.
How to get started
To start viewing existing data sources:
-
To see the datasource management function, select Administration from the left-hand side pane and then click Data sources.
-
Any existing data sources that have been created for your workspace are shown in the main view under Datasource management.
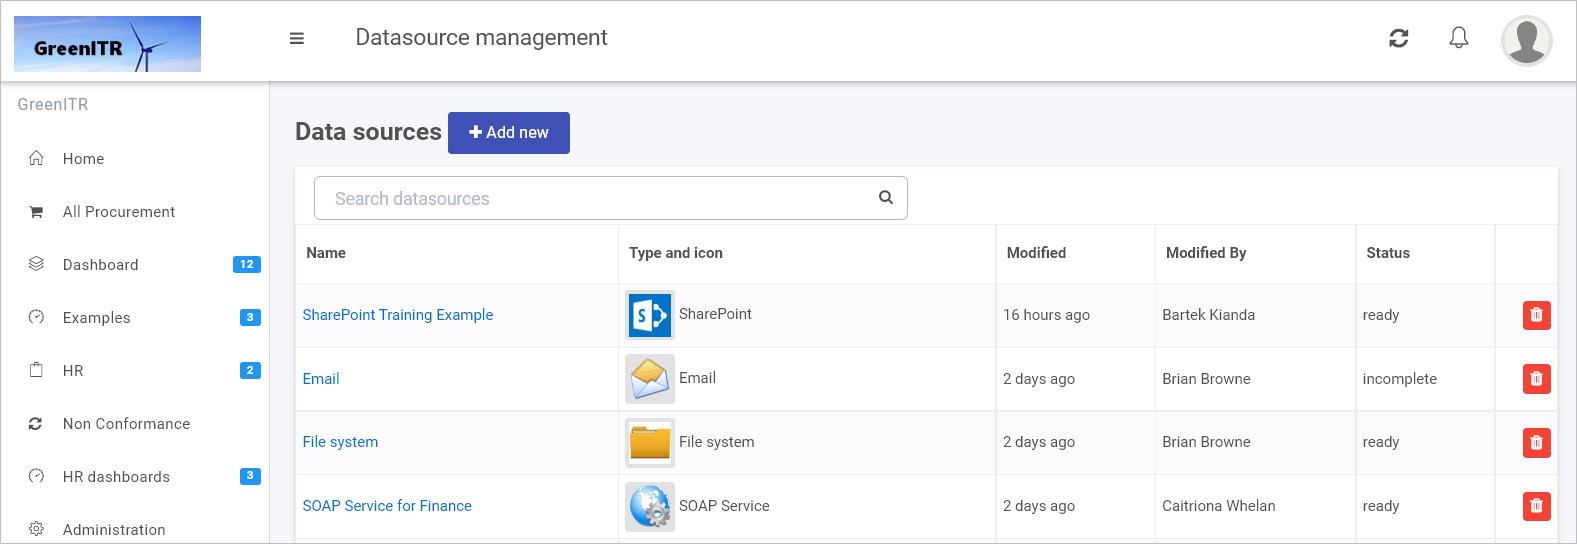
Data sources are listed by:
- Name - assigned title
- Type and icon - assigned data connector type and icon image
- Modified - the date the connector was modified
- Modified By - the person who last made changes
- Status - for example ready means the connection has been tested and is working, while incomplete means that more details still need to be added.
-
To search for a data source, type in the name or type of data source in the search box.
-
To delete a data source, click on the Bin/Trash button
 beside the name of the datasource. You will receive a popup asking to you to confirm deletion by clicking OK, or you can exit the deletion by clicking on Cancel.
 -
To see the details of a data source, click on the name of the Data source and from there you are brought to the Data source details page:
-
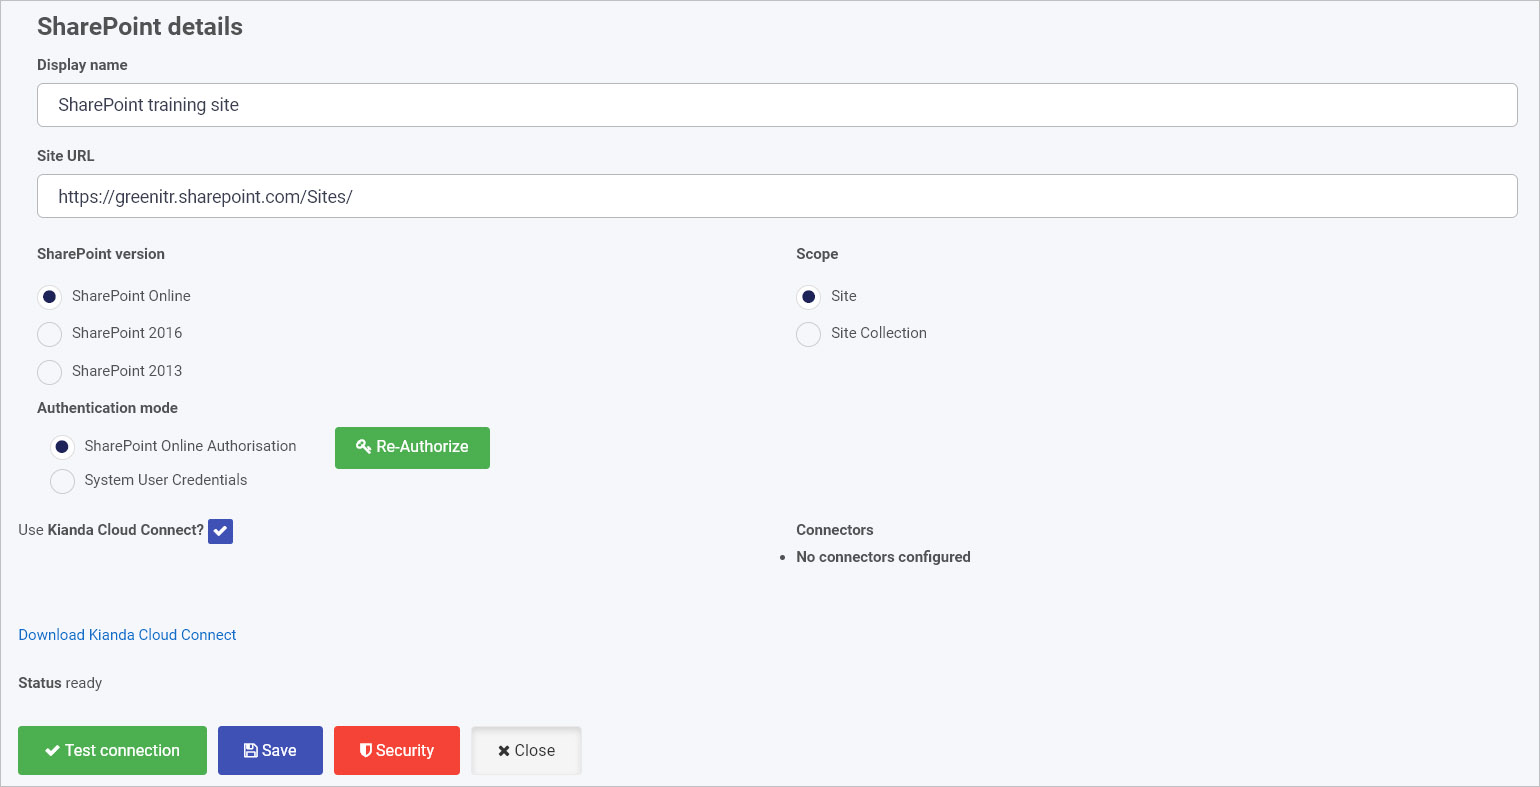
The details will vary depending on the data source, but there are some common elements:
- Display name - the name of the data source as it will display in your system. Choose something meaningful, as you will use this name in process design to connect your forms to your data source.
- Information about the data source - this could be a URL, Server name, Client ID, root folder path etc.
- Authentication details - this could be a username, password, client secret etc.
- Option to use Kianda Cloud Connect - you enable this feature and download a zip file which you can install on your server, allowing the Kianda system to reach your server and get access to data, for example SQL Server, making system integration quick and efficient.
- Test connection - all data source detail pages will allow you to test your connection using this button to ensure data exchange can happen.
- Save - at any time you can save details, even if some parameters need to be completed, allowing you to return to the configuration at any point.
- Security - all data sources can have different levels of security set up, including administrators for the connection, and users of the connection, see Setting security for data sources for more details.
- Close - allows you to exit from the data source details page.
How to create a new datasource
The following uses SharePoint as an example when creating a new datasource. The main steps for any datasource will be similar, that is: click on the Add new button, fill out the datasource details page, test the connection, save and add security.
-
From the main datasource management view, click on + Add new button
 and then one of 19 data connectors that appear, for example SharePoint.
 -
Fill out fields in the SharePoint details screen.
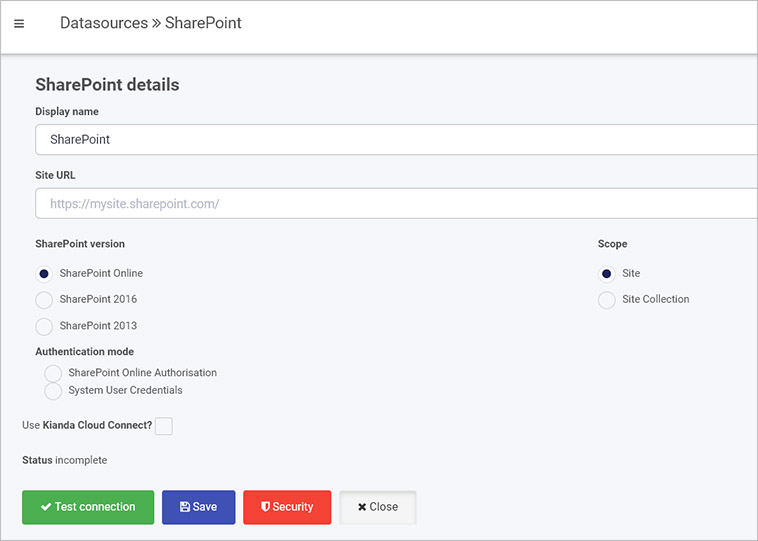
Choose from the edit options:
-
Display name - the name of the data source, for example SharePoint HR
-
Site URL - this is the link to your SharePoint data
-
SharePoint version - choose from a) SharePoint Online (also known as SharePoint in Microsoft 365) b) SharePoint 2016 or c) SharePoint 2013
-
Scope - choose from a) Site for example a particular SharePoint website or b) Site Collection, a collection of SharePoint sites
-
Authentication mode - options are a) SharePoint Online Authorisation and b) System User Credentials
If you choose a) SharePoint Online Authorisation then click on Authorize button
 in this instance you will need SharePoint administration rights
If you choose b) System User Credentials then fill out your username and password. In this instance you do not need SharePoint administration rights.
-
-
When you have added SharePoint details, you are ready to test your connection and add security. At the bottom of the SharePoint details page, click on Test connection button
 and if the service has been correctly configured, then you should receive a notification saying Connection test succeeded.
 -
Click on Save
 to save the connection and you will receive a notification saying Details saved successfully.
 -
Add Security settings by clicking on the Security button
 , go to Setting security for data sources for more details.
 -
Click on Close to close the details page and return to the datasource management main view.
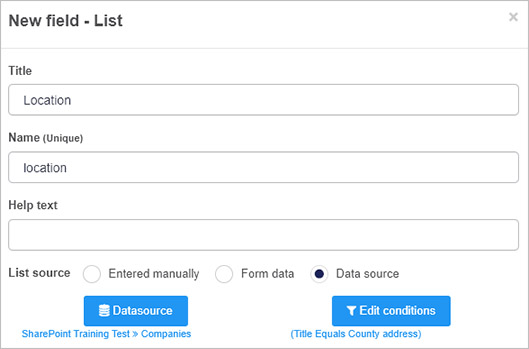
Once the data connector is created, this can be used with controls like lists and rules, for example in the image below, a SharePoint data connector called ‘SharePoint Training Test’ has been setup within the datasources function. Lists within SharePoint can then be linked to list fields in Kianda, by clicking on Datasource in the Edit list dialog box. In the example below, a list called Companies is the data source for the list.
What’s next 
To read more about data connectors and how to use them, go to Data Connectors.
To find out about help and support, go to Help.
Feedback
Was this page helpful?
Glad to hear it! Please tell us how we can improve.
Sorry to hear that. Please tell us how we can improve.