Users & Groups
Introduction
The Users function is available to users with the Administrator role and is found in the left-hand side menu, or on the top right toolbar depending on the chosen orientation, under Administration. This function allows you to manage users and groups in your Kianda workspace.
How to get started
To access the Users function:
-
Click on Administration in the left-hand side pane and then click on Users.
-
You can view any existing users and groups that have been created in the main view pane.
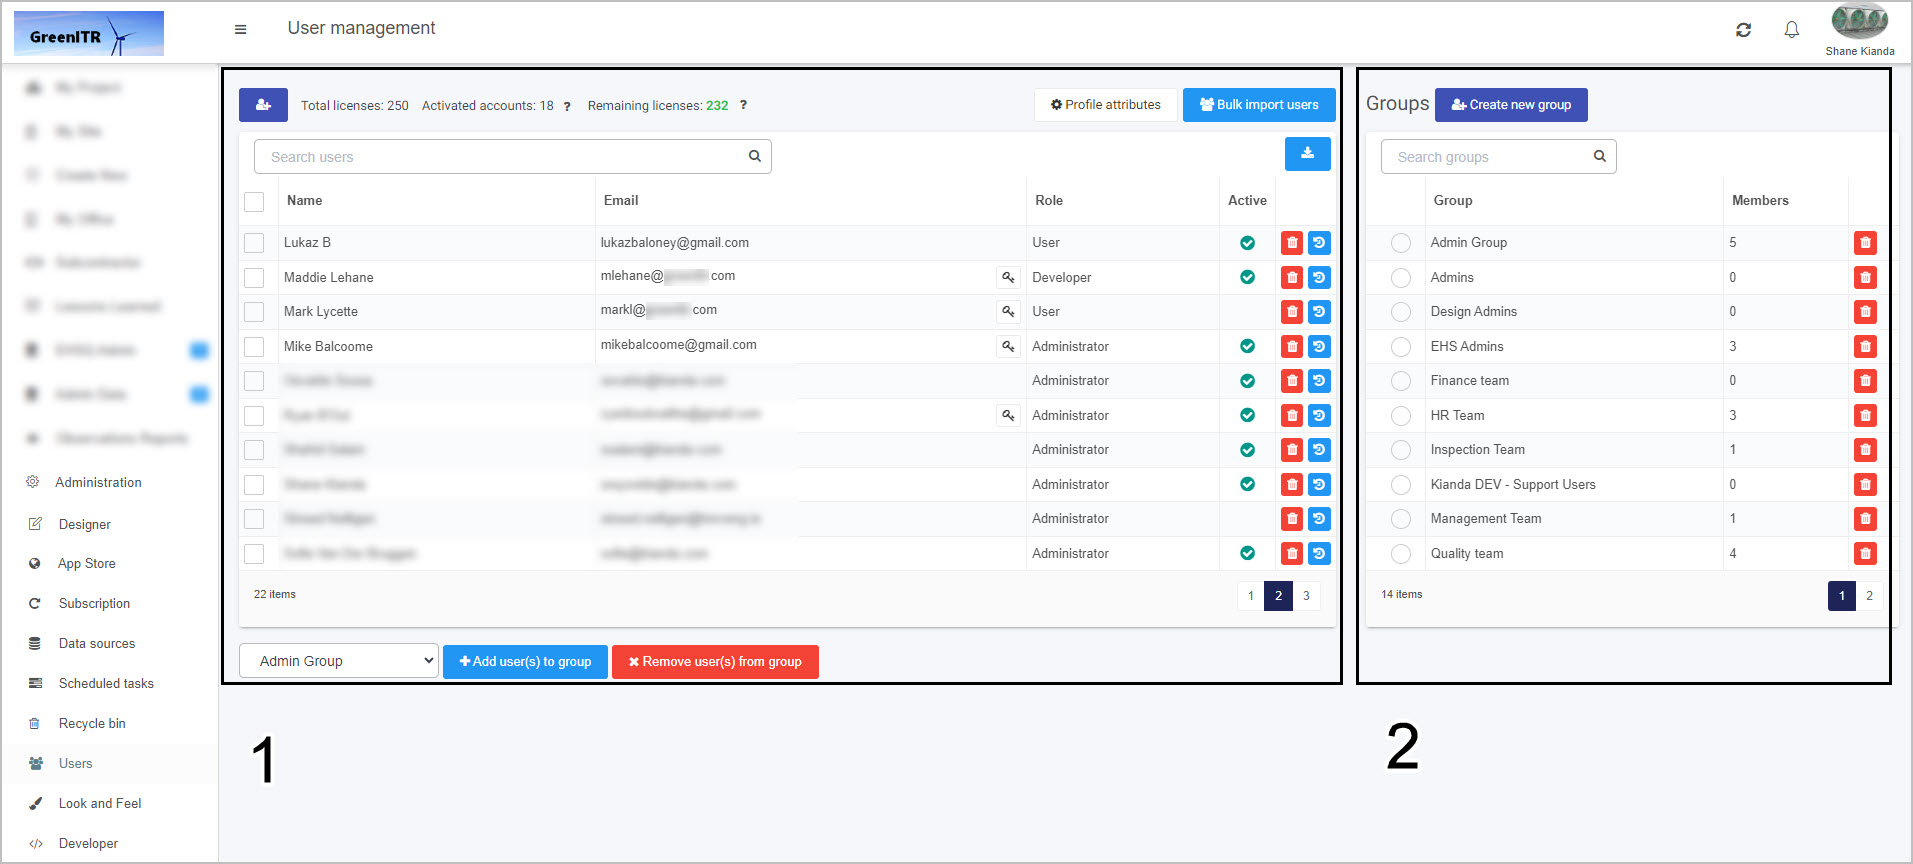
The two main areas are 1. Users and 2. Groups. These two areas are explained in more detail below.
Users
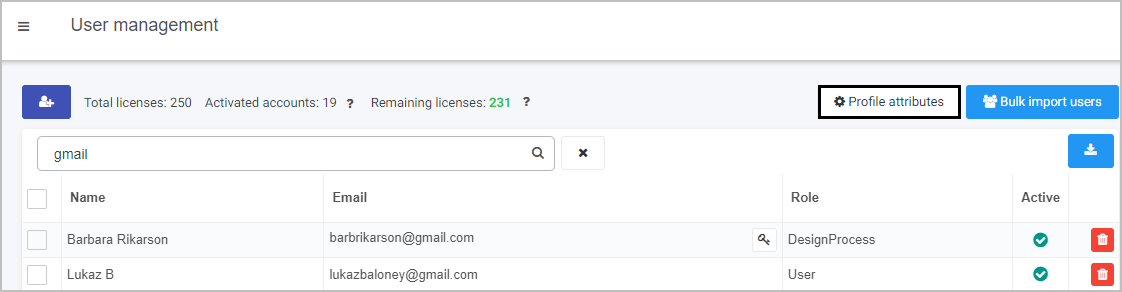
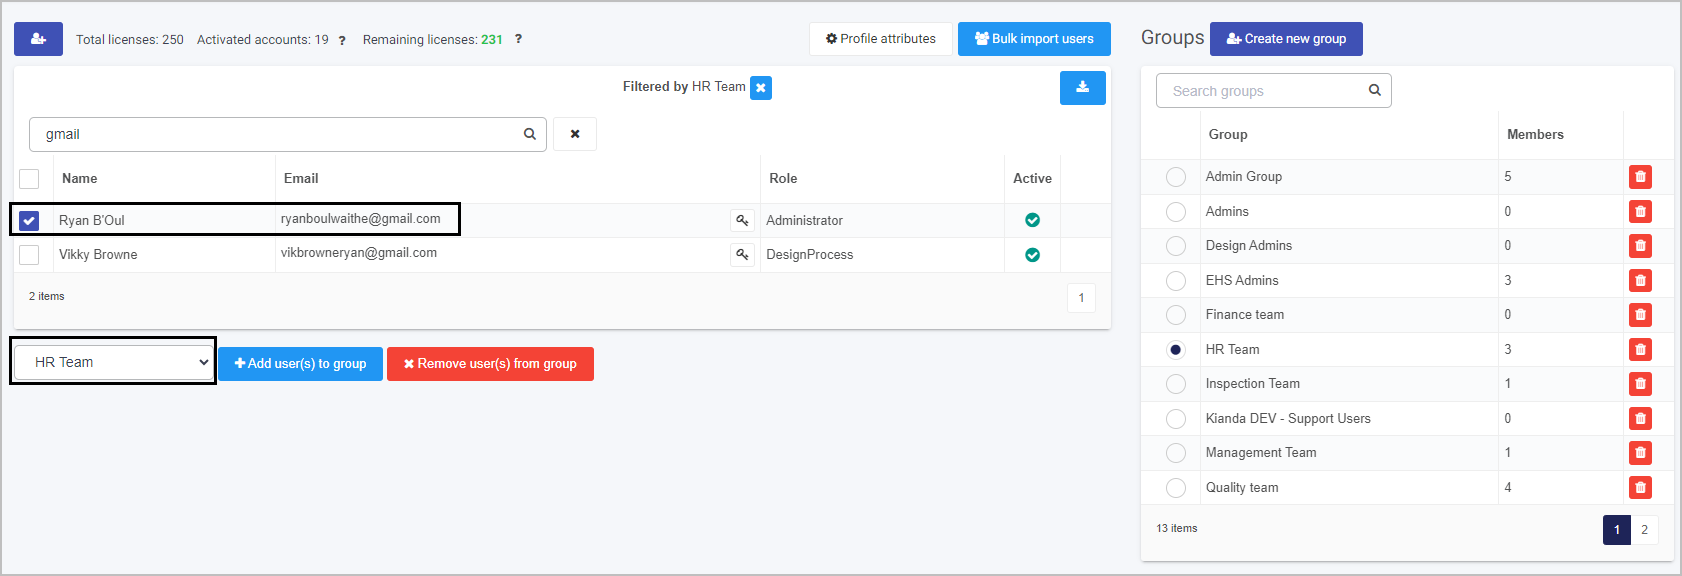
Existing users appear within this section, showing the name of the user, email, role and whether they are active or not in the system.
From this main view, you can:
- Add and remove licenses
- View and edit existing user details
- Create a new user
- Create new profile attributes
- Bulk import and export users
- Add and remove users to/from groups
Click on each of the links above to read more about each function. In addition to the above administrative functions, you can also set passwords and delete users from this main view as follows:
-
To reset a password for a user, click on the Reset password/key button
 beside a user name. This will open the reset password dialog box where you can type in a new password for the user.
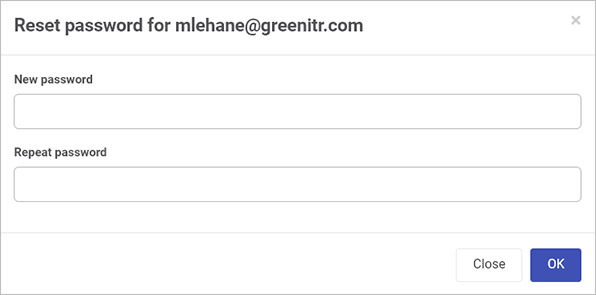
When you are finished adding the new password, click on OK, or click on Close to exit the dialog box.
-
To view the user’s platform history, click on the User History button
 beside a user name. This will open up a dialog box displaying a list of all actions carried out by that user, as well as successful/unsuccessful login attempts, when an admin user changes what group they are in, and other useful information when debugging and auditing.
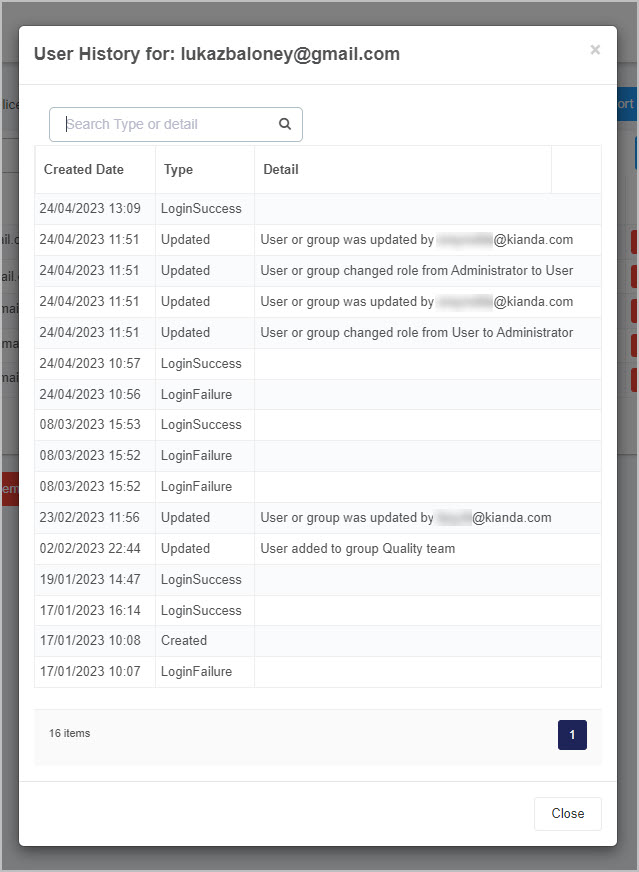
As well as this, you can search the user’s history by type or detail. Click on the Close button to return to the users and groups page.
-
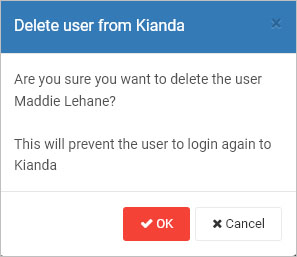
To delete an existing user, click on the Bin/Trash button beside a user name.
-
Then click on OK.
Licenses
Before managing the user accounts on your platform, you will need to understand the concept of Licenses. Depending on your subscription type, you will be allocated a certain number of licenses, which allow your users to be active on your platform.
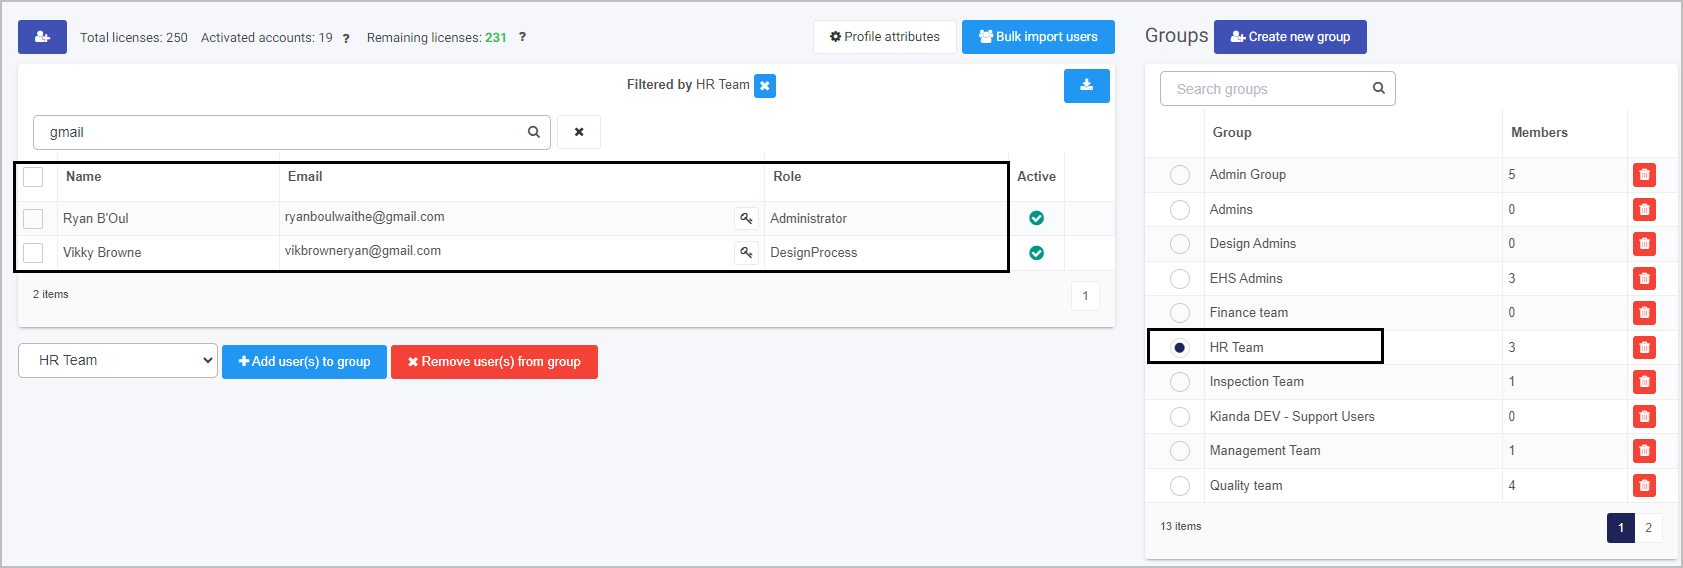
A single license is used by each individual active user within your platform, for example if your platform has 250 total licenses and you have 19 activated accounts, you will have 231 remaining licenses. If a user license is issued, the total number of licenses will decrease, and if a user license is revoked, the total number of licenses will increase. If there are no more remaining licenses, new users will be deactivated. You can get more licenses by deactivating users or purchasing additional licenses.

View and edit existing user details
-
Click on the name of a user and the user details appear.
-
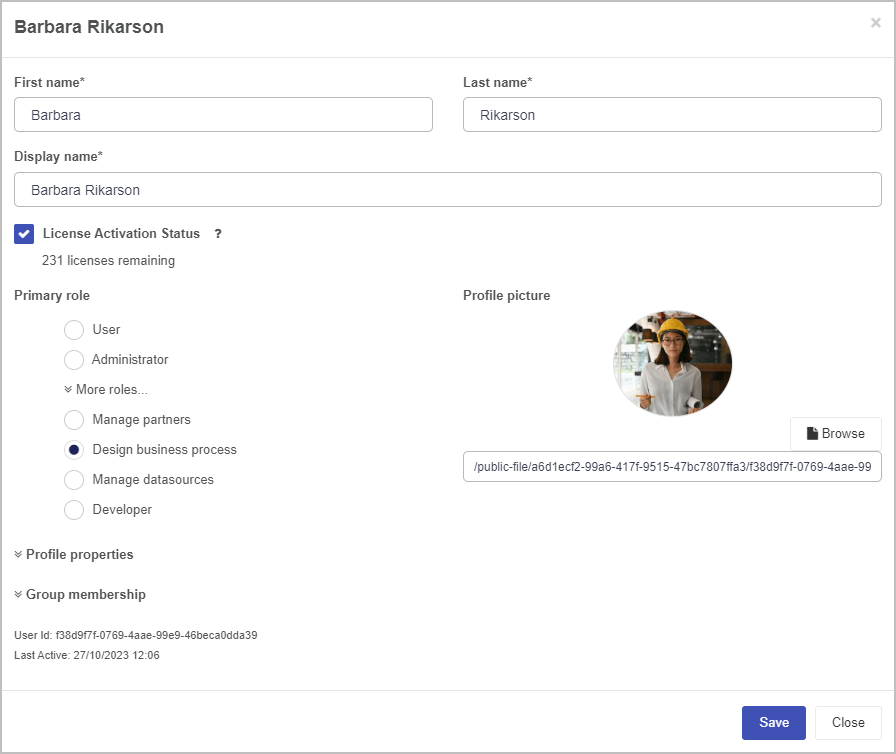
In the details box you can edit a user’s:
- First name - user’s first name
- Last name - user’s last name
- Display name - how their name will display in the system. The display name is autofilled based off of the user’s entered first and last names, which can be changed if necessary.
- License activation status - Checking this box will create the user as active. This will consume a license from your subscription. If you are out of licenses you will be prompted to purchase an additional license.
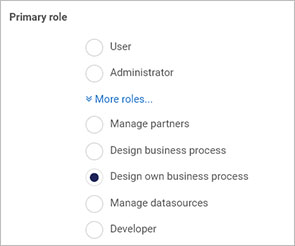
- Primary role - click on More roles to see additional roles and choose from six system defined roles.
-
User - lowest level of access where users with this role can access dashboards and forms, Help and Account details
-
Administrator - highest level of access where users with this role can access all functions under Administration such as Designer and Developer.
-
Manage partners - users with this role can access the same areas as User as well as the Invite partners function under Administration to create shared processes for business partners.
-
Design business process - users with this role can access the same areas as User as well as the Designer function under Administration to create and manage processes and form designs.
-
Manage datasources - users with this role can access the same areas as User as well as the Data sources function under Administration to create and manage data sources such as connections to SAP, Dropbox, SharePoint and Salesforce.
-
Developer - users with this role can access the same areas as User as well as the Developes function under Administration to create custom widgets for fields/controls, rules and dashboards.
-
- Profile picture URL - click on Browse to browse for a profile picture on a laptop or network drive to add a profile photo for the user.
- Profile properties - click on this option to see additional properties that you can define, see Modify profile attributes.
- Group membership - click on this option to see the groups that a user is added to. Click on the red x button
 to remove a user from a group.
As well as this, you can view:
-
User Id - this string is useful for applying user security and for low code development applications.
-
Last Active - the date and time that this user was last active within the platform.
-
When you are finished editing a user’s details, click on OK, or click on Close to exit the dialog box.
Create a new user
-
Click on the Create new user button
 .
. -
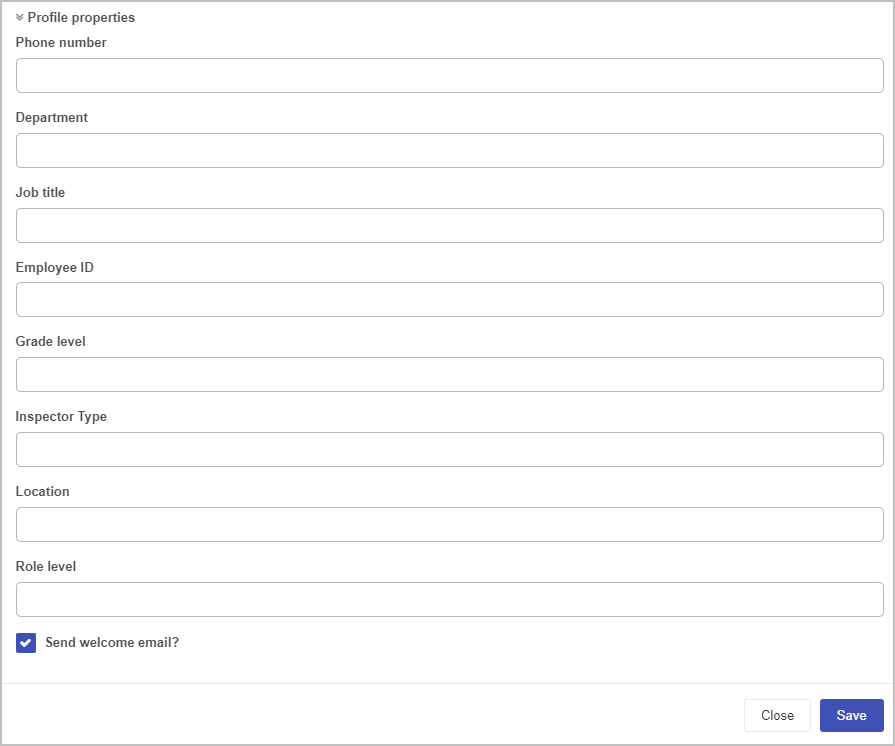
Complete the fields as listed in Step 2 in View and edit existing user details above. If additional profile properties have been set for the workspace, add in details for those properties. These properties can be set by clicking on the Profile attributes button, see Modify profile attributes section.
-
Check the Send welcome email check box if you wish to have a system generated email sent to the new user.
-
Click on Group membership to view a user’s group membership, see Groups for more details.
-
When you are finished editing a user’s details, click on Save, or click on Close to exit the dialog box.
-
When the user is created they will appear in the main Users view.
Modify profile attributes
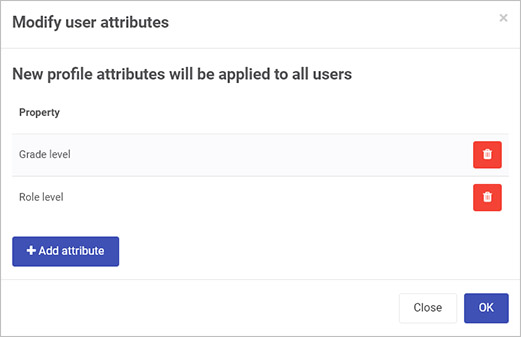
As an administrator you can set profile attributes for workspace users within your organisation. For example if your organisation uses particular grade levels for roles, then these can be set using this feature. To modify attributes:
-
Click on the Profile attributes button in the main Users section.
-
In the Modify user attributes dialog box, any existing attributes will be listed under Property. To remove an attribute, click on the Bin/Trash button
 .
.
-
To add a new attribute, click on the Add attribute button
 , then type in the name of the new attribute.
 -
When you are finished editing attributes, click on OK, or click on Close to exit the dialog box.
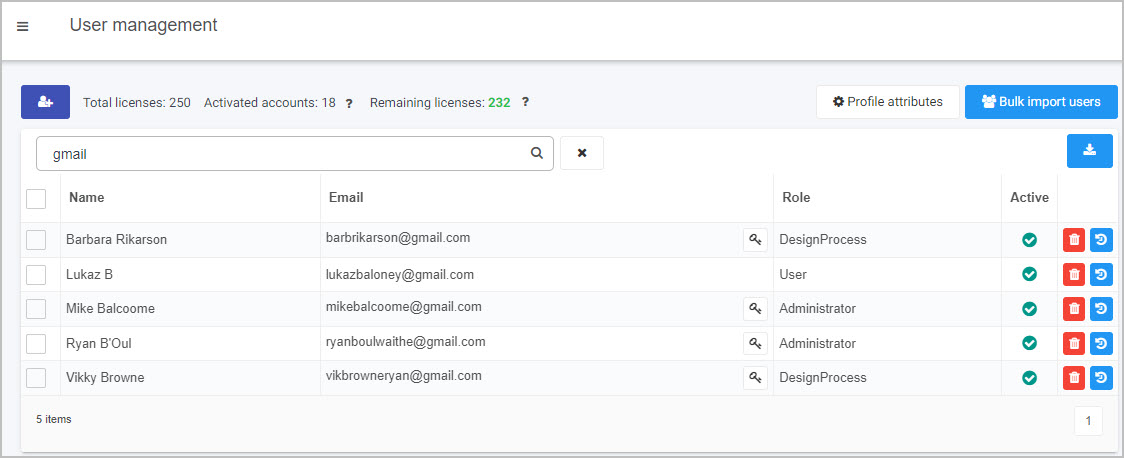
Importing and exporting users
In addition to clicking on the Create new user button , you can import users using an Excel file by clicking on the Bulk import users button  . The Import users dialog box opens.
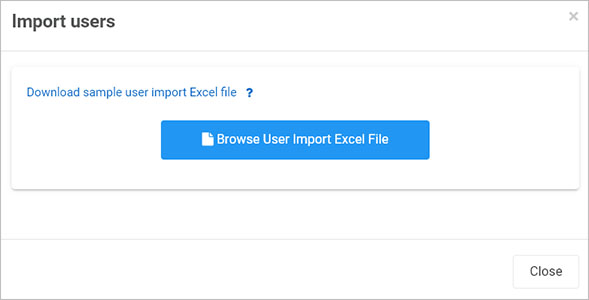
In the Import users dialog box you can:
- Click on Browse User Import Excel File to browse for a file of users to add.
- Click on Download sample user import Excel file to see the file structure needed to import users. The key user fields here are: Email, First Name, Last Name, Display Name and optional is Telephone number.
You can export a list of users by clicking on the Export to csv button  . The resulting file will list users by:
- Display name
- Primary role
- Groups - they are members of
- Active - if the user is active and is currently using a license
- Last active - when the user was last active in the platform
Seen below is an example CSV output in excel:

Groups
When you create predefined groups, you can use these group names in a myriad of ways, for example to create a set of finance managers who can then be listed as form owners to edit forms in process instances for procurement, or a set of contractors in an SSO bypass group who can go the workspace login page to login to Kianda.
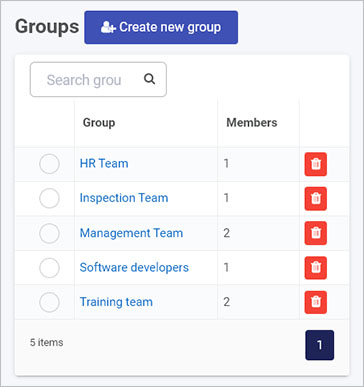
Existing groups appear within the Groups section of the User management page, showing the name of the group and the number of members.
From this main view you can:
Viewing and editing group members
-
Click on the radio button beside the group name in the main view to see the group members.
-
From this view, you can remove a user from the group by checking the checkbox beside a user name and click on Remove user(s) from group.
-
You can also change users from the current group to another group by clicking on the dropdown list of group names, by choosing a group, checking the checkbox beside the username.
-
Click on Add user(s) to group.
Note: You can only add users to groups, if you yourself are an administrator for the group, see next section.
Viewing and editing group details
-
Click on the group name in the main view to see details for a group.
-
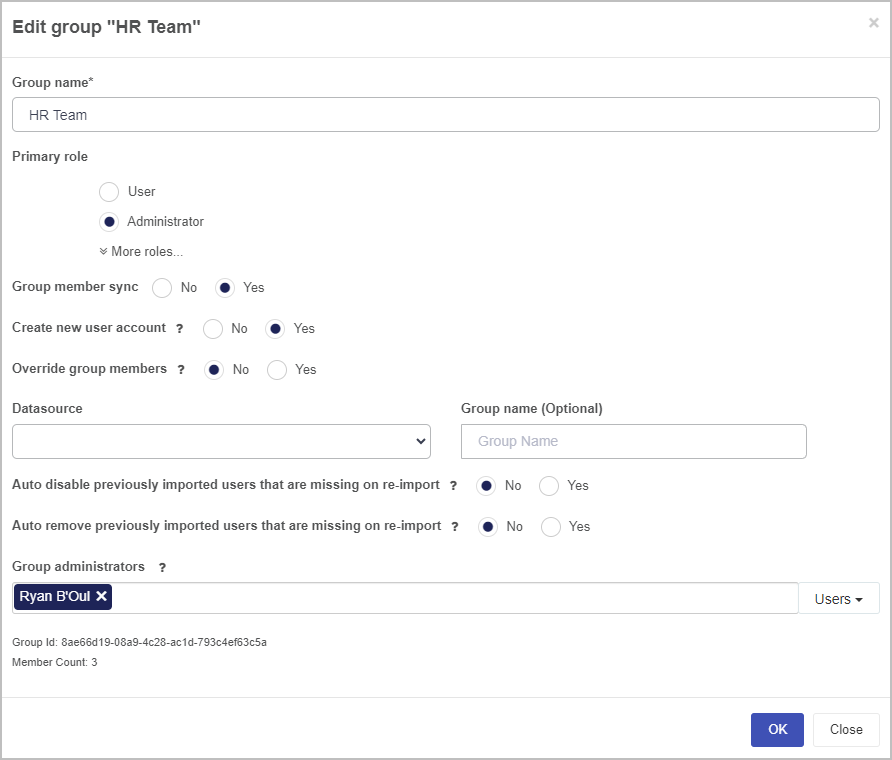
The Edit group ‘Name’ dialog box appears.

-
In this dialog box you can edit:
-
Group name - the name of the group
-
Primary role - the primary role of the group. You can learn more about them here.
-
Group member sync - options are No or Yes. By choosing Yes this allows synchronisation of the Kianda group with Active Directory or other databases connected to Kianda as data sources. As a result of choosing Yes, other parameters appear:
-
Create new user account - If switched on new user accounts will be created for any users that are listed in the data source but not present in Kianda.
-
Override group members - choose from No or Yes. By choosing Yes, a full synchronisation is enabled between the Kianda group and the data source of users. Any users that are not listed in the data source, will be removed from this group in Kianda.
-
Datasource - choose a data source from the dropdown list. This data source must be already created, see Data connectors for more details.
-
Group name - choose a name for the group if desired.
-
Auto disable previously imported users that are missing on re-import - choose from No or Yes. By choosing Yes, any previously imported users that no longer exist in the data source, will be disabled in Kianda when re-synchronisation is executed. Their account will still exist in the system, but they will no longer be able to login to Kianda.
-
Auto remove previously imported users that are missing on re-import - choose from No or Yes. By choosing Yes, any previously imported users that no longer exist in the data source, will be removed from Kianda when re-synchronisation is executed. They will no longer be able to login to Kianda as their account will be removed from the system.
Note: When a group is synchronised, a scheduled task is created to import users from the data source group every one hour by default. This can be changed by going to Administration > Scheduled tasks. Go to Scheduled tasks to find out more about different schedules.
-
-
Group administrators - only Users or Groups listed here can manage the group; if you leave the field blank then Kianda administrators can manage the group.
As well as this, you can view:
-
Group Id - this string is useful for applying group security and for low code development applications.
-
Member Count - the amount of current members within this group.
-
Deleting groups
-
To delete a group, click on the Bin/Trash button
 beside the name of the group.
 -
You will receive a popup asking you if you want to delete the particular team. Click on OK to delete the team, or Cancel to cancel the deletion.
Creating new groups
-
To create a new group, click on the Create new group button in the main view.
-
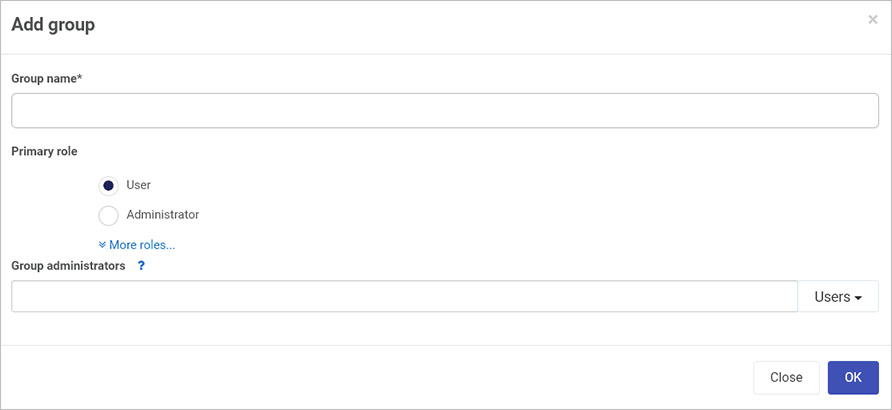
In the Add group dialog box, type in details for the group:
-
Group name - the name of the group
-
Primary role - choose a role for the group from User, Administrator, Manage partners, Design business process, Manage datasources and Developer as before, see Role details in Viewing and editing existing user details. In addition there is another role, Design own business process that allows groups to design their own process.
-
Group administrators - add Users and/or Groups to add people who can manage group membership. If you leave the field blank, any Kianda administrator can manage the group. If you specify administrators, as group creator you must add yourself as group administrator.
-
-
When you are finished editing the dialog box click on OK to save changes, otherwise click on Close to exit at any time.
What’s next 
To read more about how to create processes and forms go to Application Designer.
To find out about help and support, go to Help.
Feedback
Was this page helpful?
Glad to hear it! Please tell us how we can improve.
Sorry to hear that. Please tell us how we can improve.