Component
Introduction
A Kianda component acts like a smaller version of a process made up of various control fields and rules. You can reuse the component in your process designs to save you time and effort when creating each field and rule combination from the beginning. Within the component you can add all preconfigured control types and rules to match your needs, as well as customised field and rules found under Custom. Creating a component will significantly speed up your process creation time if some of your processes demand the same fields and logic. For example if a lot of your processes have sections in common, for example a Personal Details section where a user needs to fill in their first and last name, email, job role, and phone number. To save process creation time, you can create a component with those exact fields and rules you need and then use the component in various process designs.
The component you create can be updated at any time. Once you publish your component it can be used in any process of your choice and any processes that already use your component will be automatically updated.
How to get started
How to create a new component
-
From the home page, navigate to Administrator > Designer.
-
When you are in the Process designer screen navigate your mouse to the
 button and click the down arrow.
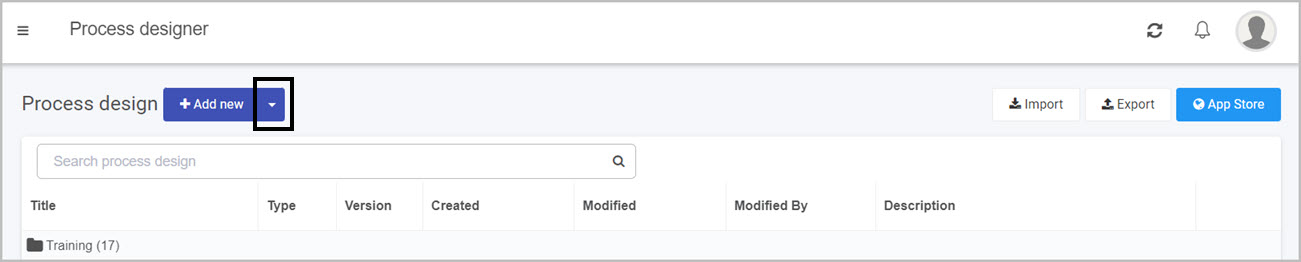
-
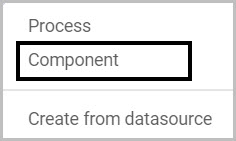
In the dropdown menu click on Component.
-
In the Add new component dialog box, fill in the following detail:

- Title - represents the title of your component.
- ID - represents the unique id of the component. Ensure that the ID entered here is unique across all components and processes.
- Description - enter a valid description of the component you are creating.
- Group - using this drop-down list, you can add your component to a existing group or create a new one.
- Administrators - select the appropriate component administrators from , to read more about process and component administrators visit Process security.
-
Click on OK when you are finished filling out the detail. You will be automatically moved to the component designer screen.
Editing an existing component
-
From the home page, navigate to Administrator > Designer.
-
In the Process designer screen, navigate to the folder (if used) where your component is click the Edit button
 . Note that the type will state Component within the list of all processes and components.
-
The Edit component dialog will appear allowing you to change some of the detail which include:
- Title
- Description
- Group
- Administrators
-
When you are happy with the changes made to the details, click on OK.
Accessing an existing component
-
From the home page, navigate to Administrator > Designer.
-
In the Process designer screen, in the list of processes, components and folders, navigate to the until you see your component and click on the title.

-
You will be navigated to the component designer screen.
What’s next 
Feedback
Was this page helpful?
Glad to hear it! Please tell us how we can improve.
Sorry to hear that. Please tell us how we can improve.