This is the multi-page printable view of this section.
Click here to print.
Return to the regular view of this page.
Getting started with Kianda processes
The power of Kianda lies in giving anyone, even those without coding experience, the ability to design a business application or process quickly and efficiently, for example, this process could be a Quality Assurance checklist that installation engineers must follow on site using a mobile app or it could be a HR process to allow employees to submit annual leave requests and approve these online. Processes can connect to your data sources like Sharepoint or SalesForce allowing for the flexibility of your applications to grow as your business grows.
Each process can be linked to dashboards so you can see at a glance, for example, how many leave requests were submitted, purchase orders approved and so on. And you can customise all of these processes the way you want.
Before you begin, we at Kianda recommend doing some simple planning before you design your process. It could be something as simple as a quick flow chart or a spreadsheet where you quickly log the key components, fields or rules that should be needed in the process.
Creating processes
-
To start creating your first process, go to the side menu on the left of the screen and click on Administration > Designer.
-
To create processes you can:
-
When you have created your process(es) go to Editing processes to find out how to start adding forms.
-
You can also export any processes for backup and reuse, see Exporting processes.
Using the App Store
-
You can choose from Kianda’s process templates by clicking on the App Store button  .
.
-
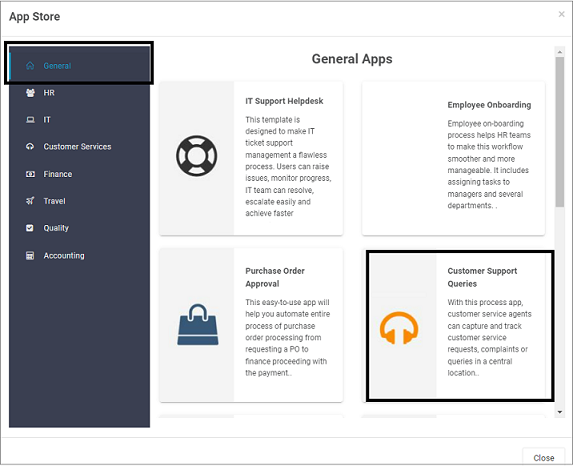
Choose from General, IT, Customer Services, Finance, Travel, Quality and Accounting apps by clicking on the relevant button in the left-hand pane and then select an app from within that category, for example Customer Support Queries.
-
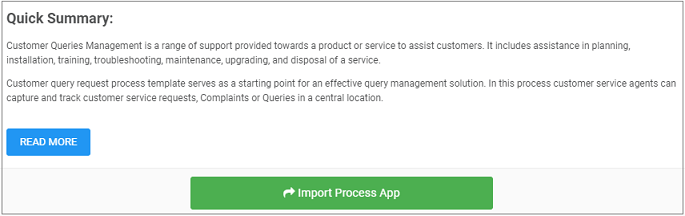
You can click on Read More to read about the app and click on Import Process App to import the process.
-
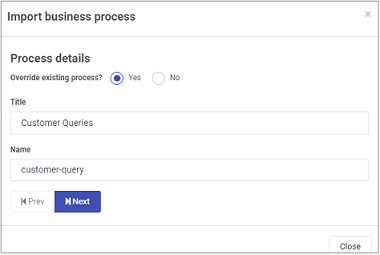
If the process is an existing process, you can choose to override the existing process by clicking Yes or if not, click No. Change the Title and Name of the process as needed, for example Customer Queries, and click on Next.
-
The system will report datasources being imported. Click on Next.

-
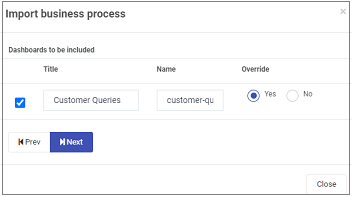
Select dashboards to be included by checking the checkbox beside dashboards you want to import. In each case you can decide to override the existing dashboards by clicking on Yes or if not No. Click on Next.
-
You will see a summary of what is about to be imported. Click on Import to execute the import.
-
Imported processes are available to view and edit from the main process view.
-
When you have created your process go to Designer to find out more on how to add and change forms within your process(es).
Creating your own processes
-
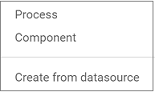
To create your own process, click on the Add new button  . Note that if you click on the arrow on the button, you have options to create a Process, a Component or Create from datasource.
-
A Process is a complete set of forms that encapsulates a business process for example, Purchase Order Approval.
-
A Component is a part of a business process, and you can decide your approach and how you want to order and present forms.
-
Create from datasource refers to using a particular data source and elements within that datasource tree, for example if you choose Kianda pre-defined processes then when you select Kianda you can see all the processes that are already imported into your system as shown on the right in the image below.
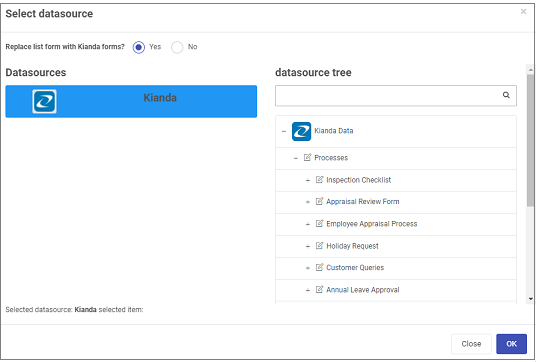
Click on the OK button when you are finished to save your work, or click on Close to exit the dialog box.
-
The following edit options are available:
-
Title - of the process, for example Annual Leave Approval
-
ID - this is a unique name for the field
-
Description - a description of the process
-
Group - a defined group of users for example HR Managers. If you choose ‘Create new group’, a further field New group name will be displayed, where you will enter the new group’s name.
-
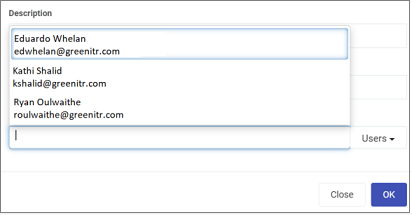
Administrators - choose from a) Users or b) Groups
These are the users or groups who will act as administrators for the process, for example to edit or delete the process. For example if you click on Users and click in the Administrators field you will see a list of all the users who are approved to administrate this process.
-
Click on the OK button when you are finished to save your work, or click on Close to exit the dialog box.
-
When you have created your process go to Designer to find out more on how to add forms to your process(es).
Importing processes
-
If you already have Kianda processes, you can also import these by clicking on the Import button  .
.
-
Click on the Browse Process App button  to browse for Kianda files.
-
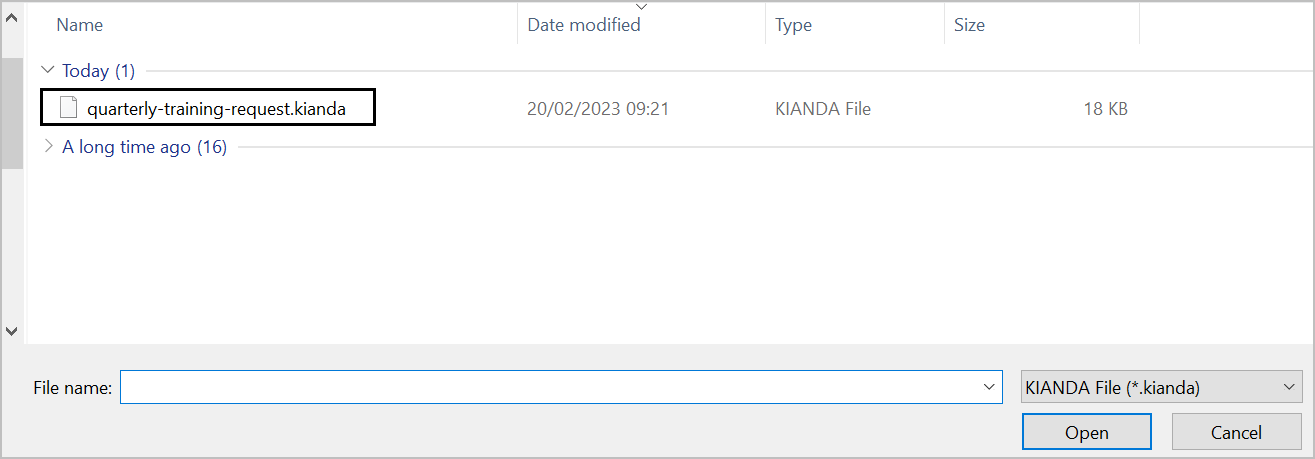
Select the files you want, for example quarterly-training-request.kianda and click on Open.
-
If the process name is an already existing process in your environment, then this new process will override it. However, if the process name does not match any current process, a new process will be created. Change the Title and Name of the process as needed and click on Next.

-
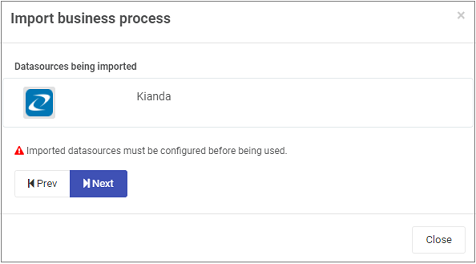
The system will report any datasources being imported. Click on Next.
-
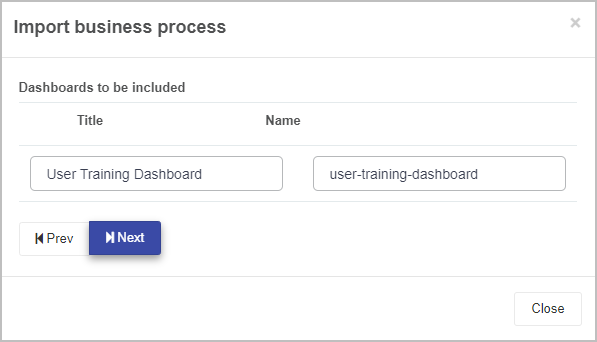
Under Dashboards to be included, you can view the Title and Name of the dashboards that are present in the Kianda file. If this dashboard already exists in your environment, then including this dashboard in your upload will overwrite it. If this dashboard does not currently exist, then it will create a new dashboard. When finished, click on Next.
-
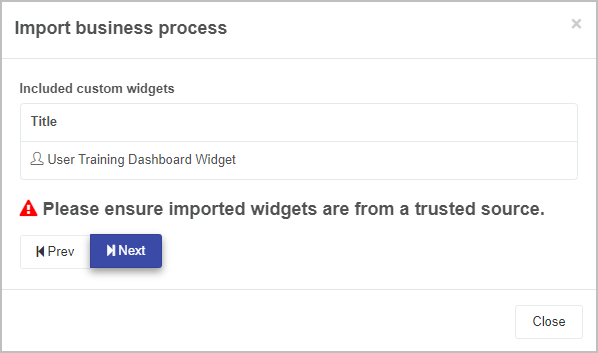
Under Included custom widgets, you can view the title of the custom widgets that are included within the Kianda file being imported. In this example, a Custom dashboard widget is included for use within the User Training Dashboard. Click on Next to continue.
-
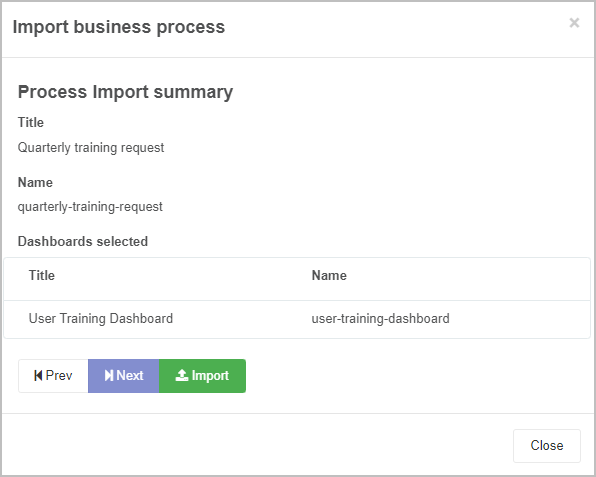
You will see a summary of what is about to be imported. Click on Import to execute the import.
-
Imported processes are available to view and edit from the main process view.
-
When you have imported your process(es) go to Designer to find out more on how to edit or add forms to your process(es).
Editing processes
-
When processes are created they are available to view and to edit from the central view panel found within Administration > Designer.

Information related to your processes, is found in this panel, for example who created the process, and when, the version of the process and a description if it exists.
-
The first version of a process is 0.1 and will increment to 0.2 and so on, each time a process is updated. Once the process is published the version changes to 1.0 and increments with each publication. This makes it is easy to keep track of who made changes and when, and to restore an older version if needed. You can also search for processes by typing your keywords into the search bar.
-
At any time you can edit the Title, Description, Group and Administrators of the process by clicking on the Pen button  beside your process of choice.
-
At any time you can delete a process by clicking on the Bin/Trash button  and then click on Ok after you have reviewed the process title and you are sure that this is what you want to delete. Click on Cancel if you wish to cancel the deletion.
-
Once you have created your process, you are ready to add forms. Go to Designer to find out more on how to add and change forms within your process(es).
Exporting processes
-
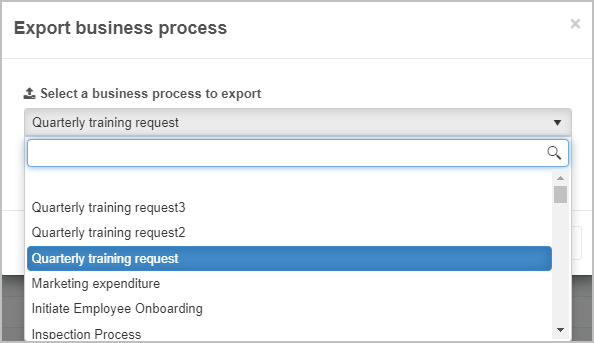
You can export any processes, by clicking on the Export button  and select a process to export from the dropdown list. Click on Next when you have selected your desired process.
-
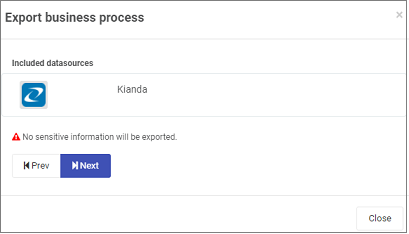
The system will report what datasources are included. Click on Next.
-
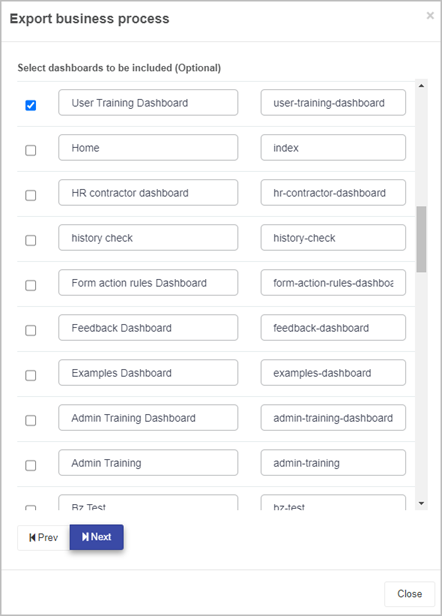
Select dashboards to be included by checking the checkbox beside dashboards you want to export. Click on Next.
-
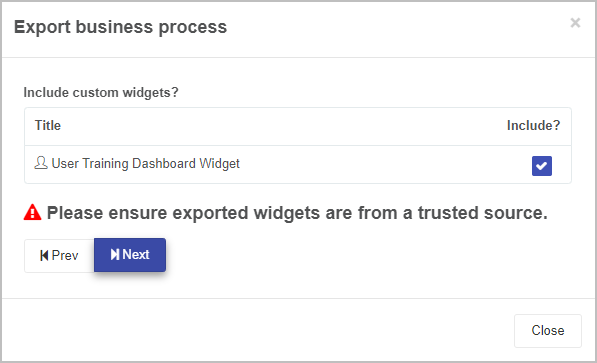
Under Include custom widgets?, you check the checkbox beside the displayed custom widget(s) to include this custom widget within the exported Kianda file. In this example, a Custom dashboard widget is included for use within the User Training Dashboard. Click on Next to continue.
-
The final screen displays a confirmation message communicating that the process is now ready for export. Click on the Export button  to export the Kianda file.
-
The result is a downloadable file of type .kianda. This can be kept as a backup on a separate system and imported into other Kianda instances as needed.
What’s next 
We have briefly introduced how to create, edit and export processes. To read more about process instances and settings go to the links below:
1 - Process instance
Introduction
Kianda processes are made up of forms, which in turn contain fields or controls and rules. Fields are used to take in user input, make calculations, display values and so on, and rules are used to execute actions to drive the process.
Kianda Designer is used to create these forms and form elements within a process. Each process in Kianda Designer will have it’s own unique link or URL and this can be shared with other form designers for co-creation, for example, for a process named ‘Training process’ the link is:
https://green-itr.kianda.com/admin/designer/training-process
Process instances
When your process is created in Kianda Designer, you can save the process, and then submit data to that process. When you save or submit data, then an instance of the process is created. Another name for a process instance is a record. This instance is tied to user data or calculated values, or to whatever the process is designed to do.
The instance has a unique ID which can be seen in a list widget in a dashboard. For example, this List widget displays the individual records of various training requests submitted by employees. The unique ID for each record is shown in the first column. Form owners or those with security access can click on ID ‘training-request-and-feedback-process-26’ to view the training request form completed and submitted by employee Mark Donnelli.
List widget in a dashboard showing process instances
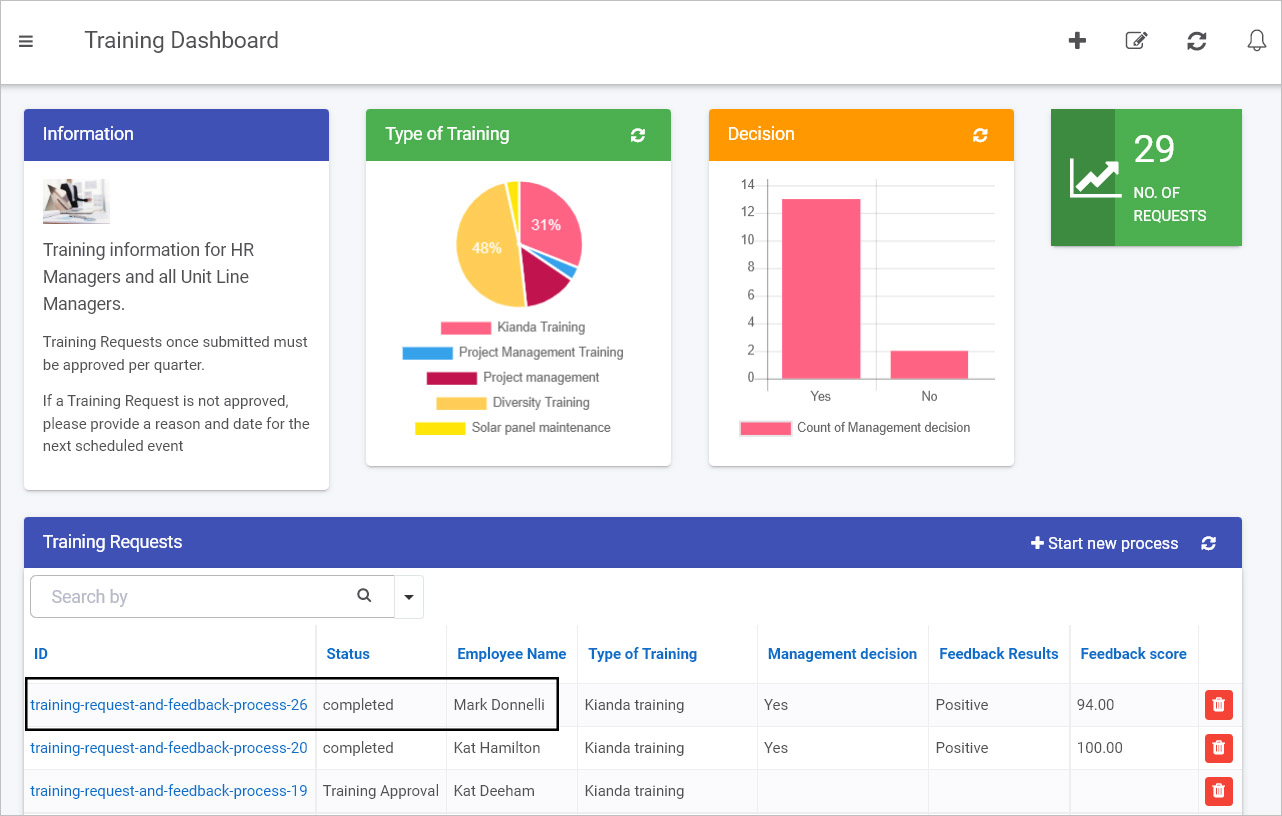
This means that each new record generated by a process will have its own unique URL that can be shared with those who have the required security access and need to be involved in that particular process instance. For example, in this case, the training request submitted by Mark (an employee) may be viewed and approved by his line manager:
https://green-itr.kianda.com/forms/training-request-and-feedback-process-26
You can create a link on your dashboard – in the example shown above, the Start new process button at the top right of the Training Requests list widget – that enables you to create a new record by bringing you into the relevant form. For information on creating list widgets go to List widget.
If you commit to the process by submitting or saving information, then the result is a new process instance – that is, a new unique record – which will be seen in a list widget in the dashboard, as seen in the image above.
Keeping in mind that Designer is used to create processes, and that each ‘run’ of the process design results in a unique process instance or record, will help you later on when designing forms and dashboards. See Process settings for more details on process settings and parameters and Dashboards for more information on dashboards.
2 - Process settings
Introduction
There are a number of properties and settings that you can implement to your process and forms.
Settings and properties
Settings are available from the right-hand pane and give you the ability to:
-
Import processes
-
View Version history
-
Change Process settings  .
.
-
Edit form information by selecting a form and clicking on the Pen button  .
.
-
Change a field to another field by clicking on Change field
-
Create a duplicate form by selecting a form, clicking on the Clone button  and then click on Ok. A version called ‘Form Name Copy’ is created and available to edit on the canvas. The Clone button can also be used to clone form elements like controls or buttons.
-
Delete a form by selecting a form, clicking on the Bin/Trash button and then click on Ok after you have reviewed the form title and you are sure this is what you want to delete. Click on Cancel if you wish to cancel the deletion.
-
View and edit Form properties and rules.
Process settings
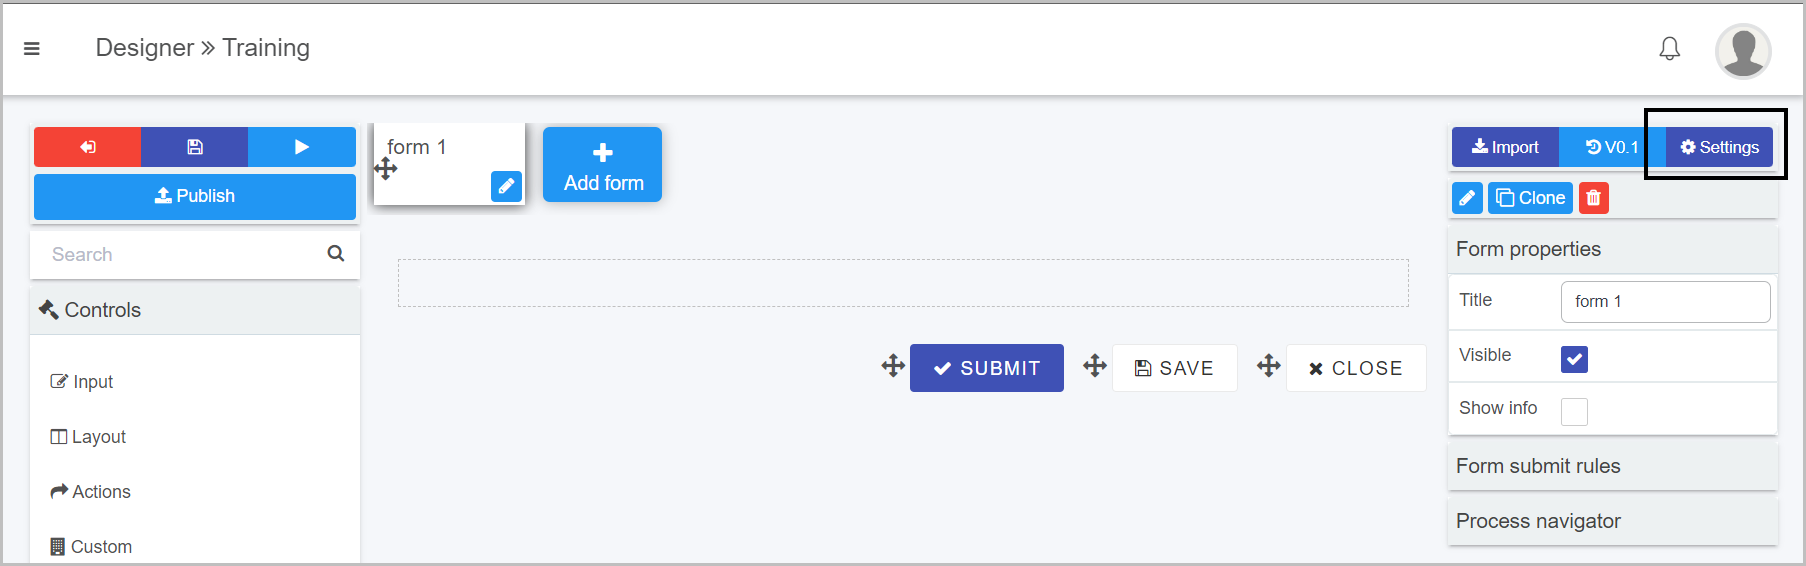
You can edit process settings by clicking on the Settings button in the right-hand pane. 
Within process settings, there are four tabs to navigate to:
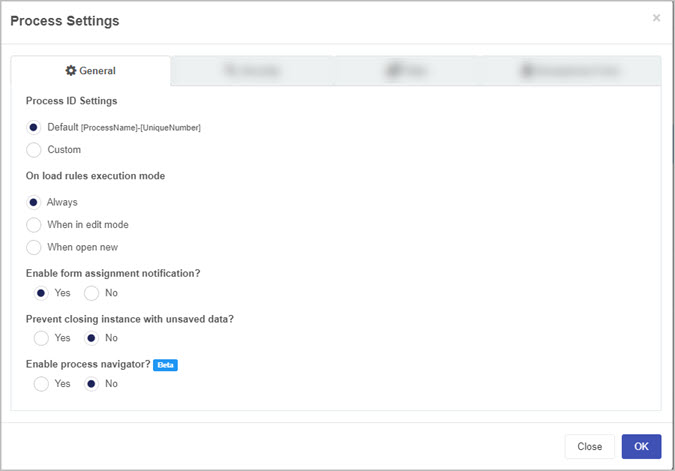
1. General:
-
Process ID Settings - choose from a) Default or b) Custom and use a combination of [ProcessName]-[UniqueNumber]-[FieldName]
-
On load rules execution mode - options are a) Always b) When in edit mode or c) When open new. The default setting is Always.
-
Enable form assignment notification? - options are a) Yes or b) No
-
Prevent closing instance with unsaved data? - options are a) Yes or b) No
-
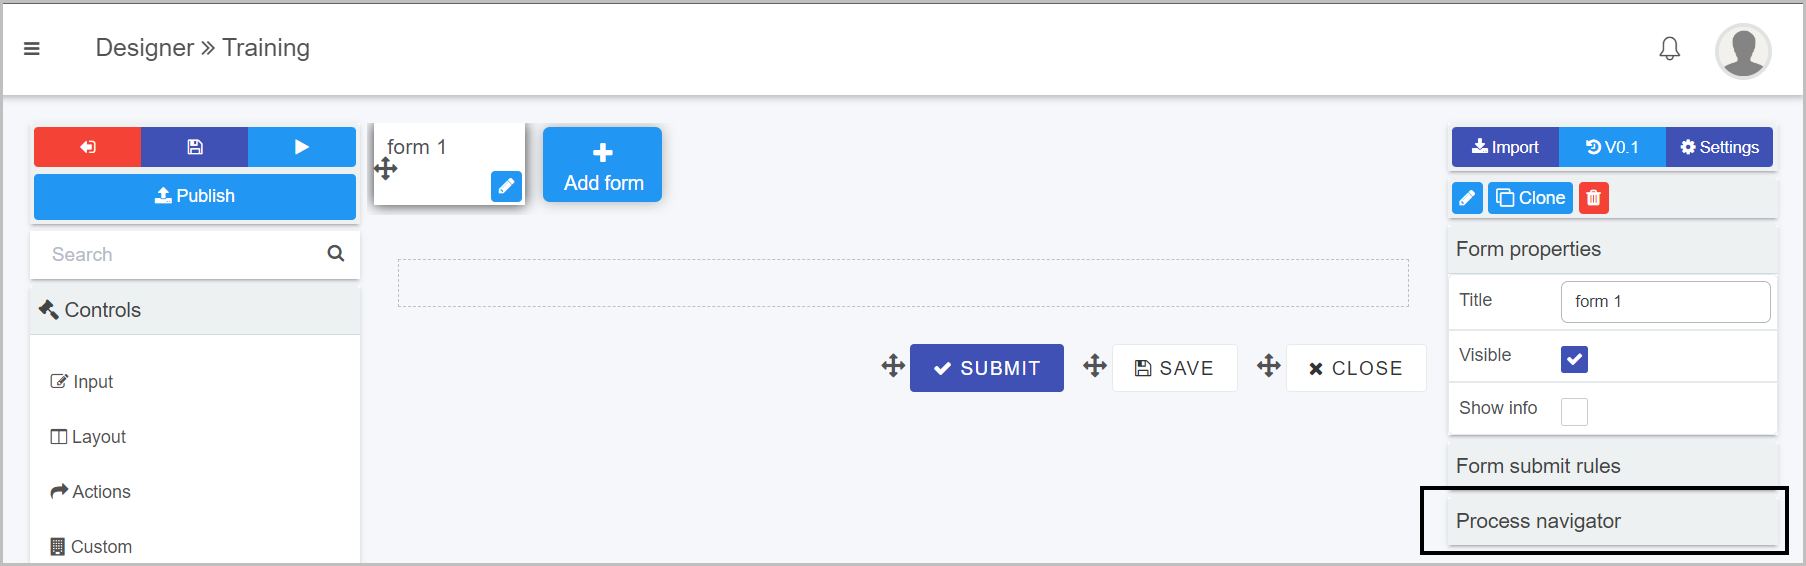
Enable process navigator? - options are a) Yes or b) No. If you select Yes, the Process navigator tab will appear in the right hand panel, allowing you to quickly snap to and view desired form controls and rules.

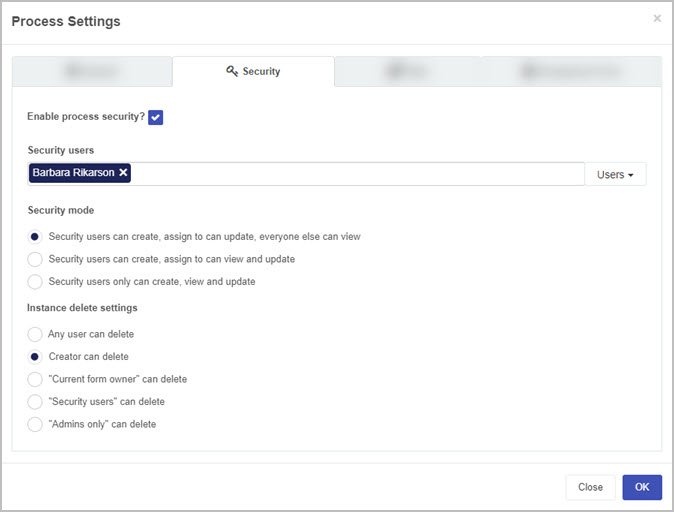
2. Security:
-
Enable process security - if you tick the checkbox, can allow certain Users, Groups or Partners to have certain privileges related to the radio button options to create, assign and view as shown below. The default setting is Security users can create, assign to can update, everyone else can view.
-
Instance delete settings - options are a) Any user can delete b) Creator can delete c) “Current form owner” can delete d) “Security users” can delete e) “Admins only” can delete. The default setting is Creator can delete.
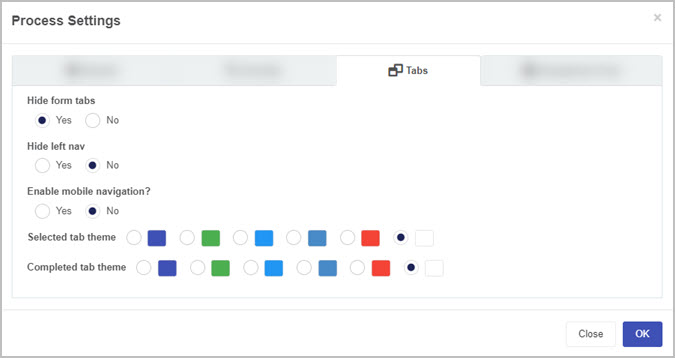
3. Tabs:
-
Hide form tabs - gives you the ability to hide form tabs, options are a) Yes or b) No
-
Hide left nav - gives you the ability to hide navigation elements, options are a) Yes or b) No
-
Enable mobile navigation? - options are a) Yes or b) No
-
Selected tab theme - choose from Navy, Green, Blue, Amber, Red or White as a colour when a form is selected.
-
Completed tab theme - choose from Navy, Green, Blue, Amber, Red or White as a colour when a form is completed.
When you are finished editing the process settings:
- Click on the OK button
 to save your changes or click on Close to exit the dialog box without saving.
 - Click on the Exit button
 to go back to the process list, the Save button
  to save your work, the Preview button
  to preview what you have created and the Publish button
  to publish your work.
What’s next
- To learn more about rules and controls that can be applied to forms go to Controls and Rules.
- To learn more about properties, go to Properties.
3 - Process properties
Kianda low-code development platform - Process Properties
In Kianda every process, every form and every control field such as text boxes and lists, will have properties visible in the right-hand pane of the Designer view.
Process properties
When you go to Administration > Designer > click on a process > Process properties in the right-hand pane, you will see the properties for the chosen process.
The following properties are visible:
- Title - the title of process for example Quarterly Training Request
- Page layout - you can click on Wide
 or Narrow
  to change the layout.
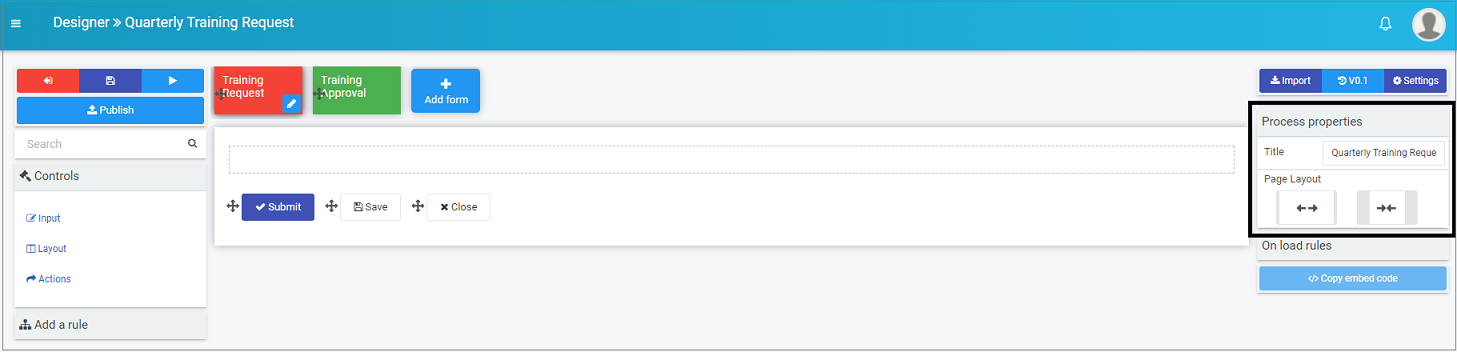
In the image above, the process ‘Quarterly Training Request’ has 2 forms ‘Training Request’ and ‘Training Approval’. Clicking on one of these forms will show the Form properties.
When you click on a form, the Form properties appear in the right-hand pane.
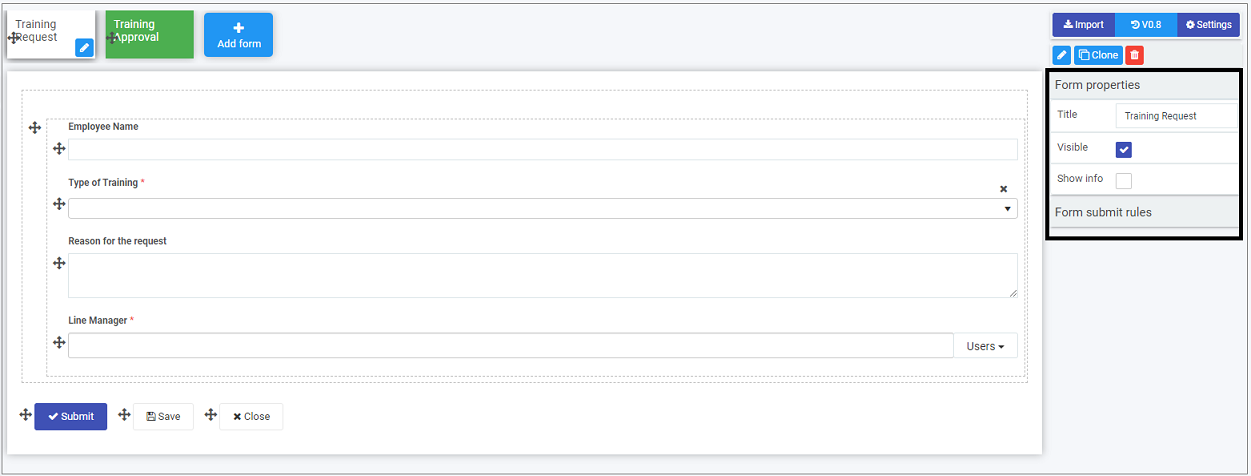
The following properties are visible:
-
Title - the form title, for example Training Request
-
Visible - click on this checkbox if you want the form to be visible to users
-
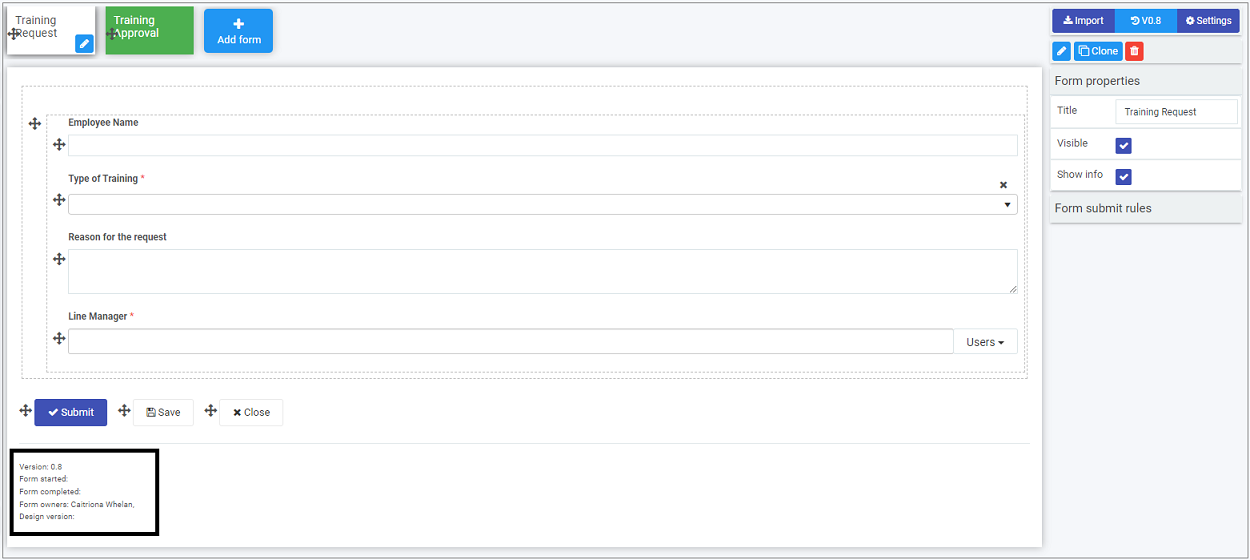
Show info - click on this checkbox if you want to show information, for example who are the form owners, the design version and when the form was started and completed. This information will pop up at the bottom of the form.
Underneath form properties you will see Form submit rules, go to Rules to find out more about Form rules.
Click on a control field, for example a text box, in the form to see Field properties.
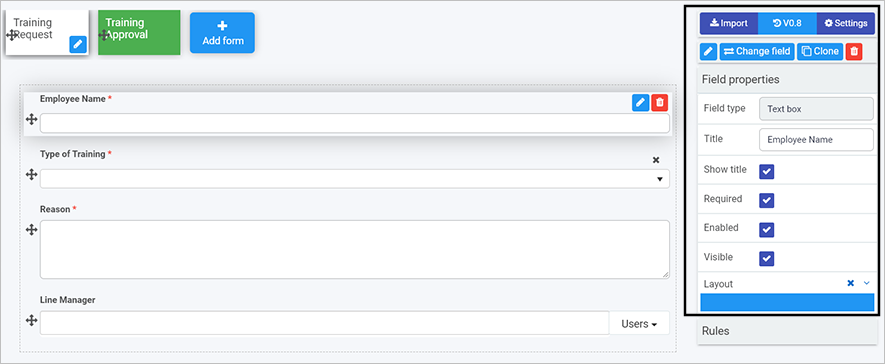
Field properties
When you click on any field, such as User picker, list or text box, the field properties appear in the right-hand pane.

The Field type, in the example above, Text box, is shown along with the Title of the field, in the example above, this is Employee Name.
The options within properties are:
- Show Title - show the title of the field
- Required - tick this checkbox to make this field mandatory for users to fill out
- Enabled - tick this checkbox to make the field enabled for users to fill out
- Visible - tick this checkbox to make the field visible to users
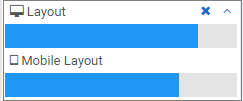
- Layout - change the width of the field by clicking on the bar in the Layout box until you see the desired size. Click on the arrow beside Layout to see the Mobile Layout and click on the bar to change the width of the text box for mobile use.
Underneath field properties you will see Rules, go to Rules to find out more about Field rules.
4 - Process common fields
Introduction
Within every process, there are forms and forms contain fields. The fields you add in, such as a text box, list or button are called Design fields. For example as seen in Field properties you can change properties for a textbox field, like making the field Required and Visible for form users as shown in the image below for the Training Request form field called ‘Employee Name’
These design fields are also apparent when creating dashboards, for example list widgets. In the example below we can see the Design fields highlighted that are found in the Training Request form. These highlighted fields like Employee Name will appear in the list widget in the dashboard.
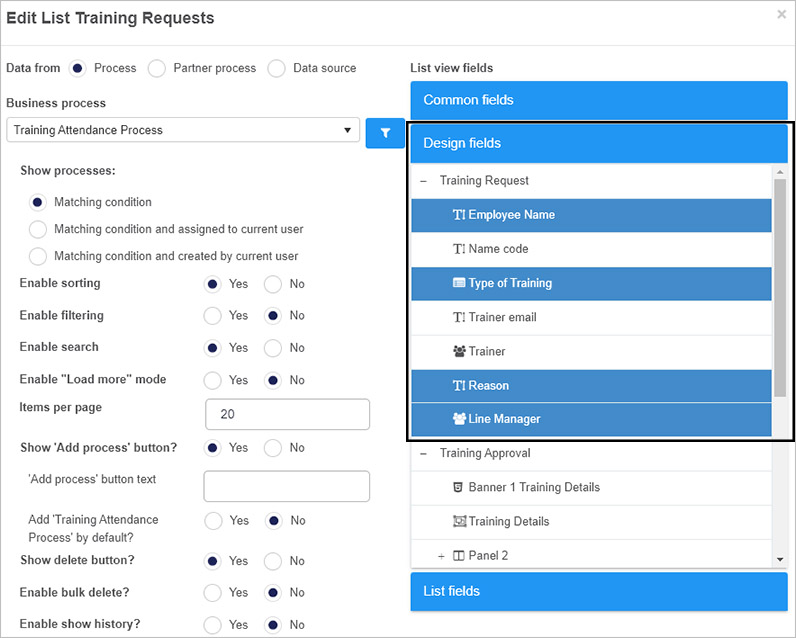
Clicking on List fields in list widget shown above will show all the fields that will appear in the widget.
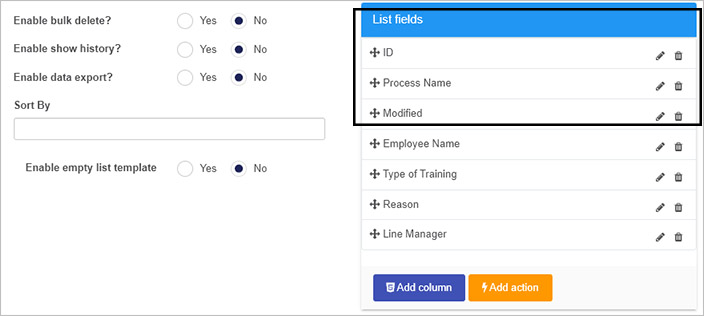
Note that non Design fields are also included in the fields to display, namely ID, Process Name and Modified fields. These fields are part of the set of Common fields associated with all Kianda processes.
Common fields
The non-design fields associated with all Kianda processes are listed below. It is useful to keep these fields in mind when designing forms, as they can be used to retrieve, store or display values from process instances for example Status which is the status of a process instance. Using these ‘internal values’ could be useful where the status of one process could be used as a condition to trigger the start of another process, for example using the Start a process rule.
The common fields associated with process instances are:
| Field name | Explanation |
| ID | This is the process instance ID, labelled as ‘process-name-number’, for example ‘safety-inspection-8’. This ID is part of the URL that brings you to the process instance/record held on the system when information is either submitted or saved. For example clicking on the process instance ID ‘safety-inspection-8’ in a dashboard brings you to the form for example ‘https://green-itr.kianda.com/forms/safety-inspection-8'. |
| Unique ID | This is a system generated ID for each process instance, a 32 letter and number generated value. |
| Status | This is the status for the process instance, that is either a ‘form name’ or ‘Completed’. Completed indicates that all forms in a process have been submitted, while ‘form name’ indicates what the active form is in the process, that is, where the process is ‘at’. For example in a process of two forms, a Request form and an Approval form. Once the Request form has been submitted then the status for a process is ‘Approval form’ indicating that this form needs to be completed. |
| Version | This is the process instance version number that starts as 1.0. If a process instance is updated, for example if a process design is updated and published and process instances are updated with the change, then the next version of the instance will be 2.0. |
| Process Version | This is the process design version, that is the version of the process design that has been used as a template for the process instance. |
| Process Name | This is the Unique ID name that comes from the process design that is the template for the process instance. The ID is created when the process is created. The ID field autofills from the title of the process as shown in Create your first process. |
| Process Title | This is the Process title that comes from the process design title, created when the process is created or updated, for example see Create your first process. |
| Created | This is a date and time stamp when the process instance is created. |
| Created by | This is the user name of the user who created the process instance. |
| Modified | This is the date and time stamp when the process instance is modified, for example after a process design is published and existing process instances are updated. |
| Modified by | This is the user name of the user who modified the process instance. |
| Assign to | This is the user name of the user who a process is assigned to. Process designs may have a static option for reassignment in their design so that process instances can be reassigned using Quick actions. Alternatively the Assign form rule can be used to dynamically assign form ownership to another user. That user is named in the Assign to field. |
| Security users | These are the named security users, defined using Process settings by selecting Enable process security and naming Process security users which can be Users, Groups and/or Partners. |
What’s next
- To learn more about design controls that can be applied to forms go to Controls.
- To learn more about how common fields are displayed in dashboards in a list widget go to List widget.
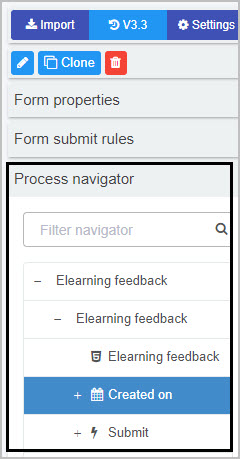
5 - Process navigator
Process navigator can be found in each process design in the right-hand pane. The navigator is used to help you navigate to fields and rules that are present within you process. By clicking on a field for example, you will be navigated specifically to where the field is within your process while also highlighting the field with a border for a short period of time. You can also do the same for rules, once you click on a rule in the navigator, you will be brought to the form where the rule is located and it will highlight the specific field that the rule is attached to.
The very useful feature of the process navigator is its search bar. With big processes that contain many forms, fields and rules can be overwhelming and time consuming to look for a particular filed or rule. You can simply type in the name of the filed/rule and options will appear under the Process Navigator
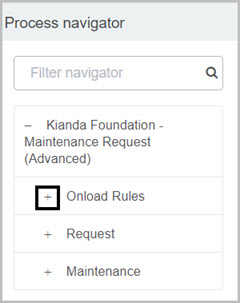
How to turn on the process navigator
By default the process navigator is turned off within each process design. To turn the process navigator on:
-
First, navigate to the desired process by going to Administrator > Designer > click on desired process.
-
Go to Settings of the process found on the right-hand pane.
-
In the General tab of the Process Settings dialog box, select Yes on the Enable process navigator.
-
Click OK on the dialog box.
-
Click process save  button.
How to use the process navigator
When you have your process navigator turned on, you will be able to see it on the right-hand pane underneath the rules tab.
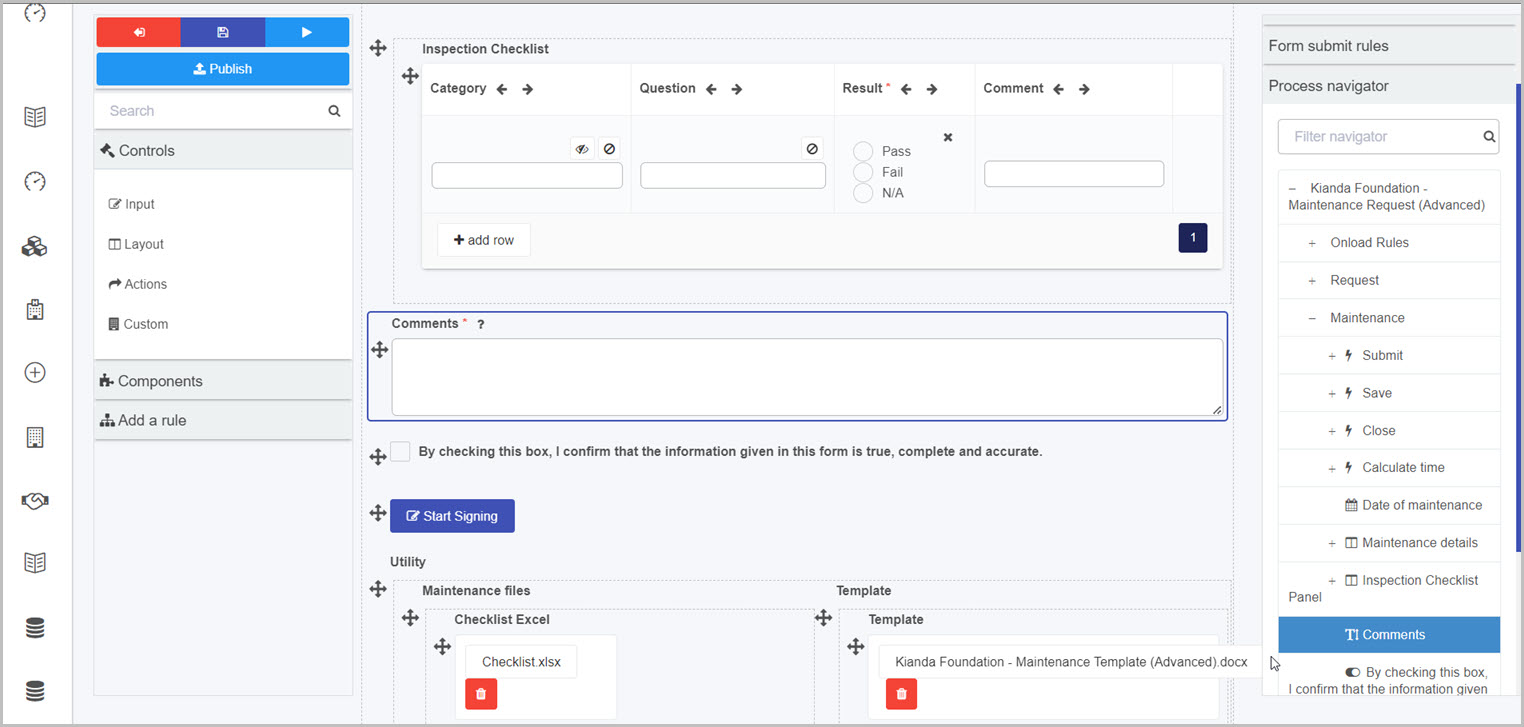
How to navigate to a field/rule
-
Click on the Process navigator tab to expand it. This will allow you to see all forms that are present within your process.
-
Expand a form in which the desired field is located by clicking on the plus, or simply type in the name of the field into the process navigator search bar.
-
Click on the field you wish to navigate to. The navigator will jump straight into the form that the field is in and the field itself will be highlighted for a brief period of time. See the image below for an example when navigating to a Comments field within a process design:
How to search for a filed/rule
The very useful feature of the process navigator is its search bar. With big processes that contain many forms, fields and rules can be overwhelming and time consuming to look for a particular filed or rule. You can simply type in the name of the filed/rule and options will appear under the Process navigator.
-
In the provided search textbox of the process navigator, type in the Name of the filed or rule your trying to navigate to.
-
Once you start typing, fields and rules will start to show that contain the text within the search textbox.

In the above image you can see that when the word date is entered, all fields and rules that contain the word date will show in the process navigator. You can then click on the desired field/rule for the navigator to navigate you to the location.
What’s next
- To learn more about design controls that can be applied to forms go to Controls.