Active Directory Connector
Kianda Active Directory Connector
The Data sources function is found under Administration in the left-hand side menu, and provides an easy way to create connections to ERP, CRM and IT systems. These connections allow you to combine multiple sources of data in one place and from there Kianda processes can use and update the data to creative effective workflows.
Connecting to data in Kianda is a breeze. You can quickly connect to a data source, for example data in Salesforce, and use this data in Kianda forms and dashboards. The connection is called a data connector and Kianda comes with a predefined set of data connectors, these include:
Click on each of the links above to find out more about each data connector.
If you have a data source that is not on the list above, you can use SOAP or REST to easily connect to your data source, go to SOAP or REST for more information.
If you are an experienced developer, you can also create your own Custom connector customising pre- and post-processing of queries, see Custom connector.
Only those with the role Administrator or Manage data sources have access to the Datasource management function. To view any existing data sources:
Go to Administration > Data sources in the left-hand side menu.
Any existing data sources that have been created for your workspace are shown in the main view under Datasource management.
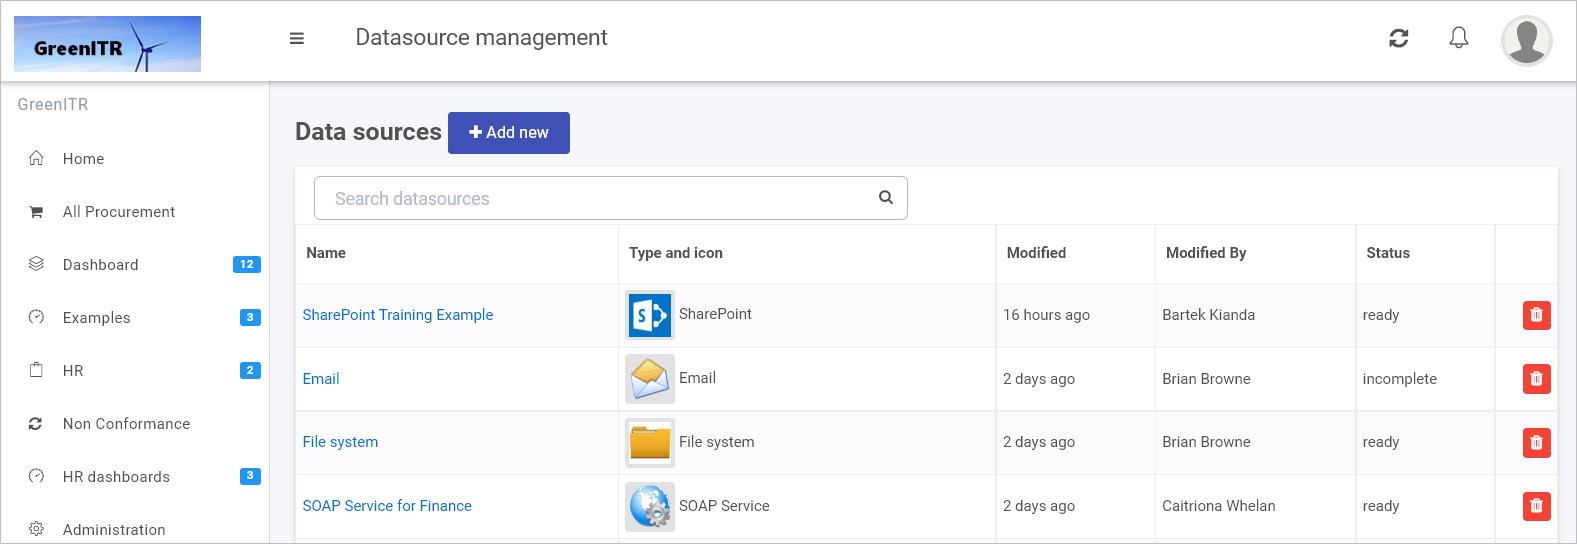
Data sources are listed by: Name, Type and icon, Modified (as in the date the connector was last modified), Modified By (the person who last made changes) and the Status, for example ready means the connection has been tested and is working, while incomplete means that more details still need to be added.
To search for a data source, type in the name or type of data source in the search box.
To delete a data source, click on the Bin/Trash button  beside the name of the datasource. You will receive a popup asking to you to confirm deletion by clicking OK, or you can exit the deletion by clicking on Cancel.
To see the details of a data source, click on the name of the Data source and from there you are brought to the Data source details page:
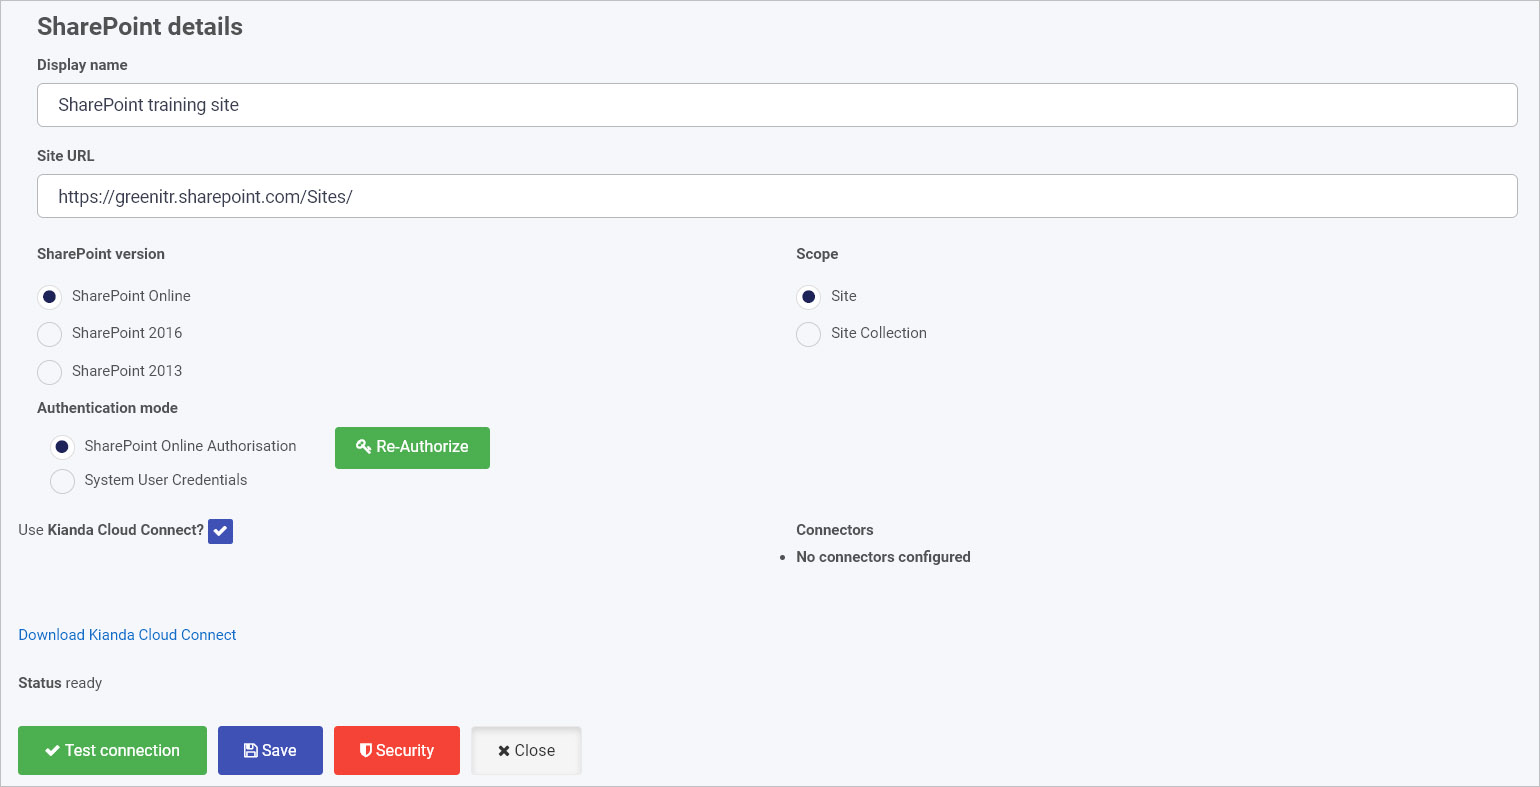
The details will vary depending on the data source, but there are some common elements:
The video below demonstrates how to create a datasource for SharePoint. The procedure shown is similar for other data connectors. Click on the links in Predefined data connectors to read more on how to connect to different data sources.
Connecting to SharePoint Data (On-premises or Online) example
There is also an option to create a customised data connector using the Kianda Developer Custom Connector.
Kianda Cloud Connect (KCC) is available with the following data sources, allowing you to streamline data system integration:
You can enable KCC when you add a new data source from the main by datasource management page:
For more information go to Kianda Cloud Connect.
All data sources can have security added at different levels, for example at a role level and even database query level.
To enable security for datasources:
From the left-hand side menu, go to Administration > Data sources.
Click on an existing data source name or click on Add new to create a new data source.
In the data source details screen, click on the Security button.
The Security settings dialog box opens.
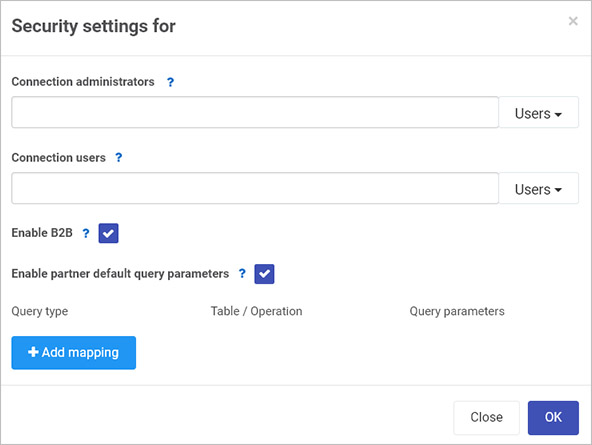
Fill out the details:
Check/Uncheck Enable partner default query parameters. If you check the checkbox, you can define default query parameters that are applied to any partner originated query. Parameters defined here take precedence over any design time queries. Click on Add mapping to choose a query type and table/operation as follows:
Query type - choose from Create, Read, Update, Delete (CRUD). These CRUD operations allow you to create, read, update and delete records within your datasource.
Table/Operation - click on Select a table to select a resource within the data connector. Click on OK when you are finished editing, or Close at any time to exit the dialog box.
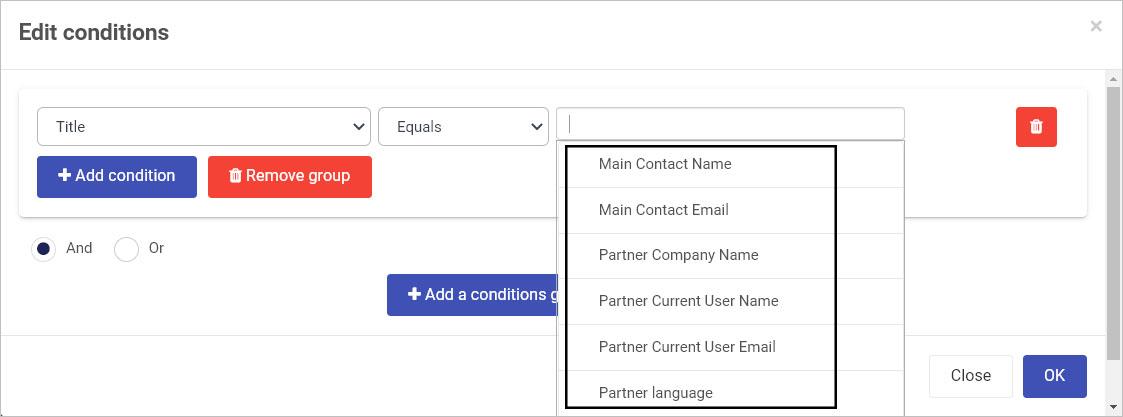
Query parameters - when a datasource resource is chosen, for example a SharePoint list called ‘Countries’ below, then you will have an option to set conditions for filtering data.
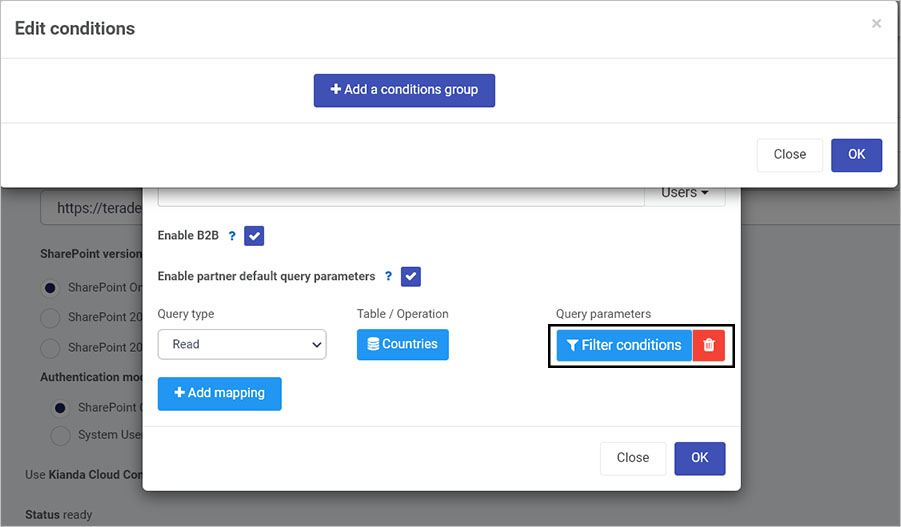
Click on Filter conditions to open an Edit conditions dialog box and from there click on Add a conditions group.
If you choose to set conditions using the steps above, then in the Edit conditions dialog box, you can set conditions based on data source parameters, operators and form fields.
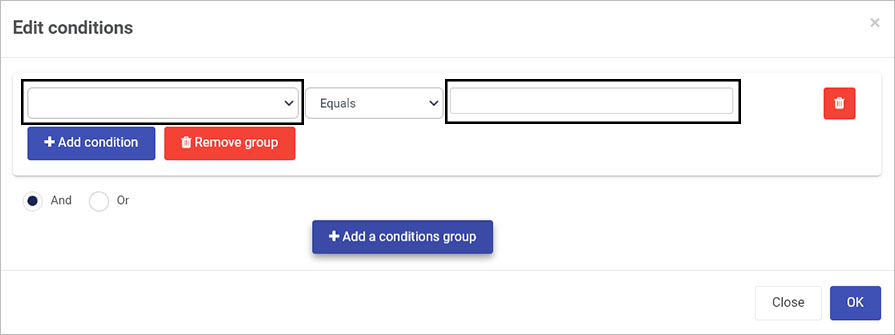
Within this dialog box you can also use different operators, for example Equals as shown above. See Conditions for more details on using conditions in Kianda.
The right-most field relates to the B2B Portal and B2B User. There are standard options listed below:
When you have added conditions click on OK, or click on Close at any time to exit the dialog box.
When you are finished editing the security settings dialog box, click on OK, or click on Close at any time to exit the dialog box.

We have introduced the data sources management function within Administration. Now let’s look at each of the data connector types in more detail:
Kianda Active Directory Connector
Was this page helpful?
Glad to hear it! Please tell us how we can improve.
Sorry to hear that. Please tell us how we can improve.