Active Directory Connector - Create user
Kianda Active Directory Connector - create user
One of the data connectors within Kianda that you can connect to is Active Directory (AD) also known as Active Directory Domain Services (AD DS). AD is a logical and hierarchical structured data store of objects which are mostly accounts. Accounts such as Users, Computers, Groups and other objects such as Printers or Group Policy Objects (GPO). For example, you can store information about user accounts within an AD such as Name, Email, Manager name, Password, Job title and Permissions.
The Kianda AD connector uses Lightweight Directory Access Protocol (LDAP) allowing users to query Active Directory libraries for example to retrieve properties for users. For more information on LDAP go to https://ldap.com/ or https://en.wikipedia.org/wiki/Lightweight_Directory_Access_Protocol.
Having an AD connector will allow you to access and update information that is stored in your AD database from your Kianda subscription. You will be able to use User-related AD functions which will allow you to use the connector when manipulating users within your AD. For example creating users, updating their permissions, moving them between groups or removing them from the directory. To use the AD functions, you can use the Data rules that are predefined within Kianda.
Before you can create a connection with your Active Directory and your Kianda subscription, you need to
a) download Kianda Cloud Connect
b) create a specific user for the connector, defined in your Active directory database
Kianda Cloud Connect is a piece of software that establishes a connection between your local machine and your Kianda subscription. This lightweight app will sit on your PC or server where files reside that you need to use in Kianda processes, and therefore is an on premise function .
Kianda Cloud Connect allows data to travel from your local machine to the Kianda Cloud Connect service, and then the Kianda Cloud Connect service sends data to your Kianda subscription. This data transfer works both ways depending on what operation you are performing for example Deleting a file or Creating one.
You must create an account in your AD service which will serve as the connector administration account for the data connector, and this account must be a global administrator in order to allow access to functions.
this account must correspond. Note that this account can only be used to manage the connector for one subscription and cannot be used in more than one Kianda subscriptions as Kianda Cloud Connect will not be able to tell which subscription you want to connect to.
To learn more about how to download and create a connection between your Kianda subscription and Kianda Cloud Connect go to Kianda Cloud Connect.
From the Kianda home page, click on Administration > Data sources.
Click on + Add new button  and choose Active Directory from the list of data sources provided.
You will be automatically brought to the Active Directory details page, where you can start setting up the connection.
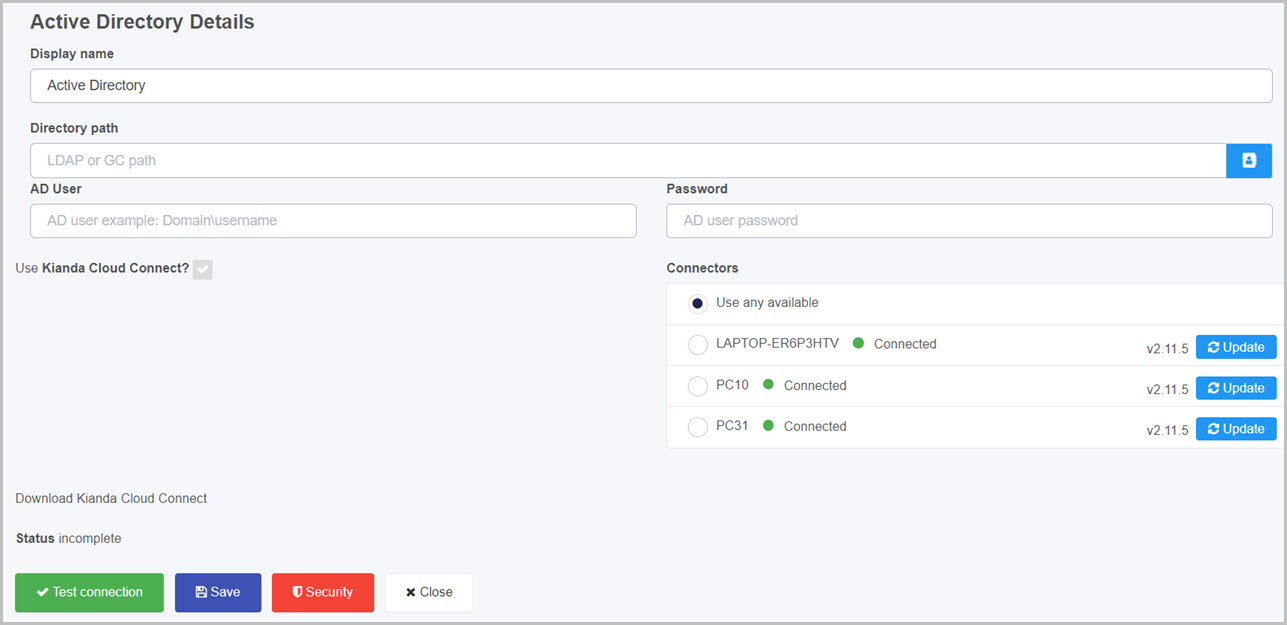
Choose from the edit options:
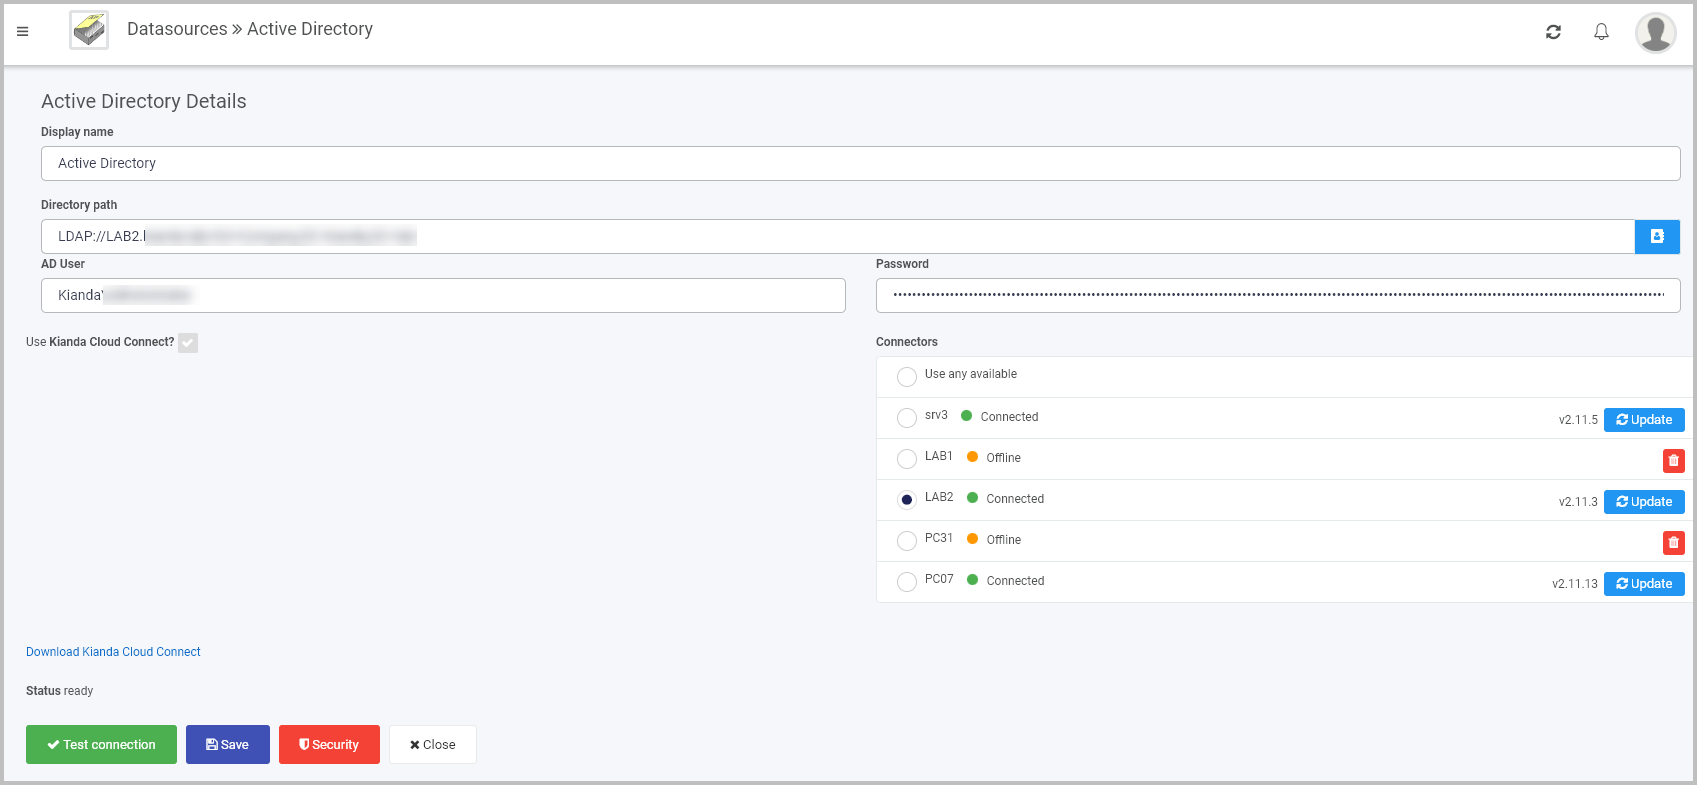
<domain>/<username>Here is an example of a completed AD connector page, where the directory path is LDAP and this connector is connecting to LAB2 where the AD database resides.
When you have added the necessary details, you are ready to test your connection and add security. At the bottom of the PowerShell Connector page, click on Test connection button  and if the service has been correctly configured, then you should receive a notification saying Connection test succeeded.
Click on Save  to save the connection and you will receive a notification saying Details saved successfully.
Add Security settings by clicking on the Security button, go to Setting security for data sources for more details.
Click on Close to close the details page and return to the data source management main view.
Active Directory functions are User-related remote procedures and to use them you have to use the Data rules that are predefined within Kianda. The remote procedures that are available are listed below. To give you an idea of how they work, some of these procedures are detailed on other pages, click on the links below to find out more.
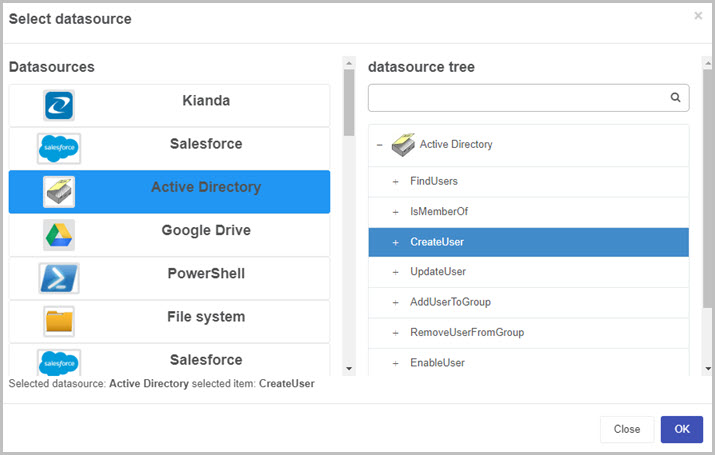
Lets take the CreateUser function as an example to show how these functions work. As mentioned earlier, we need to use the Data rules to use these functions and for this example we use the Create item rule which is available from the Data rules.
When creating a user in Active Directory, there are some required properties that we need to provide. Those properties are a username, givenName (first name), surname (last name), email and password. There are also extra properties that can be provided by expanding a properties tab within the function:
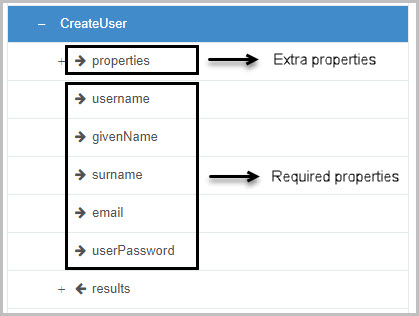
We need to create at least five fields that will be used to provide a value as the required properties. We will use a text box field for each one:

Use the create item rule to use the function. We need to map the text box fields to the appropriate properties as follow:
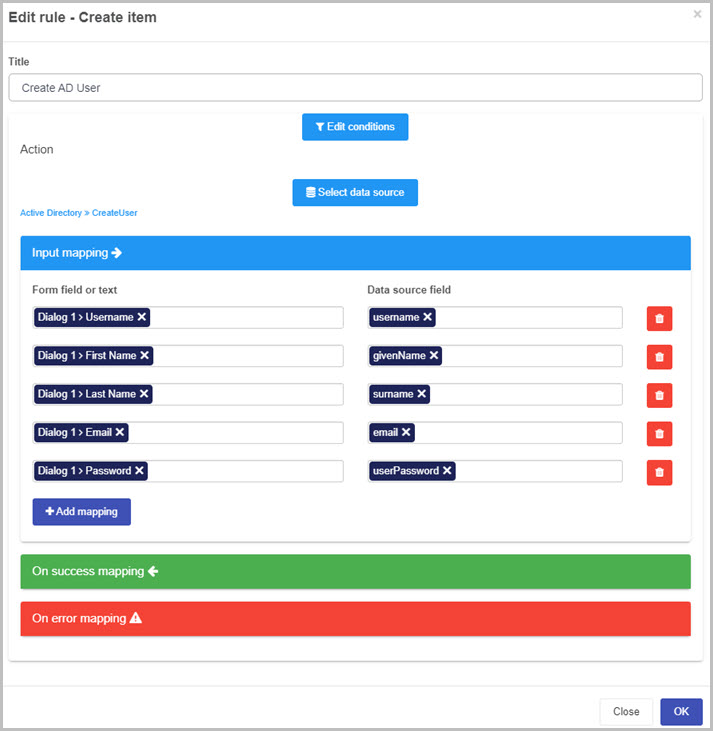
You can apply the create item rule to a button, for example, the submit button. This will result in a user being created in your AD whenever the submit button will be clicked.
Using AD you can perform user synchronisation for user groups in Kianda. For example by creating a specific group in Kianda, we can allow Group member synchronisation for that group, by choosing the option shown in the image below with, using the AD data connector. See Groups for more details on group creation.
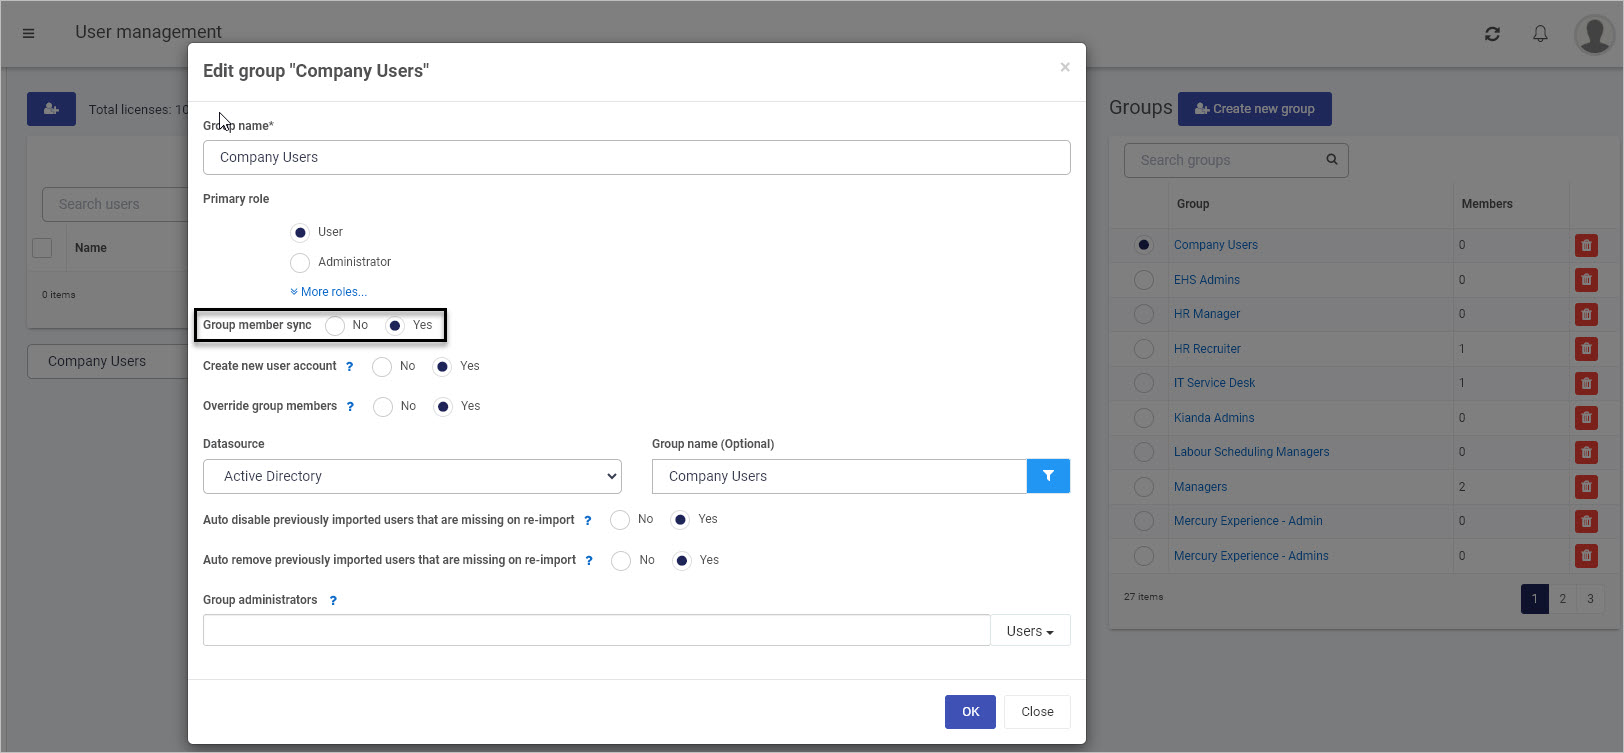
In the example above, the Kianda environment is synchronised with AD, so that any users added to or deleted from the AD database will be added to or removed from the users of the group ‘Company Users’. This kind of user synchronisation is also possible with Office 365, SharePoint as well as AD.
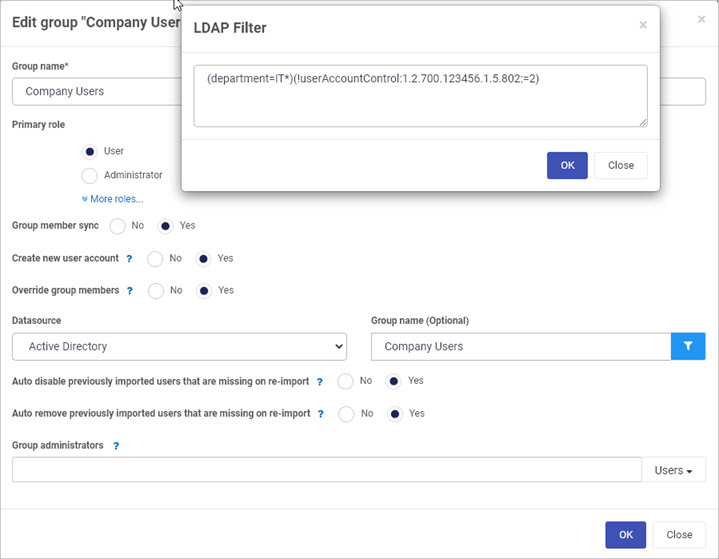
By clicking on the Filter button  within Groups, an LDAP Filter can be applied. The LDAP filter is an open format that allows you to perform queries with AD. For example the query below is used to query for users in the IT department with an account that is not disabled (=2).
LDAP queries and more information on LDAP can be found in many pages such as:
https://ldap.com/ldap-filters/
https://en.wikipedia.org/wiki/Lightweight_Directory_Access_Protocol
https://learn.microsoft.com/en-us/previous-versions/windows/desktop/ldap/ldap-reference

When you have created your Active Directory connector you can start to use the connector data in processes. To find out more about how to design processes, go to Designer.
Kianda Active Directory Connector - create user
Kianda Active Directory Connector - find users
Kianda Active Directory Connector - update users
Kianda Active Directory Connector - permissions
Was this page helpful?
Glad to hear it! Please tell us how we can improve.
Sorry to hear that. Please tell us how we can improve.