MySql
One of the datasources available in Kianda is a MySQL Server datasource. MySQL is a relational database management system (RDBMS) used to manage structured collections of data. This data can consist of anything from a simple to do list to a more complex organisation network. Using the MySQL server as your datasource, you can perform any Create, Read, Update and Delete (CRUD) operations using the Data rules provided in the Kianda platform, to learn more about data rules go to Data rules. Using the MySQL server connector, you have access to all tables within your database from your server, keep in mind that you can perform CRUD operations on data within a table of the database, but you cannot create or delete tables themselves.
When to use
You can use the MySQL Server connector when you want access or modify data within a table in your MySQL server. You can connect the MySQL server connector to a List field as its datasource, meaning you can access information from a table and display the information that is stored in the table. For example if your MySQL server contains tables such as Employees, Purchases and Standing Orders, you will be able to connect the list field to one of those tables giving you CRUD access to its data.
Take a table Employees as an example, if this employee table contains data about the employees in your company such as name, phone number, email address and home address. You can create a new employee by providing necessary information, you can read (display) employee data, update employees information for example when a home address has changed and you can delete an employee from the table. Those are the CRUD operations you can perform on MySQL server through a process within Kianda.
Before getting started
When establishing a connection using MySQL data connector, you are creating a connection with a Database from a server, not the server itself. Before continuing make sure that your MySQL server has a database you can connect to. A database can represent any type of data you want to access, and within this database, you need to create a table representing the actual data you will have CRUD access to. For example creating a database of your company name such as GreenITR, and within this database you can create tables to represent your Employees, Purchases and Standing Orders.
How to get started
-
From the Kianda home page, click on Administration > Data sources.
-
Click on + Add new button
 and choose MySQL from the list of datasources provided.
 -
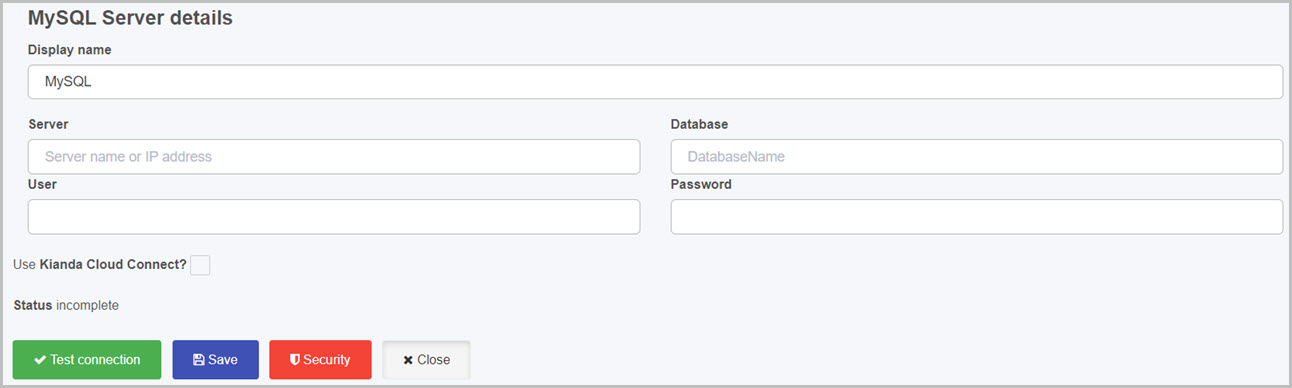
Fill out fields in the MySQL Server details screen.
Choose from the edit options:
- Display name - type in the name for your MySQL server connector. This is used to distinguish between different data connectors on your platform.
- Server - the name of the server you want to access or the IP address where the server is hosted. When you are running a local server on your machine you can use
localhostas the server name. If you are connecting to a public server, enter in the name of the server. - Database - the name of the database from your server that you want to connect to.
- User - username used to log into the server.
- Password - password used to log into the server.
- Use Kianda Cloud Connect - by default this option is disabled, the cloud connect is used to create a connection between a locally run MySQL server and Kianda itself. To learn more about Kianda Cloud Connect and how to create a connection between Kianda and your PC, go to Kianda Cloud Connect. Check this option if you want to connect to a server that is running on your local machine. When Use Kianda Cloud Connect is enabled, a Connectors option appears.
- Connectors - displays all available connector PC’s that have a connection established with your Kianda subscription. This option is used to select the PC connection that runs the local MySQL server that you want to connect to.
- Status - represents the current status of the connection.
- incomplete - means that the details of the connector were not fully completed
- test failed - means that the details of the connector are incorrect and the connection has failed.
- ready - means that the connector has successfully connected and its ready to be used.
-
When you have added the MySQL server details, you are ready to test your connection and add security. At the bottom of the MySQL Server details page, click on Test connection button
 and if the service has been correctly configured, then you should receive a notification saying Connection test succeeded.
 -
Click on Save
 to save the connection and you will receive a notification saying Details saved successfully.
 -
Add Security settings by clicking on the Security button, go to Setting security for data sources for more details.
-
Click on Close to close the details page and return to the data source management main view.
What’s next 
Your MySQL Server connector is now set up and ready to be used in your processes. To find out more about how to design processes go to Designer.
Feedback
Was this page helpful?
Glad to hear it! Please tell us how we can improve.
Sorry to hear that. Please tell us how we can improve.