PowerShell
One of the data connectors within Kianda that you can connect to is PowerShell. PowerShell is a command-line interface (CLI) based tool that allows to automate tasks and configurations using code. With PowerShell you are able to create scripts and functionality to automate tasks within your organisation and the PowerShell connector allows you to call those PowerShell scripts from within Kianda. You can call your scripts with the Data rules that are available, use input mapping to pass parameters to your PowerShell script and receive the outcome of the script using results mapping. To learn more about input and result mapping visit one of the Data rules, for example Create Item.
When to use
You can use the PowerShell connector when you want run a PowerShell script from within your Kianda subscription. Any data that you to be passed into a script can be passed in using the input mapping functionality from Data rules. This allows you to have dynamic usage of your PowerShell scripts as you can have different value each time you call a script from Kianda.
Before you get started
In advance of using the PowerShell data connector, there are a couple of prerequisites to establish a working connection between your PowerShell scripts and Kianda.
- Downloading Kianda Cloud Connect
- Creating a new local PowerShell user
- Changing user rights assignment
- Changing Execution Policy for the new user
- Running Kianda Cloud Connect as PowerShell user
Downloading Kianda Cloud Connect
Kianda Cloud Connect is a piece of software that establishes a connection between your local machine and your Kianda subscription. This lightweight app will sit on your PC or server where files reside that you need to use in Kianda processes. It allows the data to travel from your local machine to the Kianda Cloud Connect service, and then the Kianda Cloud Connect service sends data to your Kianda subscription. This data transfer works both ways depending on what operation you are performing for example Deleting a file or Creating one.
To learn more about how to download and create a connection between your Kianda subscription and Kianda Cloud Connect go to Kianda Cloud Connect.
Creating a new local PowerShell user
We need to create a local user on your computer and designate it when running the Kianda Cloud Connect app on your computer. On the newly created local user, we will enable the ability to run PowerShell scripts and use this user as a link between Kianda Cloud Connect and your PowerShell scripts. Follow the steps bellow:
-
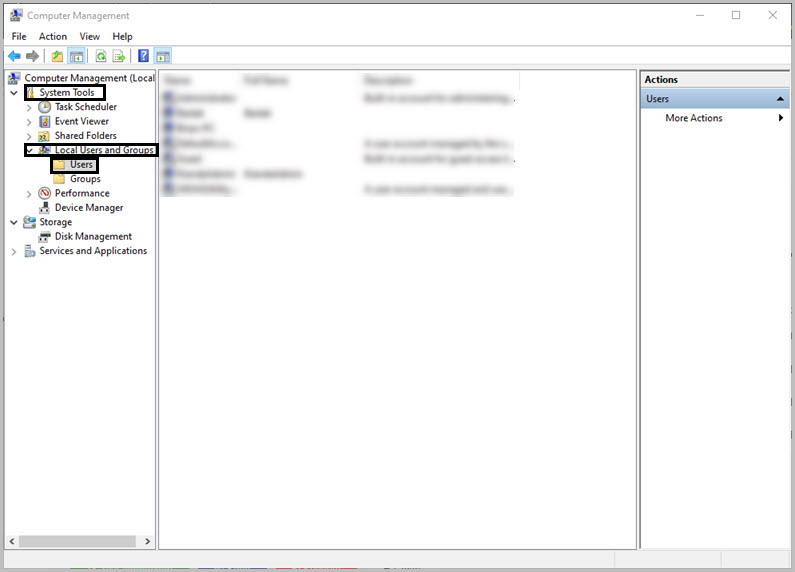
Go to start, search and open Computer Management.
-
Go to System Tools > Local Users and Groups > Users
-
In the Users screen, right click your mouse and select New User…
-
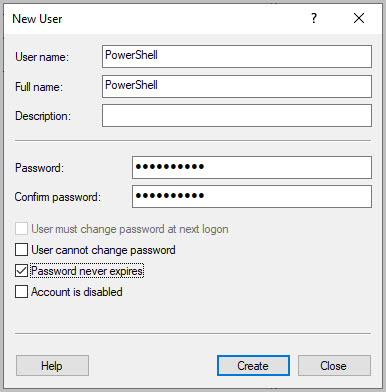
Fill out the New User dialog box. Uncheck User must change password at next login and check Password never expires.
-
Click Create and then Close. The new user should be added to the list.
Changing user rights assignment
In order for PowerShell and Kianda Cloud Connect to work successfully, we need to add our new user to the Rights Assignment list.
-
Go to Start on your computer, search and open Window Administrative Tools.
-
In the Window Administrative Tools, search and open Local Security Policy.
-
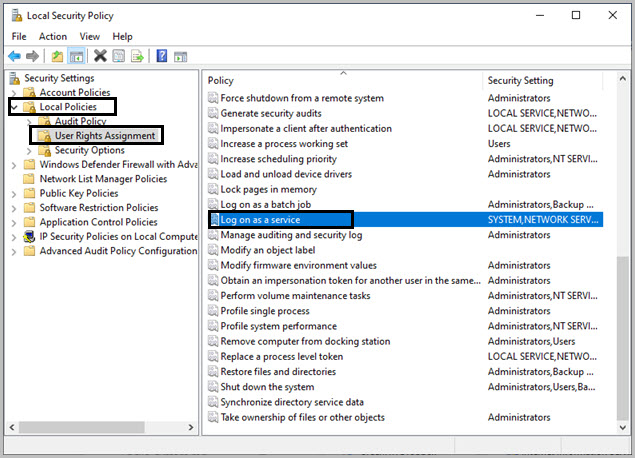
In the left-hand pane go to Local Policies > User Rights Assignment.
-
In the right-hand pane of User Rights Assignment, search and double left-click Log on as a service.
-
In the Log on as a service Properties dialog box, click on Add User or Group…
-
In the Select Users or Groups dialog box, under the Enter the object names to select text box, enter your new user and click on Check Names.
-
Click on OK.
-
In the Log on as a service Properties dialog box, click Apply and then OK.
Changing Execution Policy for the new user
With our new user created, we also need to allow PowerShell scripts to be executed by it and therefore we need to change Execution Policy for our newly created user. This will allow Kianda Cloud Connect to run scripts using the user that was created.
-
Log in to your computer as your new PowerShell user.
-
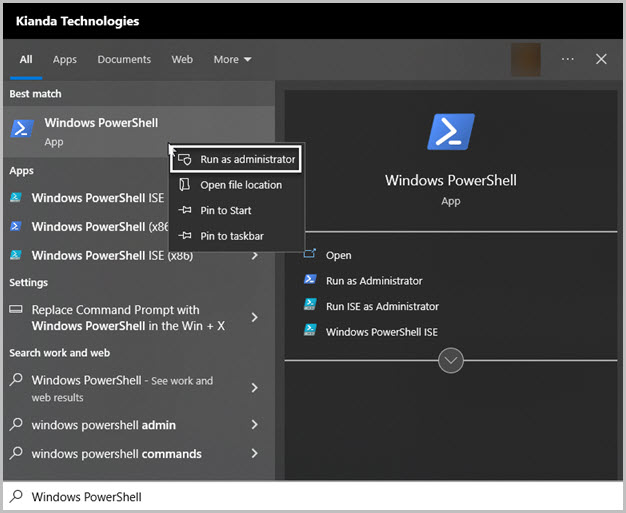
Go to Start and search for Windows PowerShell.
-
Right-click on Windows PowerShell and select run as administrator.
-
In the PowerShell window run the following command:
Set-ExecutionPolicy -ExecutionPolicy RemoteSigned -Scope CurrentUser -
Answer yes to change of policy question by entering
yinto the PowerShell console. -
You can now close the PowerShell console and log back into your original user.
Running Kianda Cloud Connect as PowerShell user
Now when we have our user created, the rights and policy have been changed, we need to set up our Kianda Cloud Connect service to run as our newly created user. Log into your original user and follow the steps below:
-
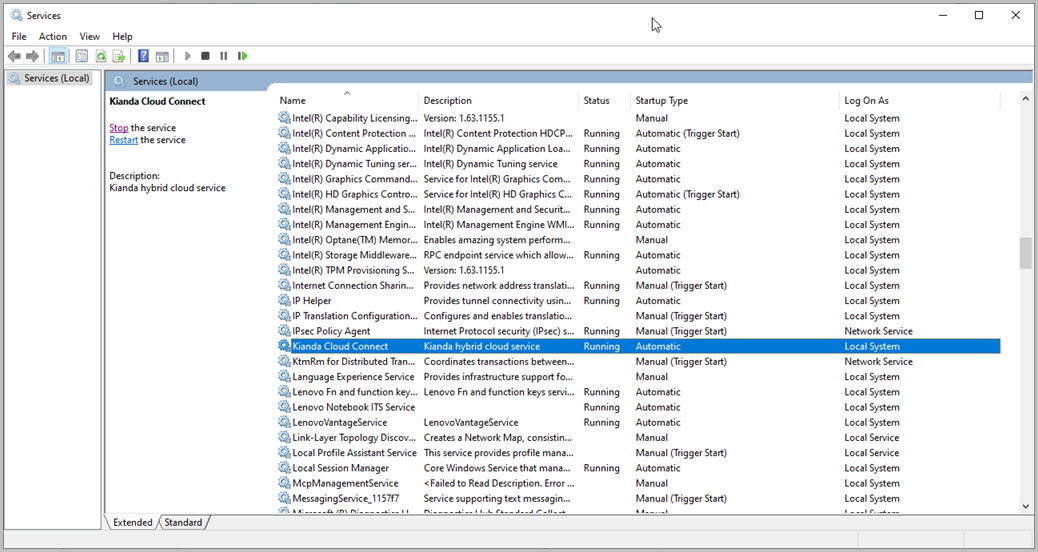
Go to Start, search and open Services.
-
Look for Kianda Cloud Connect.
-
Right click on the Kianda Cloud Connect service and open the properties.
-
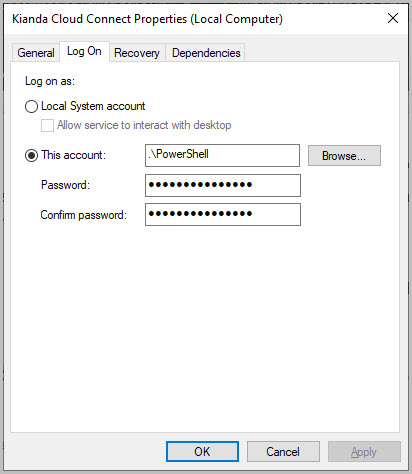
In the Kianda Cloud Connect Properties (Local Computer) dialog box, go to Log on tab.
-
Select This account radio button.
-
Click on Browse.
-
In the Select User dialog box, in the Enter the object names to select text box, enter the name of your user and click Check Names.
-
Click on OK.
-
In the Kianda Cloud Connect Properties (Local Computer) dialog box, enter the password for your user, click Apply and then OK.
-
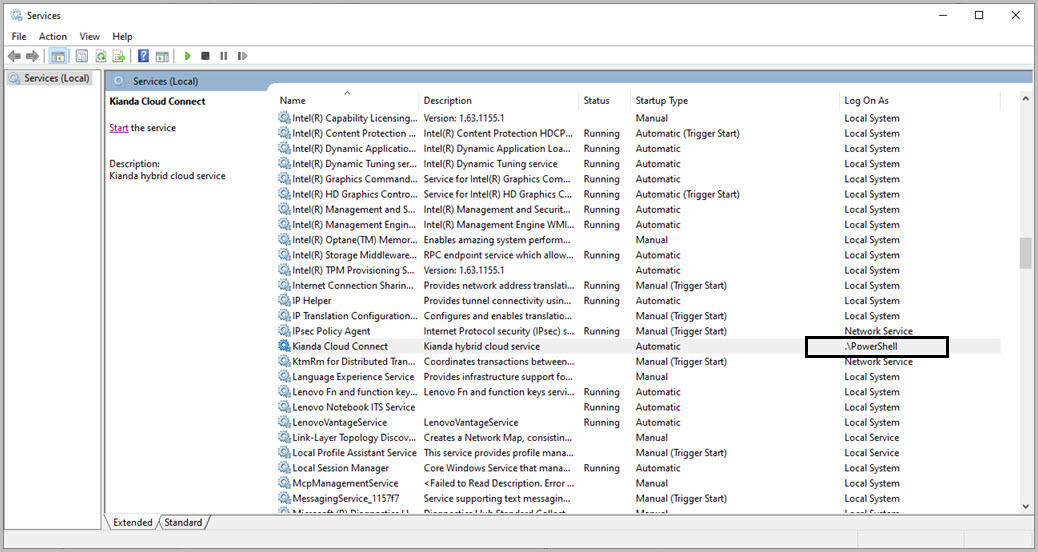
Your Kianda Cloud Connect should be logged on as your new user. You can see this in the Log on as tab in the Services window. In the Services window, stop and start Kianda Cloud Connect.
How to get started
-
From the Kianda home page, click on Administration > Data sources.
-
Click on + Add new button
 and choose PowerShell from the list of data sources provided.
 -
You will be automatically brought to the PowerShell details page, where you can start setting up the connection.
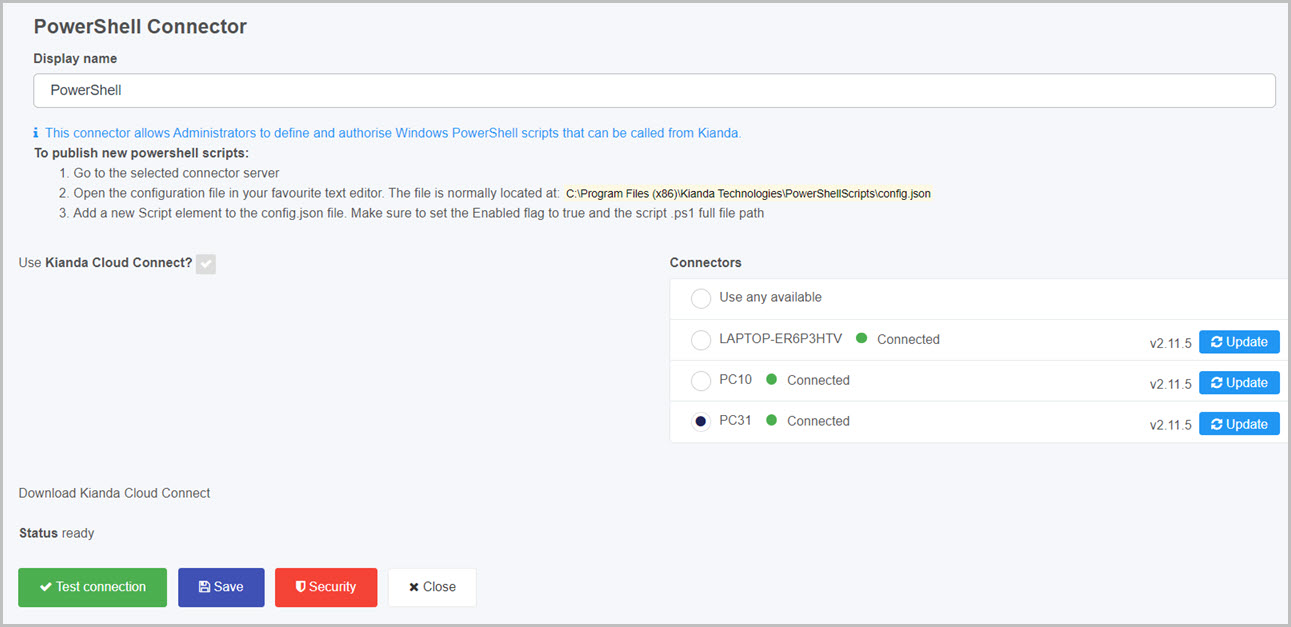
Choose from the edit options:
- Display name - type in the name for your PowerShell connector. The display name is used to identify your connector.
- Use Kianda Cloud Connect - by default this option is enabled, the cloud connect is used to create a connection between the PowerShell connector and Kianda itself. To learn more about Kianda Cloud Connect and how to create a connection between Kianda and your PC, go to Kianda Cloud Connect.
- Connectors - displays all available connector PC’s that have a connection established with your Kianda subscription. This option is used to select the PC connection that contains your PowerShell scripts and
config.jsonfile
- Connectors - displays all available connector PC’s that have a connection established with your Kianda subscription. This option is used to select the PC connection that contains your PowerShell scripts and
- Status - represents the current status of the connection.
- incomplete - means that the details of the connector were not fully completed.
- test failed - means that the details of the connector are incorrect and the connection has failed.
- ready - means that the connector has successfully connected and its ready to be used.
-
When you have added PowerShell details, you are ready to test your connection and add security. At the bottom of the PowerShell Connector page, click on Test connection button
 and if the service has been correctly configured, then you should receive a notification saying Connection test succeeded.
 -
Click on Save
 to save the connection and you will receive a notification saying Details saved successfully.
 -
Add Security settings by clicking on the Security button, go to Setting security for data sources for more details.
-
Click on Close to close the details page and return to the data source management main view.
Adding new PowerShell scripts to your connector
When installing Kianda Cloud Connect, a folder called PowerShellScripts should be located at:
C:/Program Files (x86)/Kianda Technologies
This folder will be used to store your a config.json. The config.json file is used to define new PowerShell scripts in the Scripts array. Import to note is to put the correct path to your script in the Path parameter of your script object and to set the Enabled parameter to true. In the image below, you can see an example of a config.json file that contains one Script Object in the Scripts array. To define more scripts in the array, simply add another Script Object to your array by separating them with a , (comma).
config.json file:
{
  "Notes": "This is the PowerShell manifest file. System administrators can define new PowerShell scripts under the 'Scripts' array",
  "Scripts": [
    {
      "Description": "Sample PowerShell module used to add days to now date",
      "Name": "AddDaysToNow",
      "Path": "C:\\Program Files (x86)\\Kianda Technologies\\PowerShellScripts/AddDaysToNow.ps1",
      "Enabled": true,
      "Parameters": [
        {
          "Description": "",
          "Name": "Days",
          "Type": "NUMBER",
          "Value": 2
        }
      ]
    }
  ]
}
The Parameters array is used to define dynamic parameters for example to pass in values from Kianda into your PowerShell script. Taking the above config.json file and the below AddDaysToNow.ps1 file as an example:
AddDaysToNow.ps1 file:
Param([int]$Days = 2)
$Now = Get-Date
$Date = $Now.AddDays($Days)
$Date.ToString("dd/MM/yyyy")
In our Script Object of our config.json file we have a parameter called Days. We also define a Days parameter in our AddDaysToNow.ps1 file. This allows us to then access the Days parameter from a Kianda process. We will use a Create Item rule and its input and results mapping to assign a value to the Days parameter and return an Outcome of the script.
Here we have a simple Kianda process that uses the PowerShell connector and uses the config.json file and AddDaysToNow.ps1 script from above to add a number of days to todays date.
In the form we have Date field to specify todays date, a Number field to specify how many days we want to add to todays date, and a Text box field to see the Outcome of the script, see the video below:
Feedback
Was this page helpful?
Glad to hear it! Please tell us how we can improve.
Sorry to hear that. Please tell us how we can improve.