REST Service and Access Token refresh
Introduction
When creating a REST Service datasource that uses OAuth for authentication, you may want to create a ‘refresh functionality’ within Kianda. This is achieved by creating a process and scheduling the process to run before the Access Token expires.
How to get started
Create a datasource
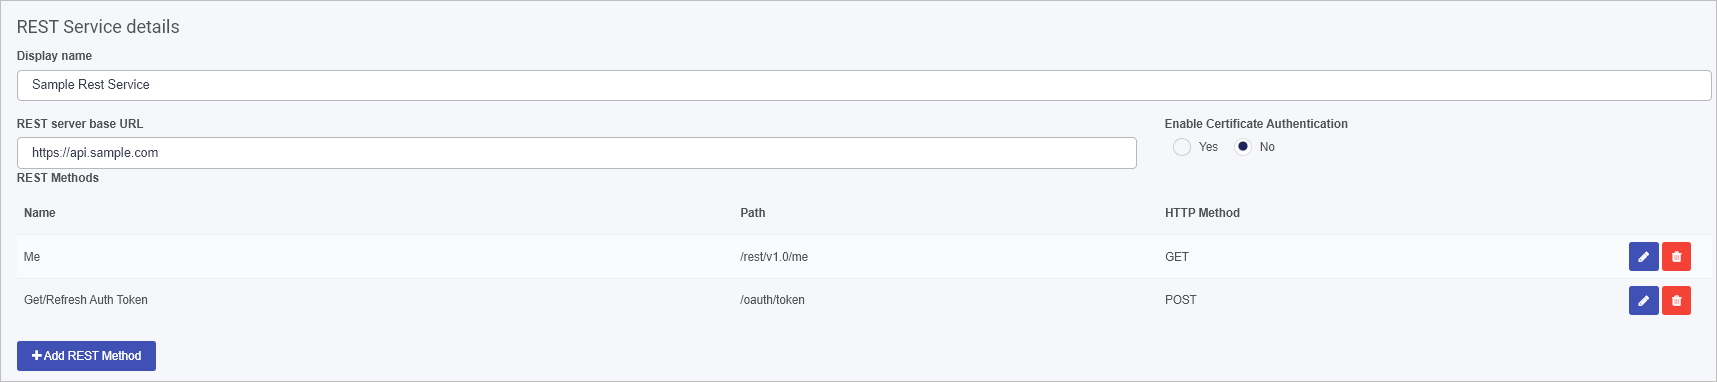
First you will need to create the datasource to connect to the application, for example, creating a REST Service with two REST Methods. The method titled Get/Refresh Auth Token will be used to refresh the Access Token with the scheduled task. For more information on how to create REST Services go to the REST Service page.
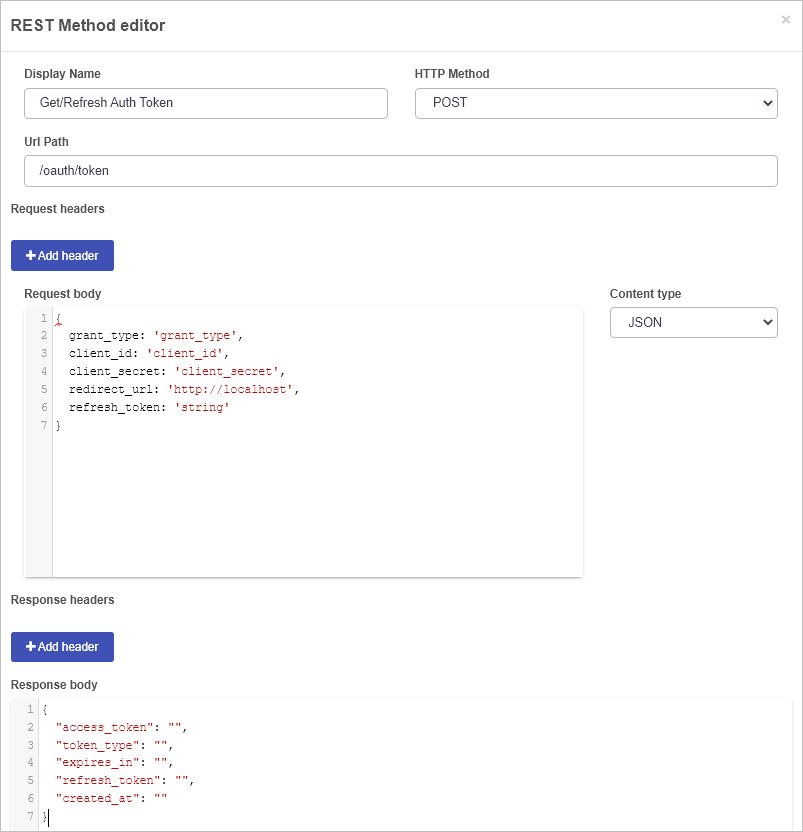
There are five parameters to pass into the request body: grant_type, client_id, client_secret, redirect_url and refresh token, shown below as follows:
These parameters need to be ‘held’ in a process, see Create a process below.
Create a process
Once a datasource is created, a process is created which will contain fields for the parameters for the request body, and will hold fields from the response parameters.
As shown in the image above there are five parameters in the request body which need to be populated, and each of these parameters must correspond to a field in a process.
In the response body there are five parameters : access_token, token_type, expires_in, refresh_token and created_at, although only access_token, expires_in and created_at is needed. You can obtain the Access Token via the Developer console so details can be entered into Designer directly.
A form is created using Kianda Designer with textbox fields as well as a button called Refresh as follows:

Form rules are applied to fields in the form in the next section.
Form rules
Rules are applied to both the AccessToken textbox field and the Refresh button as follows:
-
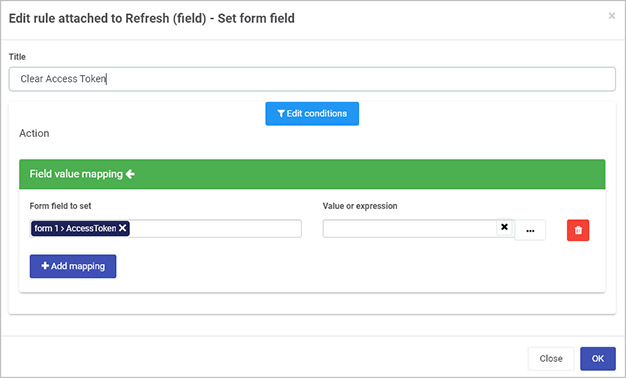
On the Refresh button add a Data rule > Set Form Field which will be used to clear the AccessToken field. Give the rule a title for example ‘Clear Access Token’ and map a ‘blank’ value to the Access Token field by ‘pressing space bar key’ as shown below:
-
On the Refresh button add a Data rule > Create item which will be used to invoke the REST Service to get a new token and map the response back to the process.
-
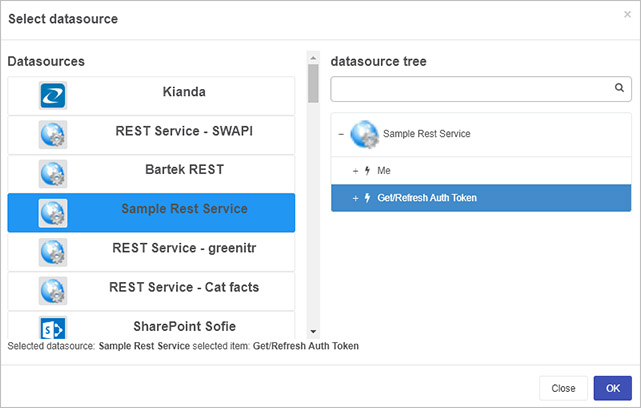
Within the rule, click on Select data source and select the datasource created within Create a datasource, in the example on this page, ‘Sample Rest Service’.
-
Then select the ‘Get/Refresh Auth Token REST Method’ as shown below.
-
Under Input mapping map the values from the process into the request body. The left-hand column, Form field or text, represents the fields within the process or hard coded values. The right-hand column, Data source field, represents the values within the REST Service, be it the request header, request body, response header or response body**.** For example choose the form field such as grant_type and then in the data source field drill down to the value you want from the REST method.
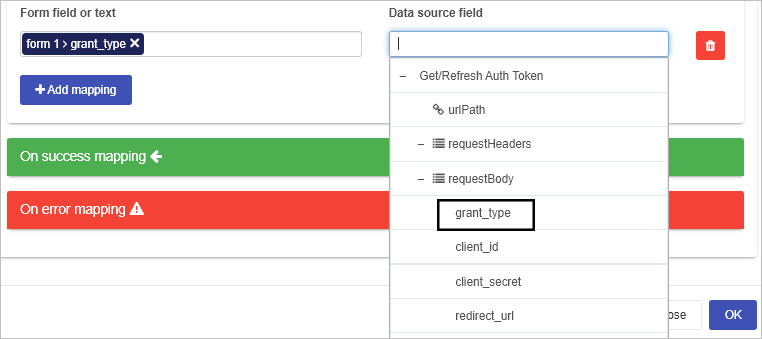
-
In addition to the parameters defined with the REST Service the urlPath can be defined in the process and passed into the datasource. Map the form fields
grant_type,client_id,client_secret,redirect_urlandrefresh token, into the form fields.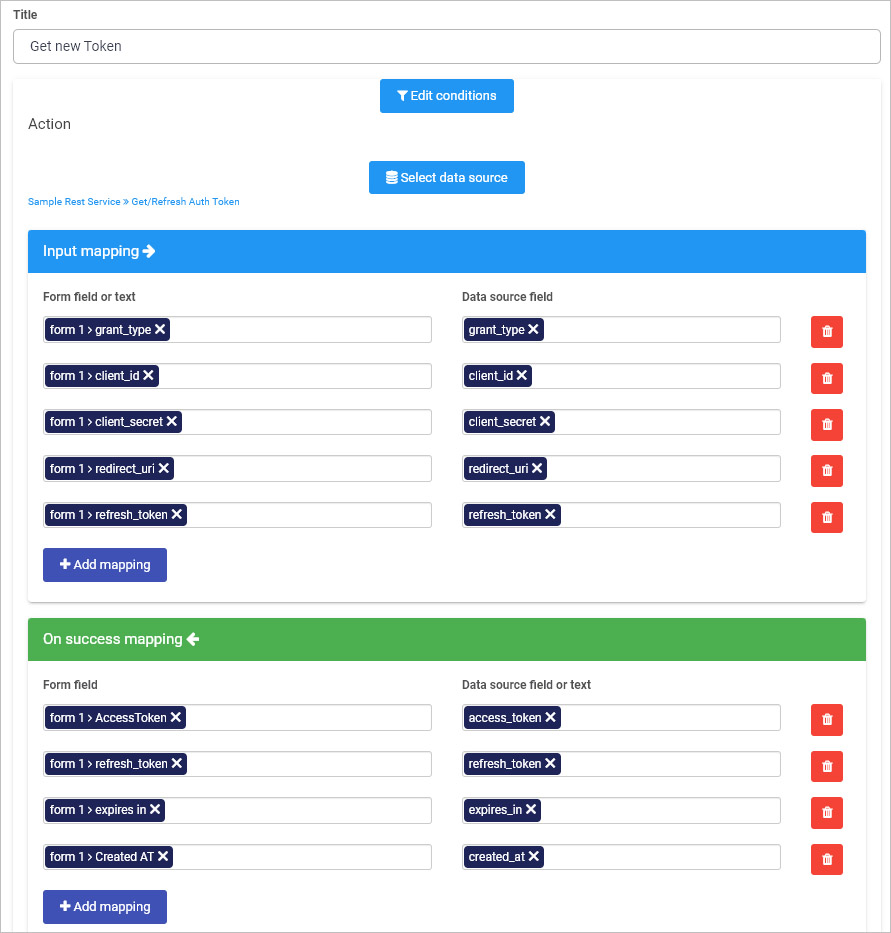
-
The On Success Mapping section is used to map the result from the API call back into the process. Map
access_token,refresh_token,expires_inandcreated_at, to the relative form fields.
-
-
In addition to the parameters defined with the REST Service the urlPath can be defined in the process and passed into the datasource.
-
On the Refresh button add a Form action rule > Save form so that the details from the process are saved to the system database. The rule order then is as follows:
Finally; run the Process in preview mode, ensure the details you want to pass into the REST Service are correct and save the process. Take note of the Process ID as this will be needed for setting up the Scheduled Task
Create the Scheduled Task
The final step will be to create the scheduled task that will run before the refresh token expires. Navigate to the Scheduled tasks within the Administration section in the site. Click on the Schedule a task button and fill in the dialog box.
-
Enter a name for the task in the Task Name field.
-
Under Schedule select the Minutes option. In the Every Minutes field enter a numerical value. For example, if the Access Token expires every 60 minutes, enter 55, meaning the schedule will run every 55 minutes.
-
Leave the Expire checkbox blank as this schedule should never stop.
-
Under Process Design select the name of the process that you created in the step above. This will expose a new field called Select the field or rule to trigger on schedule.
-
In Process ID enter the ID of the process that you created in preview mode.
-
In Select the field or rule to trigger on schedule select the Refresh button.
-
Click OK to save.
The Schedule is now set up and will refresh the access token as frequently as the time entered in the minutes field.
Next Steps
The Schedule is now set up and will refresh the access token as frequently as the time entered in the minutes field. This will run indefinitely until a user chooses to delete the schedule.
The datasource is now available to used and the Access Token is being kept current. The Access Token can be pulled into different Processes and used to send further REST APIs. Check out the articles below on how to build processes:
[Using Kianda Designer](/docs/platform/administration/users/#view-and-edit-existing-user-details)
Feedback
Was this page helpful?
Glad to hear it! Please tell us how we can improve.
Sorry to hear that. Please tell us how we can improve.