Salesforce
One of the data connectors that you can connect to is Salesforce. Salesforce provides customer relationship management software and applications focused on sales, customer service, marketing automation, and analytics. The Salesforce data connector allows you to access information from your Salesforce account which can then be used within your Kianda subscription.
Before you get started
In advance of using the Salesforce data connector, you must have an account with Salesforce which is used to obtain information for a successful connection. If you have an account with Salesforce, all you need to create within the Salesforce application is a Connected App. These connected apps within Salesforce enable external applications to integrate together using its APIs. The connected app will provide you with a Consumer Key and a Consumer Secret. These consumer information are used to establish the connection between your Connected app in Sales force and your Kianda subscription, to learn how to acquire the Consumer Key and Consumer Secret go to Acquiring Consumer Key and Consumer Secret. In order to successfully connect your Connected App and Kianda, the settings of the Connected App in your salesforce account need to be configured, to learn how to configure your Connected App in Salesforce go to Configuring Salesforce Connected App.
When to use
You can use a connected app to integrate external applications with the Salesforce API, such as a process that pulls in order status data from your Salesforce organisation into your Kianda subscription.
How to get started
-
From the Kianda home page, click on Administration > Data sources.
-
Click on + Add new button
 and choose Salesforce from the list of data sources provided.
 -
You will be automatically brought to the Salesforce details page, where you can start setting up the connection.
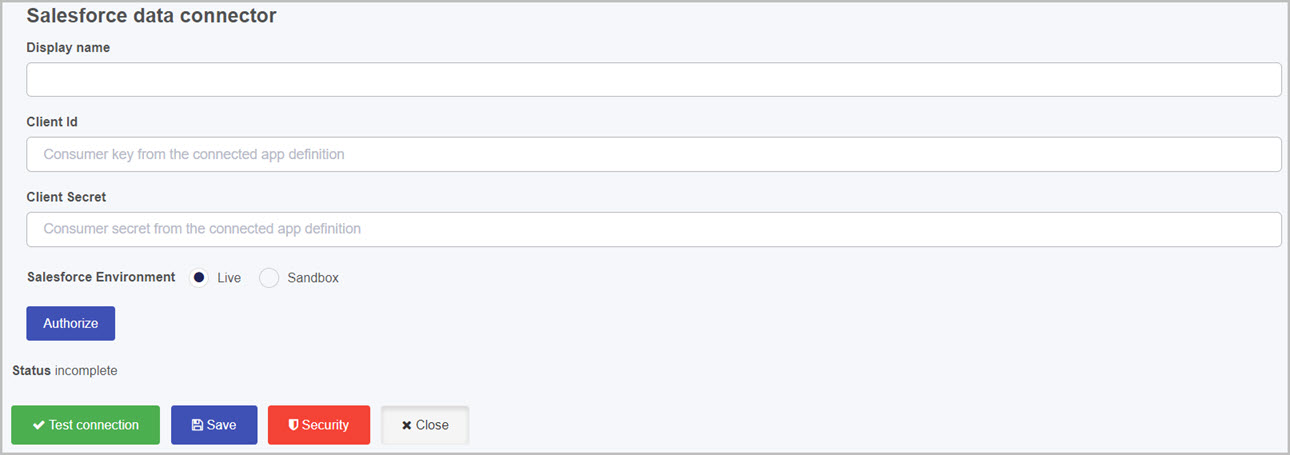
Choose from the edit options:
-
Display name - type in the name for your Salesforce connector. This is used to distinguish between different data connectors on your platform.
-
Client Id - used to identify the Connected App created in your salesforce account. In salesforce this Client ID is called Consumer Key and can be found in your Connected App settings. To learn more about on how to find the Consumer Key in sales force go to Finding Consumer Key and Consumer Secret.
-
Client Secret - used to identify the Connected App created in your salesforce account. In salesforce this Client ID is called Consumer Secret and can be found in your Connected App settings. To learn more about on how to find the Consumer Secret in Salesforce go to Finding Consumer Key and Consumer Secret.
-
Salesforce Environment - indicates which environment you have your account created in. There are two types of accounts that you can create in Salesforce. A developer account and an ordinary account. If you have an ordinary account and your trying to connect a salesforce app, you need to select the Live option and if your account is a developer account, then select the Sandbox option.
-
Live - indicates that your Salesforce account is an ordinary account.
-
Sandbox - indicates that your salesforce account is a developer account.
-
-
Authorize - allows you to authorize the connection with your Connected App and Kianda. When you click this button, a Salesforce window will open allowing you to log in into Salesforce to authenticate your account.
-
-
When you have added Salesforce details, you are ready to test your connection and add security. At the bottom of the Salesforce details page, click on Test connection button
 and if the service has been correctly configured, then you should receive a notification saying Connection test succeeded.
 -
Click on Save
 to save the connection and you will receive a notification saying Details saved successfully.
 -
Add Security settings by clicking on the Security button, go to Setting security for data sources for more details.
-
Click on Close to close the details page and return to the data source management main view.
Acquiring Consumer Key and Consumer Secret
- Log into your Salesforce account.
- On the top right-hand side of the screen, click on the cogwheel and select Setup.
- In the left-hand pane go to Apps > App Manager.
- From the list of apps, find your Connected App that you want to connect with Kianda and click on the drop-down list on the right-hand side. Select View.
- Under API (Enable OAuth Settings), click on Manage Consumer Details. A Verify Your Identity window opens.
- Enter in the Verification code that was sent to your email that you used to sign up to Salesforce.
- Click on Verify.
- Once verified, your will be brought to a page where you can find the Consumer Key and Consumer Secret.
Configuring Salesforce Connected App
Before starting going through the steps below you must ensure that you have a Connected App created in your Salesforce account, to learn how to do that go to Create a Connected App.
-
Log into your Salesforce account.
-
On the top right-hand side of the screen, click on the cogwheel and select Setup.
-
In the left-hand pane go to Apps > App Manager.
-
From the list of apps, find your Connected App that you want to connect with Kianda and click on the drop-down list located on the right-hand side. Select View.
-
From your Connected App screen, click on Edit.
-
Scroll down to API (Enable OAuth Settings). Check the Enable OAuth Settings checkbox.
-
In the Callback URL text box enter
https://app.kianda.com/index.html. -
On a second line of the Callback URL text box enter
https://{company}.kianda.com/index.htmlwherecompanyis the name of your company’s subscription, for examplehttps://green-itr.kianda.com/index.html. The Callback URL should look as follows when the company’s name isgreen-itr:
-
In the Selected OAuth Scopes section, move all of the scopes from Available OAuth Scopes to Selected OAuth Scopes window by selecting them and clicking Add. Here you can add scopes that you want your Connected App to have access to from within Kianda.
-
From your Connected App screen, click on Manage.
-
From the manage connected app screen, click on Edit Policies.
-
In the OAuth Policies section, go to Permitted Users and select All users may self-authorize.
-
In the IP Relaxation select the Relax IP restrictions option.
-
Click on Save.
What’s next 
Your Salesforce service is now set up and ready to be used in your processes. To find out more about how to design processes go to Designer.
Feedback
Was this page helpful?
Glad to hear it! Please tell us how we can improve.
Sorry to hear that. Please tell us how we can improve.