SOAP
One of the datasources available in Kianda is a connector to Simple Object Access Protocol (SOAP) messaging services. Kianda has the ability to execute a command within the service whatever the function may be.
When to use
You will want to create a SOAP Service datasource when you want Kianda to have access to your SOAP Service operations and execute them.
How to get started
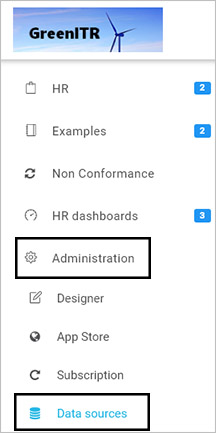
A SOAP Service data connector can be configured by users with the role Administrator or Manage datasources. These users can access the datasource management function, found under Administration > Data sources.
-
From the Kianda home page, click on Administration > Data sources.
-
In the main view you will see any existing data sources that have been created. From this view, you can click on the name of a data source to see details or delete a data source by clicking on the Bin/Trash button
 .
. -
Click on + Add new button
 and a range of data source connectors will appear.
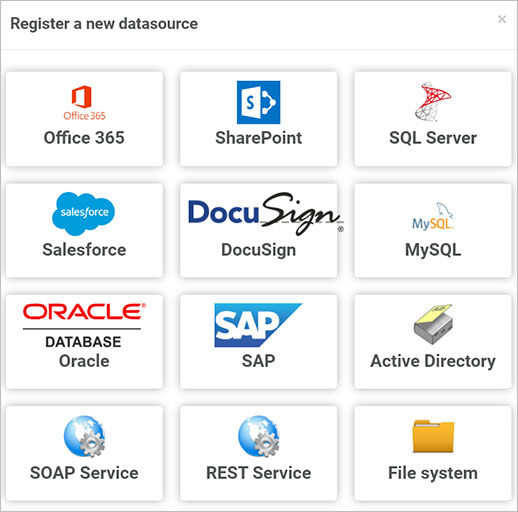
-
Click on SOAP Service.
-
Fill out the details in the SOAP Service details page:
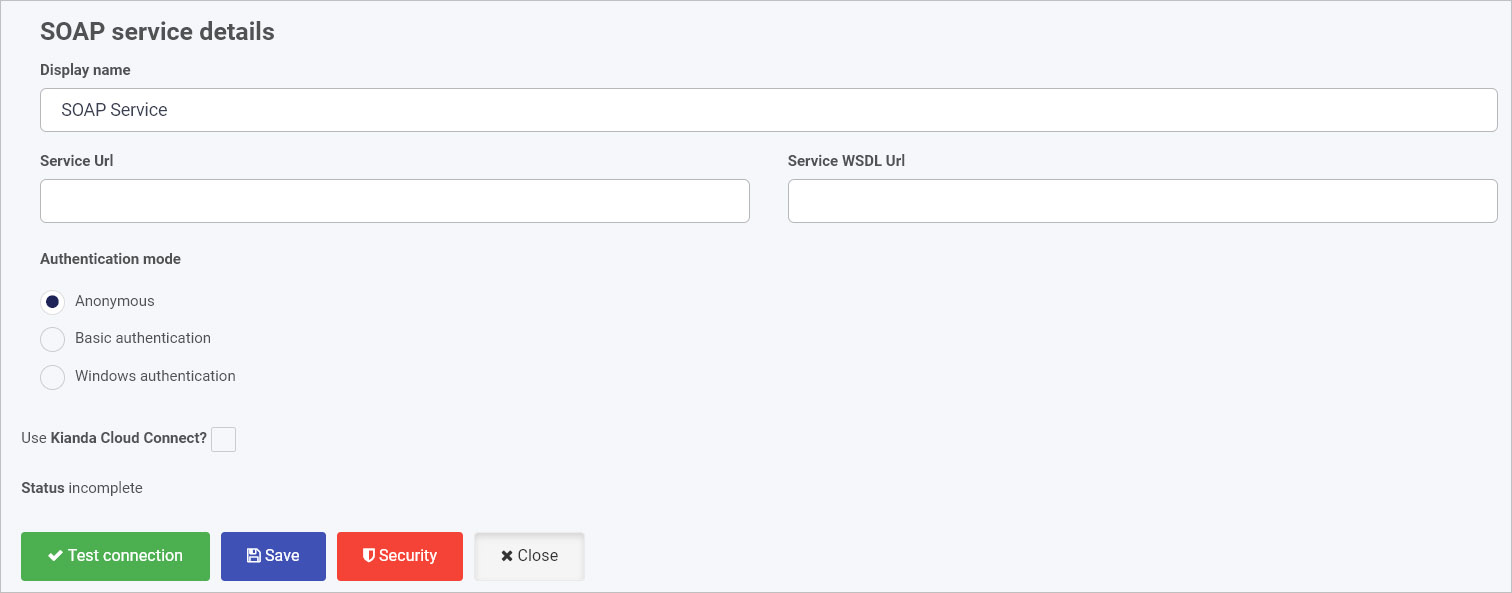
Note: The status of the datasource will be incomplete until it has been fully configured. When set up it will be ready.
-
Display name - this is the name of the data source. Use an appropriate name, as this will be used within your process(es).
-
Service URL - this will be the URL of the service.
-
Service WSDL URL - this will be the URL of the service including the Web Services Description Language (WSDL). WSDL describes the structure, contents and limitations of the elements of XML passed between the web service and client.
-
Authentication Mode - there are three options available:
-
Anonymous - the message initiator is anonymous and the responder is authenticated, no credentials needed.
-
Basic - provides basic authentication and requires credentials to be entered.
-
Windows - provides authentication using Windows login and requires credentials to be entered.

-
-
-
When you have added SOAP service details, you are ready to test your connection and add security. At the bottom of the SOAP service details page, click on Test connection button
 and if the service has been correctly configured, then you should receive a notification saying Connection test succeeded.
 -
Click on Save
 to save the connection and you will receive a notification saying Details saved successfully.
 -
Add Security settings by clicking on the Security button, go to Setting security for data sources for more details.
-
Click on Close to close the details page and return to the datasource management main view.
What’s next 
Your SOAP Service is now set up and ready to be used in your processes. To find out more about how to design processes go to Designer.
Feedback
Was this page helpful?
Glad to hear it! Please tell us how we can improve.
Sorry to hear that. Please tell us how we can improve.