File upload control
File upload controls (fields) can be inserted in a form if you want form users to be able to upload or store a file(s). File upload fields can also be useful if you want a file to be generated from the information entered in a form or if you want a file to be sent as part of your process - see Rules for more information.
For example, in an Inspection process, you may want the user (an inspector) to be able to upload the details of their inspection as a PDF file or photos as they complete an Inspection Form; or you may want the Kianda system to generate a report based on the information in the Inspection Form and to email this as a PDF file to a supervisor.
How to get started
-
To add a File upload field to a form, first open the relevant process.
-
Select the form within that process that you want to add the field to (so that the Edit Form button
 is visible).
 -
Click on Controls in the left-hand pane to expand the Controls menu.
-
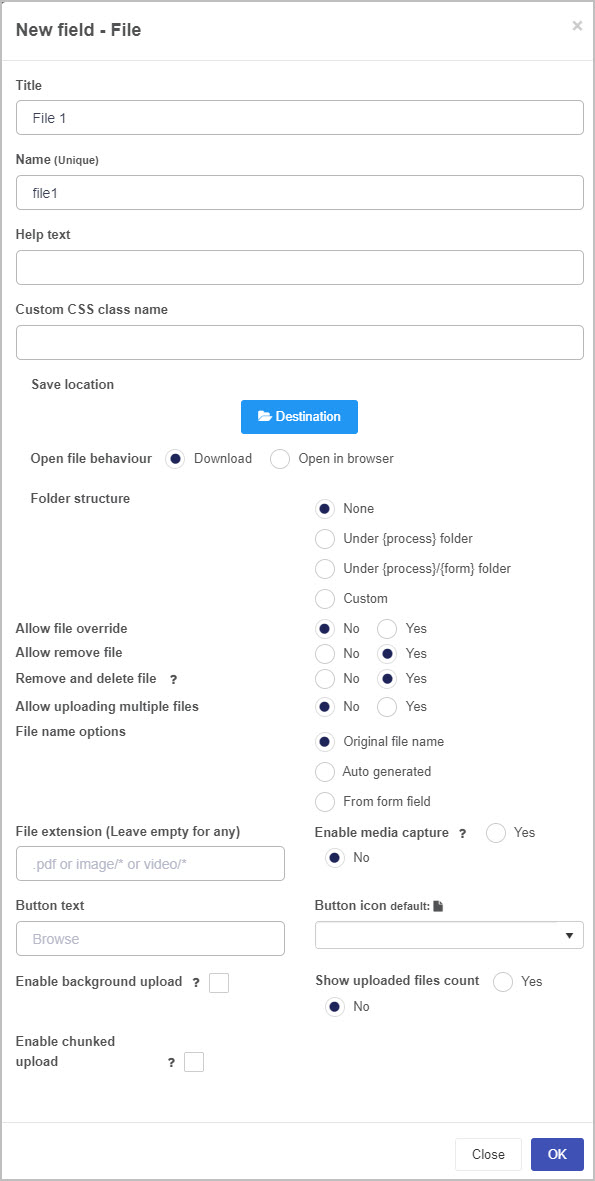
Select Input to view the range of Input controls and click on File. A New field - File dialog box will open with a range of options you can choose from for your new File upload field.
-
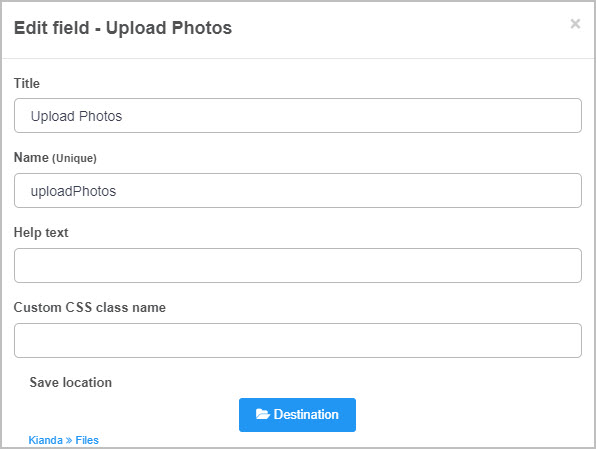
Title: You can change the name of the File upload field from the default ‘File 1’.
-
Name - This is a unique name for the field and inherits a camel case version of the entered Title.
-
Help text: You can insert text to help the form user to complete the File upload field - if you add help text, a question mark
 icon will appear next to the field title and, if the user clicks on this, they will see the help text you have inserted.
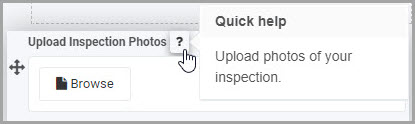
-
Custom CSS class name - You can type the name of a CSS class to allow the File upload to inherit specific styles defined in the Global CSS file.
-
Save location: This is the location the file will be saved to. When you click on the Destination button, a Select datasource dialog box opens in which you can choose where to save the file(s):
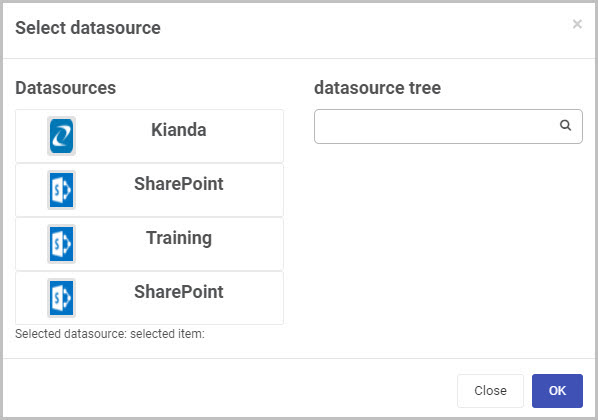
You can choose to save the file or files to Kianda or to another external data source.
-
Open file behaviour: You can choose whether the file is downloaded or opens in an internet browser.
-
Folder structure: If you have chosen an external data source as the ‘Save location’ for the file(s) uploaded to the file upload field, you can then choose the folder structure you want to use for saving the files to that external data source.
-
Allow file override: You can choose whether or not to allow file override. If you choose ‘Yes’, if a user goes back into the form and uploads another file to the File upload field, this will override the original file they had uploaded. This option works in conjunction with the Allow uploading multiple files option - if you choose to allow multiple files to be uploaded, then the ‘Allow file override’ option is no longer relevant (as uploading more files will not override file/files already uploaded).
-
Allow remove file: If you select Yes, this allows the form user to come back into the form and remove the file they had previously uploaded, and another option appears - Remove and delete file: if you choose Yes, when the file is removed, it will also be deleted from the location where it was stored specified in the Save location; if you choose No, then only the reference to the file is removed from the form and the file remains in the Save location.
-
Allow uploading multiple files: Choose No to only allow the user to upload one file or choose Yes to allow the user to upload multiple files.
-
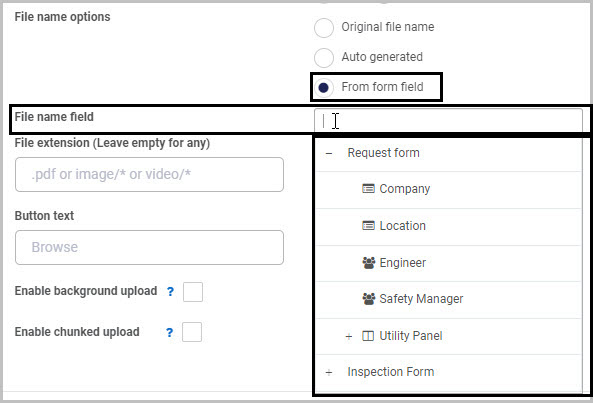
File name options: Choose whether to keep the original file name, to have the file name auto generated by the system, or to be based on a form field. If you choose From form field, another option appears - File name field - allows you to select a field representing the name of the file:
-
File extension: You can set/limit the type of file(s) that can be uploaded by inserting a specific file type. For example, if you insert .pdf in the File extension box, when the user browses for the file to attach, the file type will automatically be set to .pdf. If you want to allow any type of file to be attached, leave this option blank.
-
Enable media capture: If you choose Yes, this enables the user to capture media to upload - on a mobile device, when the user clicks on the Upload button their camera/video recorder will open (depending on whether you’ve selected the file extension to be image or video).
-
Button text: By default, the File upload icon has the text Browse, but you can change this here.
-
Button icon: By default, the file upload icon is
 but you can change this by clicking the Button icon drop-down menu and choosing a different icon from the large range of icons available.
 -
Enable background upload: Select this checkbox to enable files to be uploaded using a background operation. This option is typically used in conjunction with the Enable chunked upload option.
-
Enable chunked upload: Select this checkbox to upload files using resumable chunks. This option can be useful if the file size is likely to be large or the network speed is likely to be slow.
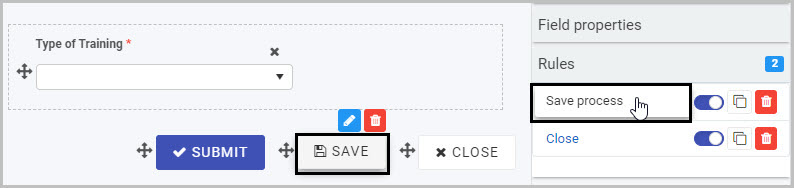
Note: If you select Enable background upload and Enable chunked upload there is an additional step you need to take to ensure that these upload options work. In your form, you need to select each field or button that has a Save process rule applied to it, click on that rule to open the Edit rule dialog box and select the Perform background save checkbox. Then click OK. This will ensure that the upload options you’ve chosen for your File upload field work as intended.
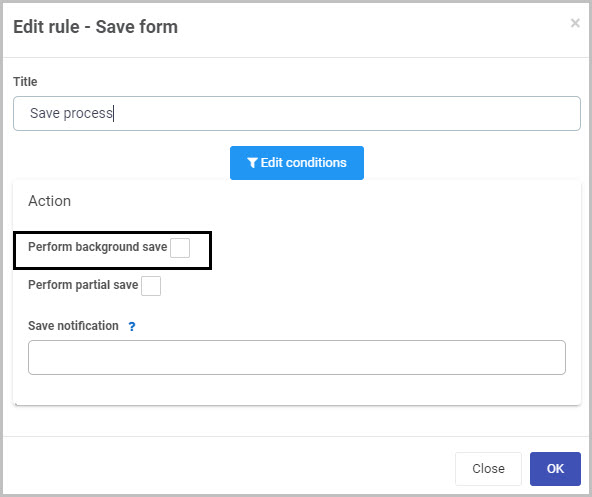
For example, you would need to select the ‘Save process’ rule attached to the ‘Save’ button in your form (by clicking on the Save button and then clicking on the Save process rule):
This opens the Edit rule - Save form dialog box - check the Perform background save option and then click OK:
If the Enable background upload and Enable chunked upload options are chosen and a user completes a form while they are in an area with poor coverage, once the user re-establishes internet connection they will need to go back into Kianda and click the Force refresh button
 at the top right of the Home page.
- Show uploaded files count: Select Yes to show the number of uploaded files.
-
Once you complete the New field - File dialog box and click OK, a new File upload field is added to your form, with the name you inserted as the Title in the dialog box (by default the title is File 1 unless you change it).
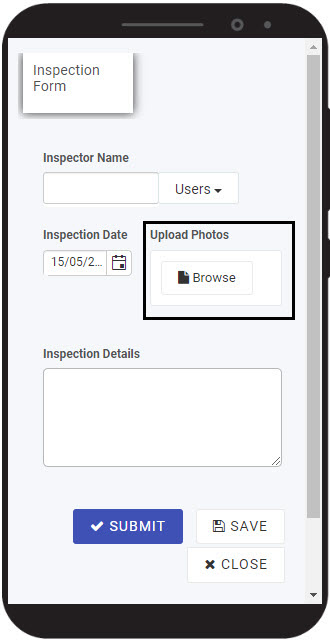
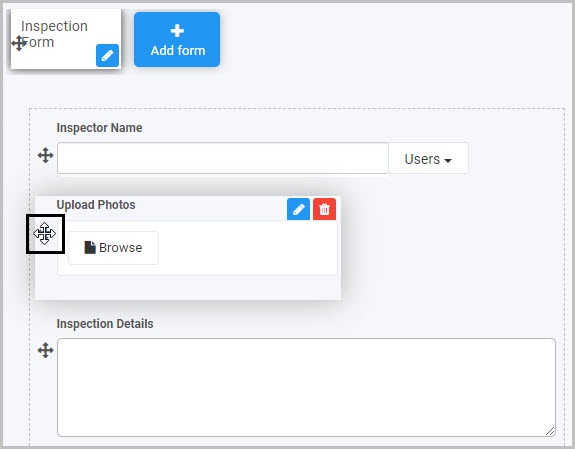
In the example of our Inspection Form, the new File upload field (titled Upload photos) added to the form could look like this when a user views it on a mobile phone (to see how your form or field will look on a mobile, view it in Mobile preview by using the Preview option which can be opened by clicking the play button icon  ):
):
How to edit, move and delete File upload fields
To edit a File upload field:
- Select the File upload field (by either clicking on the field title or on the field’s drag handle button
 ).
). - Click on the Edit field button (Pen icon) .
- The Edit field - File dialog box will open, enabling you to choose from the same range of options as appear in the New field - File dialog box (as already discussed in How to get started).
You can make any changes you wish in this dialog box and then click OK to confirm.
To move a File upload field, simply:
- Select the field’s drag handle button .
- Drag and drop the field wherever you want to move it to within your form.
To delete a File upload field from your form:
- Select the field (by either clicking on the field’s name or its drag handle button ).
- Click on the Bin/Trash button
 .
. - Click on OK to confirm.
How to edit File upload field properties
To view or edit the field properties associated with a File upload field, select the field (by clicking on the field title or field drag handle button ) - the Field properties menu will appear in the right-hand pane.
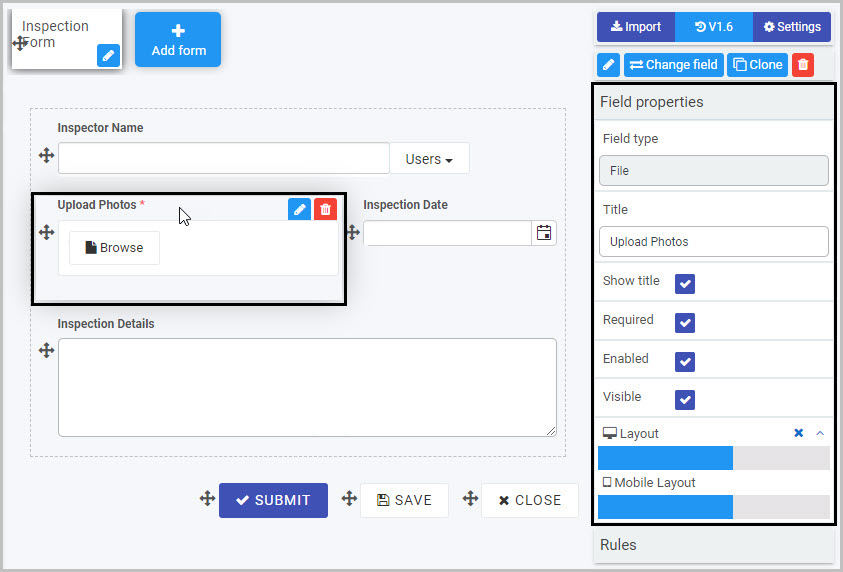
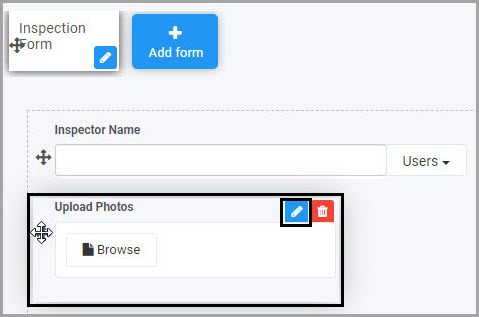
For example, the Field Properties associated with a File upload field titled ‘Upload photos’ are shown here and include:
- Field type - The type of field, in this case a File field.
- Title - The Title of the field, in this case ‘Upload photos’.
- Show title - If this is selected, the File upload field title will be shown in the form.
- Required - If this is selected, the File upload field will be mandatory for the form user.
- Enabled - If this is selected, the user will be able to edit or interact with the field.
- Visible - If this is selected, the File upload field will be visible in the form.
- Layout - The width of the blue bar can be adjusted to change the width of the File upload field as it appears on a PC or mobile phone (to view the Mobile layout, click on the expand button
 to the right).
To learn more about the different options within the Field properties menu, go to Field Properties.
Saving changes and version history
Make sure to save any changes you make by clicking on the Save button  . You will always have the option to revert back to previous versions of your form by clicking the Design Version History
  button in the top right corner.
What’s next 
Now that you’ve learned about the File upload control, find out more about the other types of Input fields you can add to a Kianda process:
- Date control
- List control
- Number control
- Table control
- Text box control
- Toggle control
- User picker control
Feedback
Was this page helpful?
Glad to hear it! Please tell us how we can improve.
Sorry to hear that. Please tell us how we can improve.