Control properties
Each process, form and control (field) will have the properties associated with it displayed in the right-hand pane of the Designer view.
Process properties
When you go to Administration > Designer and then click on a process, you will see the Process properties for that process in the right-hand pane.
The Process properties include:
- Title - the title of the process, for example Quarterly Training Request
- Page layout - you can click on Wide
 or Narrow
  to change the process layout.
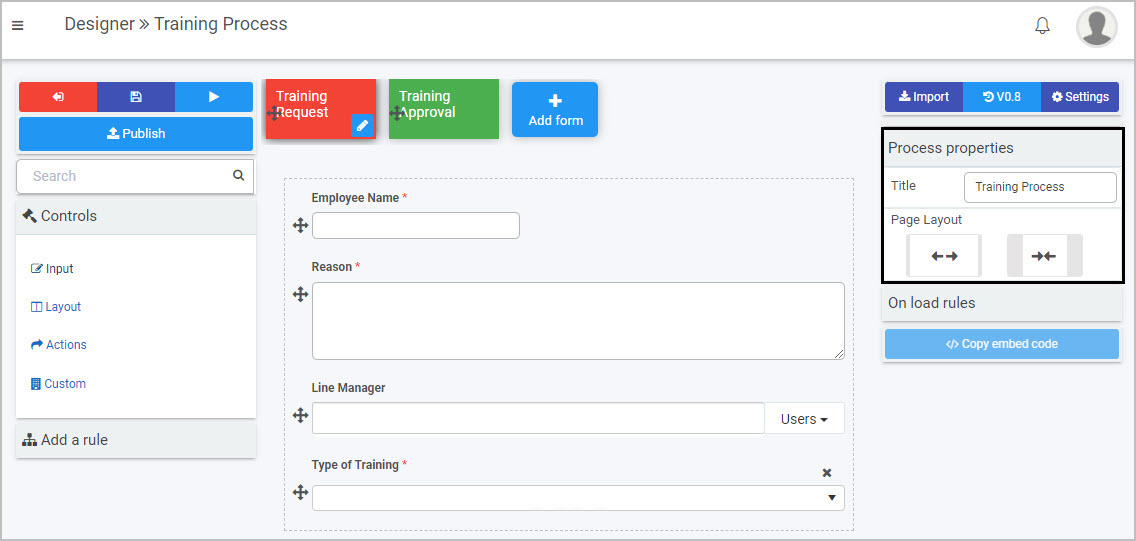
In the example shown here, the ‘Training Process’ has two forms: ‘Training Request’ and ‘Training Approval’. When you open the process, the Process properties are shown. If you click on one of the forms within the process, the Form properties associated with that particular form will then be shown in the right-hand pane.
Form properties
When you click on a form, the Form properties appear in the right-hand pane.
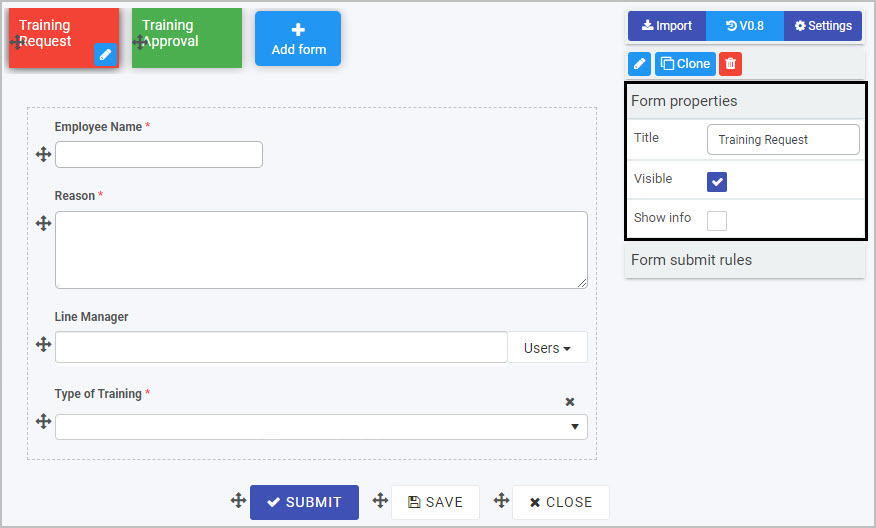
The Form properties include:
-
Title - the form title, for example Training Request
-
Visible - click on this checkbox if you want the form to be visible to users
-
Show info - click on this checkbox if you want details (such as the form owner, the design version and when the form was started and completed) to be displayed at the bottom of the form.
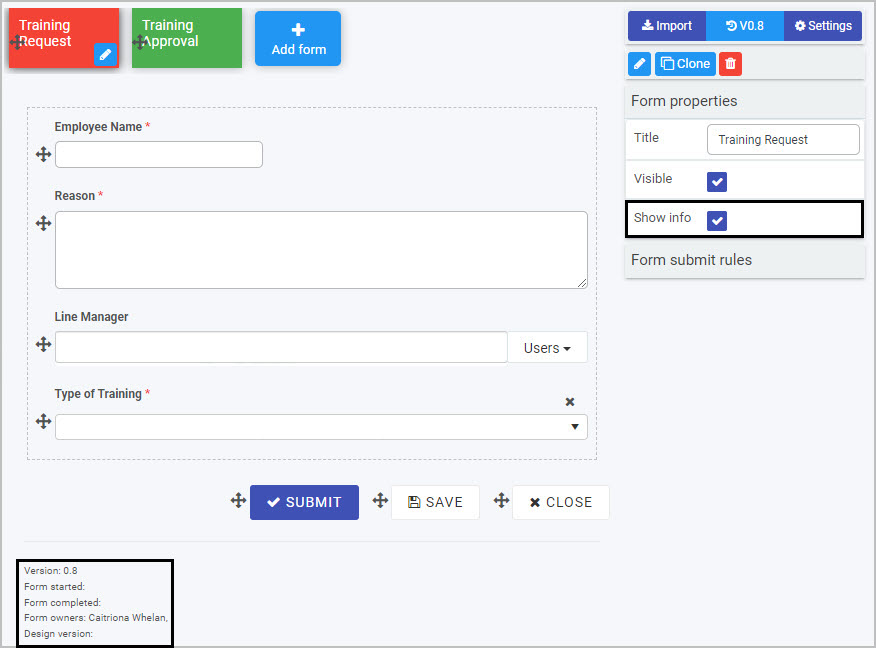
Underneath the Form properties you will see Form submit rules - go to Rules to find out more about the rules that can be applied to forms.
Click on one particular field (control) in the form - for example a text box - to see the Field properties associated with that field.
Field properties
When you select any field within a form (by clicking on the field name or field drag handle button  ) - such as User picker, list or text box - the Field properties associated with that field will appear in the right-hand pane.
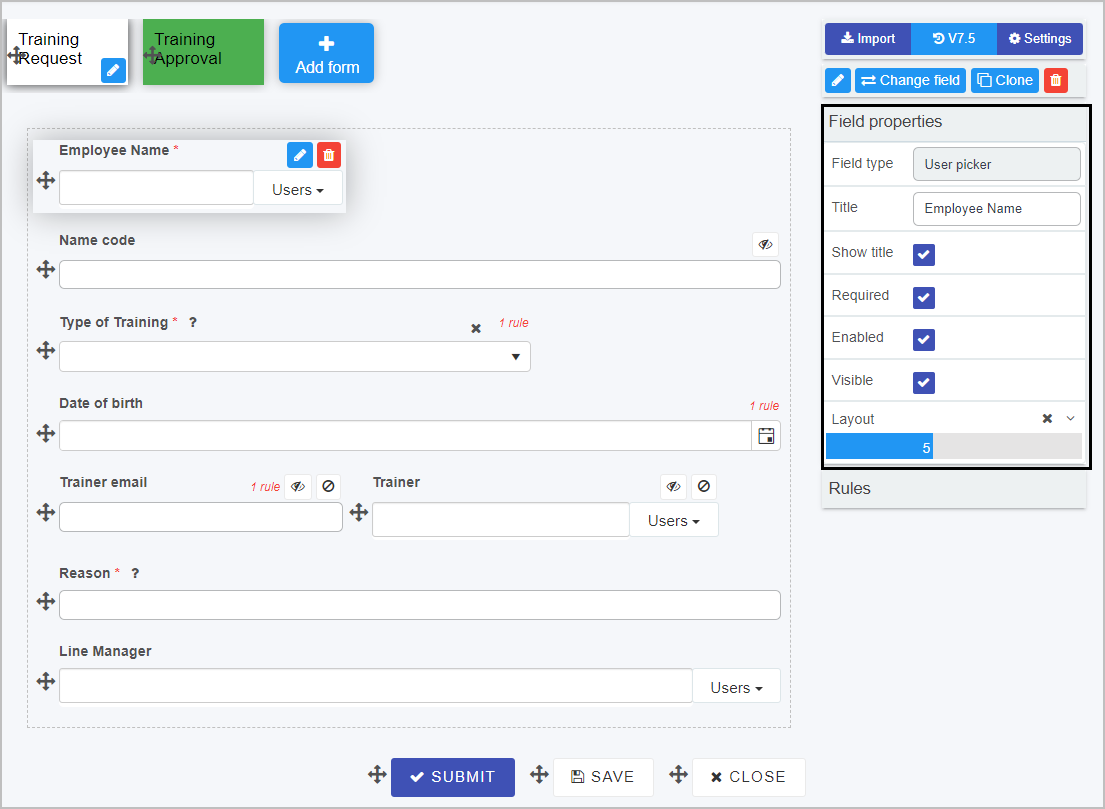
In the example shown here, the Employee Name field has been selected and the Field properties associated with it include the Field type (Text box in this case) and the Title of the field.
The options within the Field properties menu are:
-
Show Title - show the title of the field
-
Required - tick this checkbox to make this field mandatory for users to fill out (this will be denoted by an asterix beside the field name)
-
Enabled - tick this checkbox to make the field enabled for users to fill out
-
Visible - tick this checkbox to make the field visible to users
-
Layout - change the width of the field by clicking on the bar in the Layout box until you see the desired size. Click on the arrow beside Layout to see the Mobile Layout and click on the bar to change the width of the field when viewed on a mobile phone. The layout is split into 12 different bootstrap grid columns (a responsive CSS framework) - for example, a layout set to 6 columns would make the element span half of the screen/canvas.

Underneath the Field properties menu, you will see Rules - go to Rules to find out more about the rules that can be applied to fields.
Saving changes and version history
Make sure to save any changes you make by clicking on the Save button  . You will always have the option to revert back to previous versions of your form by clicking the Design Version History
  button in the top right corner.
What’s next 
Now that you’ve learned about the Properties associated with processes, forms and fields, find out more about the different categories and types of fields (controls):
Feedback
Was this page helpful?
Glad to hear it! Please tell us how we can improve.
Sorry to hear that. Please tell us how we can improve.