Meeting request
The Meeting request rule sends an email according to a predefined template. It works exactly like the Send email rule with three additional fields to which are used to set up the date and time of the meeting. The three additional fields are as follow:
-
Start time - indicating the starting date and time of the meeting.
-
End time - indicating the ending date and time of the meeting.
-
Location - indicating the location of the meeting.

If you are using an email connector, a meeting request will appear in the calendar of the receiver(s). Otherwise the meeting request will appear as a calendar file (.ics file type) attached to an email. to learn more about email connector go to Email connector.
When to use
You can add this rule:
- to a field
- to a form
- to a process (the rule will run on load)
Before you get started
In advance of using this rule, you need to have created one or more forms, complete with control fields. For example a Text box control with an employee’s ‘Name’ may be part of a form ‘Meeting request’. Then this ‘Name’ field can be used as an expression in the email to send personalised emails, so these aspects must be set up in advance. The Meeting request rule must also contain three specific fields which are the Date control for both the Start and End time fields, as well as textbox control or a List control a field for the Location.
- Decide how the rule will be implemented, for example will an email be sent once a form is saved or submitted. In the example of form submit, then click on that form in the process > Submit button > Add a rule > Send email.
- Decide who the automated email will be sent from, for example a no-reply type email. If you leave the From field empty, the email will be sent from noreply@kianda.com. If you want your email to come from a different sender, then go to Email connector for more details on how to set that up.
- Any email addresses to send To, From, CC or BCC must be set up in advance. This could be a textbox in a form called ‘Email address’ with a unique Name like ’emailAddress’, or it could be a user picker field associated with particular users, groups or partners.
- If you want to track the emails, then you must set up a field in your form to store email tracking.
- If you want to attach any files to an email, files must first be stored in a File field in one of the forms.
Note; the start and end time fields are both required on the request meeting rule therefore you should make the start and end fields required on your form too. To learn more about required fields go to Control properties.
How to get started
-
Click on an existing process by going to Administration > Designer and decide which form, or field you will apply the rule to, by clicking on that item so that it is in edit mode so you can see the Edit/pen button
 . For example selecting the Submit as shown below.
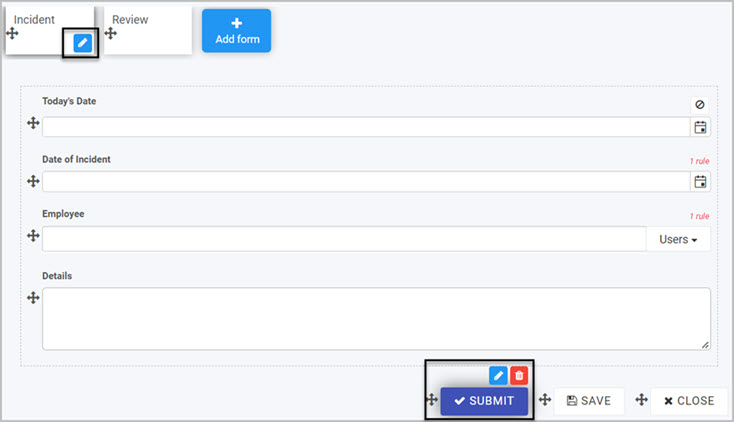
-
In the left-hand side pane, click on Add a rule > Communications > Meeting request rule.
-
In the Edit rule - Meeting request dialog box, fill out the following details:
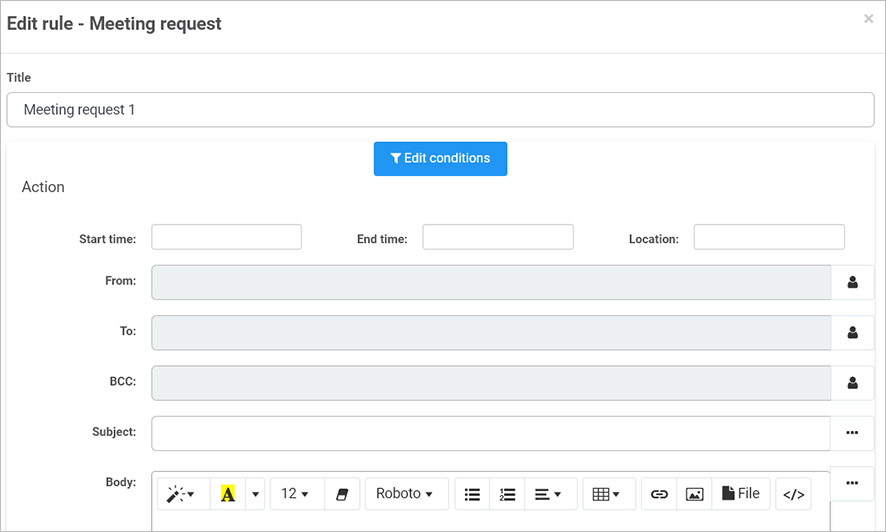
- Title - of the email for example ‘Send meeting request’
- Edit conditions - click on Edit conditions
 to set conditions for sending an email, for example while a process has a ‘status’ of ‘open’, send reminder emails. To learn more about conditions go to Conditions.
 - Start time - select a pre-defined date field from your form. This is a required field.
- End time - select a pre-defined date field from your form. This is a required field.
- From - who the email is from, click on Person button
 and choose from the appropriate Selection mode, see Selection mode below.
Warning
If you add an email address to the From field, you must specify an Email connector, see Email connector. If a connector is not specified, the emails will come from noreply@kianda.com. If a Global SMTP connector is configured, all emails will be sent from the global connector.
- To - who the email is to, click on Person button and choose from the appropriate Selection mode, see Selection mode below. This is a **required **field.
- BCC - who will be blind copied on the email, as with To field.
- Subject - type in your email subject and click on the Ellipsis button
 to add an expression, go to Expression builder for more information. This is a **required **field.
 - Body - choose from an array of styles and formats to create your email including Style, Colour, Font size, Remove font style, Font family, Unordered list, Ordered list, Paragraph, Table, Link, Picture, Attach a File and Code view. For example if you click on Code view button
 you can copy HTML code directly into the body text. This is a required field.

To find out more about how to attach a file, see Attachments for more details.
To add a message to your email, click on the Body text box. You can personalise automated emails using fields from the process by clicking on the Ellipsis button
to add an expression, see Expression builder for more details.-
Send via connector - options are a) No or b) Yes
-
If you choose Yes then you must choose an Email connector and decide if you want to Save Sent Items (Yes or No) which means sent emails are saved in a sent items folder in your email account. For more information go to Email connector

-
Note that if Global SMTP Mail connector has been configured, all emails sent will use the Global connector settings instead, including no-reply@kianda.como find out more, go to Setting up a Global SMTP mail connector.
-
-
Enable tracking - options are a) No or b) Yes
-
Note that this option is only available if Send via connector is set to No and the email is being sent from noreply@kianda.com.
-
If you choose Yes then you must click into the field under Field to store tracking event (Open, Click, Bounce, Spam) and choose a field from a form to store the event.
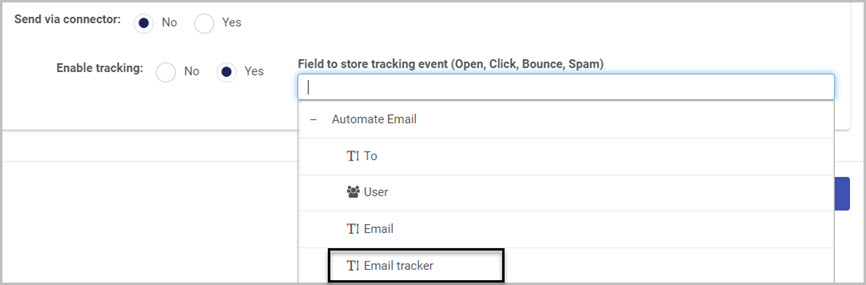
- This option allows you to track the email after it is sent. All of these events, Open, Click, Bounce and Spam will be tracked.
-
-
Click on OK button when you are finished editing to save your changes or click on Close to exit the dialog box without saving.
-
Note when your rule is complete you may want to change the order of rules for the particular field or form that it has been applied to. Drag the new Meeting request rule to where you want, so the order of execution of rules is correct.
For example for a Submit button on a form I may want my Meeting request rule to be executed first before any other rule is executed. To do this click on the Submit button to make sure you are in Edit mode so that the Edit/pen button
appears, and under Rules in the right-hand pane, drag the Meeting request rule to the top of the list by clicking on the rule and dragging it. For more information on rules, see Rules.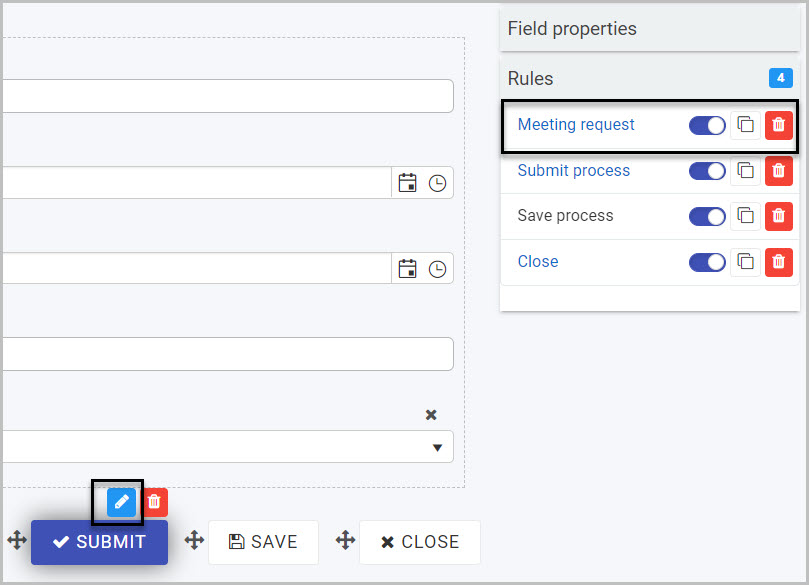
Email connector
The Email connector is a mailing tool that allows you to send emails with a specified email account, for example support@ or info@. An email connector must be set up in advance, to learn how to do that go to Email connector.
If you leave the From field empty, the email will be sent from noreply@kianda.com. If you want your email to come from a different sender, follow these steps when you are editing the Meeting request rule:
- Set Send via connector to Yes.
- Click into the field under Email connector and select a connector.
- Click on OK button when you are finished editing to save your changes or click on Close to exit the dialog box without saving.
Note that if Global SMTP Mail connector has been configured, all emails sent will use the Global connector settings instead of what is specified in the send email rule. Go to Administration > Subscription > Subscription Details to check for a global setting or to find out more, go to Setting up a Global SMTP mail connector.
Selection mode
When you are filling out the To, From, or BCC fields and click on the Person button
you have the following selection mode options to choose from:-
Any user or partner
-
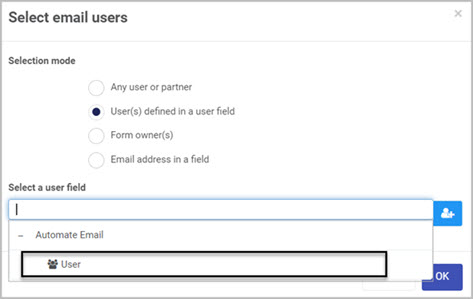
User(s) defined in a user field
-
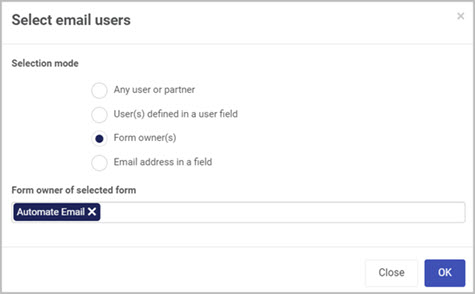
Form owner(s)
-
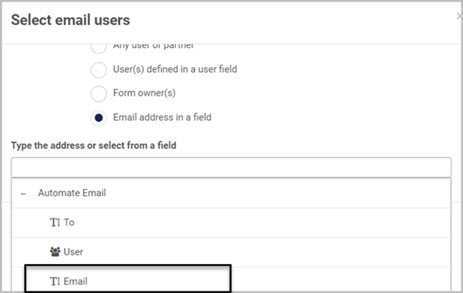
Email address in a field.
Note; You can reset user/ field you selected by clicking Clear
 on the dropdown field in the Select email users dialog box.
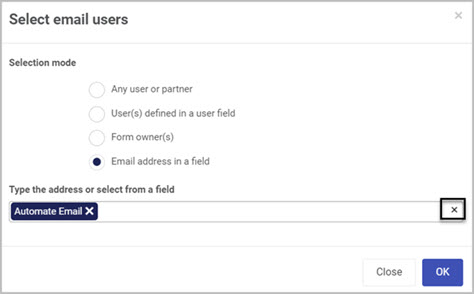
-
Any user or partner - choose from Users, Groups and/or Partners in the drop-down list. All users must be predefined in the system, see Users and Groups for more details.
-
User(s) defined in a user field - choose a user picker field from the process, where the selected users, groups or partners will be assigned to the To, From or BCC respectively.
-
Click on the desired User field in your process to add to the Select a user field box.
-
Click on
 to add more selection fields.
-
Remove a field clicking on the Bin/Trash button

-
-
Form owner(s) - selecting this option allows you to click into the field under Form owner of selected form and choose from the forms within that process. This automatically uses the form owner(s) email address. To learn more about forms and form owners go to Form basics.
- Email address in a field - With this option selected, by clicking into the field under Type the address or select from a field, you can either type in an email address manually or choose from a field within the process you are working in.
In all cases when you have made your selection, click on OK button to save your changes or click on Close to exit the dialog box without saving.
Expression builder
The expression builder is a useful and efficient way to use existing form fields as part of automated emails that you want to send out.
For example if you have a form Annual Leave request that contains a text box field ‘Employee Name’ you can use this field in an automated email to let a manager know that an employee has submitted a request.
-
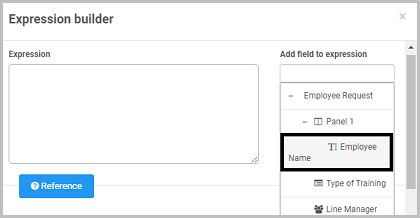
Before you begin have your message inserted into the Body of the email and position your cursor where you want to add an expression, for example an Employee Name after ‘Your employee’ as shown below.

-
Click on the Ellipsis button
on the right-hand side of the email Body. An Expression builder dialog box opens. -
Click into the field under Add field to expression. Forms and fields that are part of your process appear where you can expand elements to drill down to find the field that you want, for example ‘Employee Name’. Click on the field to add field to the expression.
-
Click on the Add to expression button
 to add the field as an expression. Note that the expression is the Name(unique) of that field.
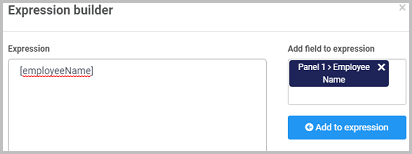
-
Click on OK button when you are finished editing to save your changes or click on Close to exit the dialog box without saving.
-
The result is the expression is now part of the automated email.

-
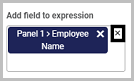
To add more expressions, firstly position your cursor in your body text where you want to add the expression, then click on the Ellipsis button and under Add field to expression clear any existing fields by clicking on the Clear button. This appears when you hover over the Add field box.
Then search for other fields, for example lists or links, and use the Expression reference functions, see step 7.
-
Click on Reference
 to find out how to use particular functions in your email. For example ProcessLink() returns the html link to the current process. Copy this function into the Expression box and click on OK to add the function. Then in the Body type in the text you want associated with this link for example “click here” into the brackets of the function:
In this way you can build personalised automated emails that provide a link back to a process instance, for example that a manager can view, update or approve. For more information on References and Expressions see Expressions for more information.
Attachments
To attach a file into the Send email rule, you must first contain a file field in your process. To learn more about file control go to File upload control.
-
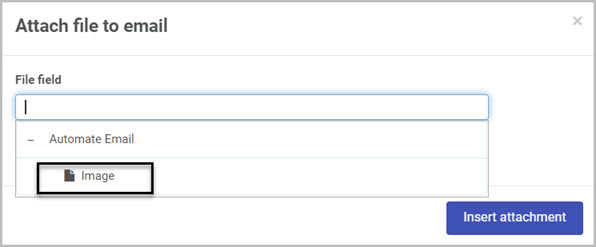
To attach a file to an email, click on the Attach a file button
 . The Attach file to email dialog box opens.
 -
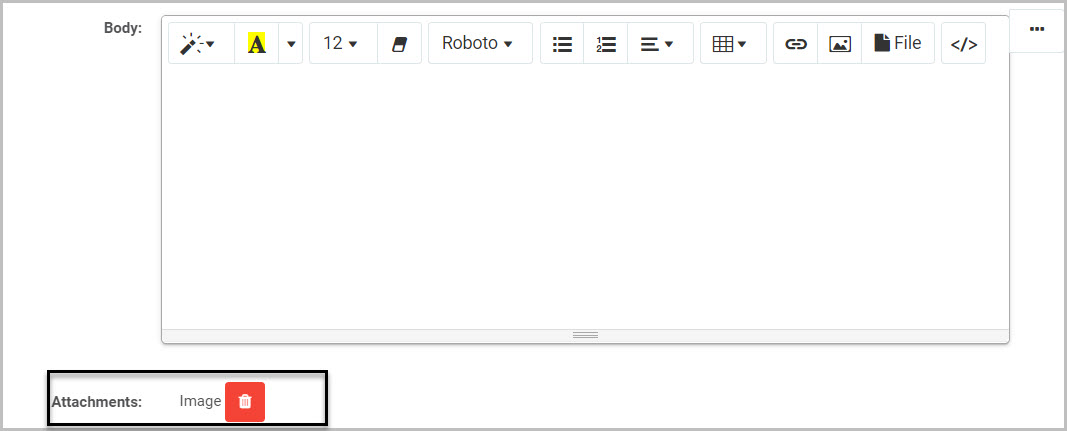
Select a File field from your process to attach the file, for example an Image filed as shown in the image below.
-
Click in the File field, find and select the desired field.
-
Click on Insert attachment. There is an option to attach a link to the file rather than the file itself.
In the Attachments section of the Send email dialog box, the name of the File field will appear indicating that attachments will come from the specified field. You can delete the specified File field by clicking the red bin/trash icon.
What’s next 
To find out more about other communication rules go to Communication rules.
To find out more about other rules go to Rules.
Feedback
Was this page helpful?
Glad to hear it! Please tell us how we can improve.
Sorry to hear that. Please tell us how we can improve.