Set existing file
Introduction
The Set existing file rule allows a user to create a file and assign it into a file field based on a provided file URL path. For example if you have access to a file stored in the cloud and have the URL, you can use this URL to download the file from the internet and place it in a file field with a name. The name you give to the downloaded file must contain the extension, for example if the file stored in the cloud is a PDF file and you want the name of the file to be “Workbook”, then you need to set the name of the file to Workbook.pdf. You must provide the correct extension for the file otherwise the created file will not be downloadable.
When to use
Use this rule when your process requires you to bring an existing file that you have a link to but not the file itself. For example if you have a link that leads to a file that is stored in a SharePoint datasource, you can bring this file into your process by using this rule and storing it in a file field.
You can add this rule:
- to a field
- to a form
- to a process (the rule will run on load)
Before you get started
In advance of using the Set existing file rule, in your process you need to have created at least one or more forms. The rule also requires one file field in order to store the file which is created from the given URL.
- File field (required) - used to store the created file from the given URL. To learn more on File fields go to File upload control.
How to get started
-
Click on an existing process by going to Administration > Designer and decide which form, or field you will apply the rule to, by clicking on that item so that it is in edit mode so you can see the Edit/pen button, Pen button
 .
. -
Click on Add a rule > File management > Set existing file.
-
In the Edit rule - Set existing file dialog box, give the rule a title in the Title field.

-
f you want to add conditions for the rule, click on the Edit conditions button
 see Conditions for more details.
 -
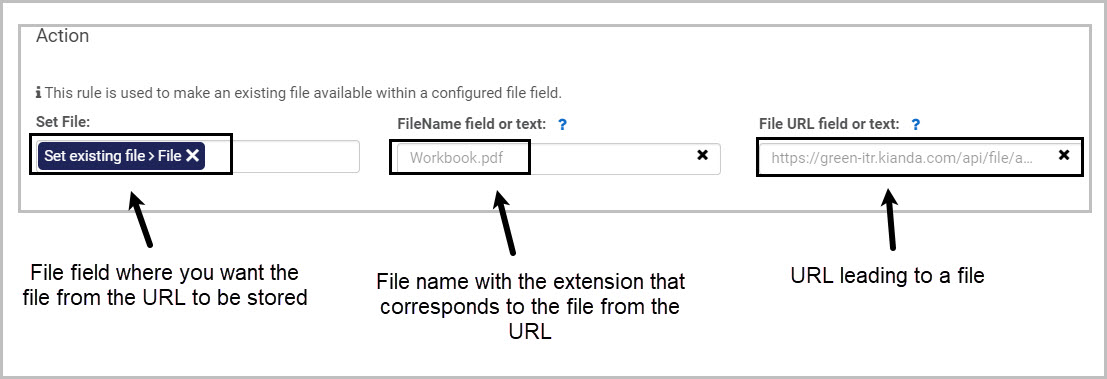
Under the Action section fill out the following:
- Set File - file field used as a container to store the created file using the given URL.
- FileName field or text - you can select a field within your form or type in text manually to represent the name you want your created file to have.
- File URL field or text - you can select a field within your form or type in text manually to represent the URL used to create the file.
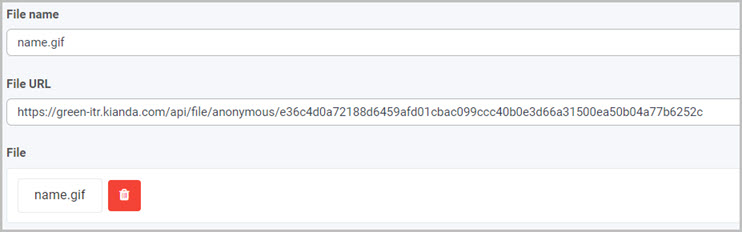
Using a field for the name and a field for the URL will allow you to create a different files with a different names every time you use this rule, see the image below and note how the File name field corresponds to the created file in the File field:
-
When you are finished editing the dialog box, click on OK or click on Close at any time to exit the dialog box.
Editing, deleting or duplicating rules
When you have clicked on an existing rule, and the rule is visible in the right-hand pane under Rules, there are a number of options available to you.
- To disable a rule click the slider across beside the rule name.
- To copy a rule, click on the Duplicate button
 beside the rule name.
 - To delete a rule, click on the Bin/Trash button
 .
. - To view a rule, click on the rule name to open the Edit rule dialog box.
User tip 
- Create a Text box field that can be used to change the URL every time you want to create a file. This will make the rule dynamic and versatile. To laern more about text box field and how to create one, got to Text box control.
- Create another Text box field that can be used to change the name of the file every time you want to create it from a URL.
What’s next 
To find out more about other File management rules go to File management rules.
To find out more about other rules go to Rules.
Feedback
Was this page helpful?
Glad to hear it! Please tell us how we can improve.
Sorry to hear that. Please tell us how we can improve.