General rule concepts
Rules are an important component of any process as they can be used to trigger automated actions, requiring minimal user management once created. There are 60 predefined rules in Kianda covering workflow applications, communications and file management to name a few.
Categories of rules
-
Workflow - Enables you to execute actions that might change the flow of the information within a process.
-
Communications - Enables sending emails or meeting requests or even user (push) notifications.
-
Data - This is an important and flexible rule group because it allows you to configure CRUD (Create, Read, Update and Delete) actions to configured data sources.
-
Users - This enables you to retrieve a user property, updating user properties or lookup for a user based on a user attribute.
-
File management - Allows operations such as the generation of a word document and conversion to PDF and more.
-
Tables - Provides specialised rules to enable working with tables like sorting, copying table rows to another table and more.
-
Dates - Enables convenient date calculation with advanced options like ignoring weekends or special dates.
-
Form actions - Allows operations like submit, save, close and delete forms.
-
SharePoint - Provides a variety of operations to be performed on the SharePoint connection. These rules include operations like create a list, find a user, define permission to an item, check-in / out an item or adding a user to a SharePoint group.
Working with rules
The following headings step through how to view, add, copy, edit and disable rules in processes. It is also important to keep in mind how rules should be listed when multiple rules are used on the same field.
When to add a rule
-
to a field
-
to a form
-
to a process (the rule will run on load)
How to view a rule
If rules have already been created
-
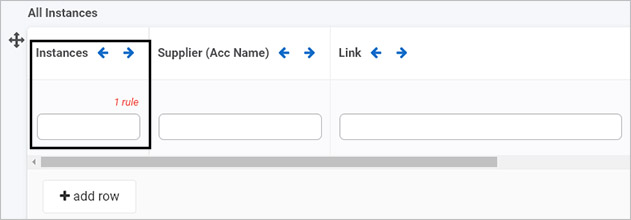
Select the field or form that contains a rule, for example a button at the end of a form. If a field within a form has rules attached to it, this will be indicated within the form, as shown in the example below where the column Instances has 1 rule attached.
-
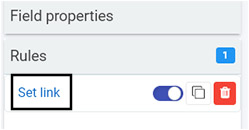
Under Rules in the right-hand pane, click on the given rule name to view the rule details, for example a ‘Set form’ rule called ‘Set link’ as shown below.
-
Details of the rule are available in the Edit rule dialog box, for example the Set form field rule is shown below.

You can view rule conditions by clicking on Edit conditions and actions to be performed as part of the rule are under Action. Other features to note in the dialog box are:
- Expression button
 used to add expressions to rules so that dynamic values can be returned based on calculations or form IDs, see Expressions for more details.
 - Mapping - mapping is used within rule actions, for example in the Set form field rule shown in the image above, the rule updates a form field based on a given value or expression. In many other fields mapping can be used to determine success or error during rule execution, see Success and error mapping for more details.
How to add a rule
To add a rule to a specific component:
-
Select the field you want.
-
Under Add a rule, select a category of rules, and then select the rule you want.
-
Edit the rule dialog box and click ‘OK’. The rule will be displayed on the right-hand side of the page.
How to copy a rule
Duplicating rules can be very useful where you have similar rules that are associated with different fields. To duplicate a rule:
-
Select the field with the desired rule.
-
Under Rules in the right-hand pane, click on the Duplicate rule
 button next to the rule name.
 -
Choose Copy to another field if you wish to copy to another field and select the field you want to copy to. Select OK when complete.
-
Alternatively select OK without copying to another field or click on Close at any time to exit the dialog box.
How to edit a rule
Follow the steps to View an existing rule to open the Edit rule dialog box.
In the Edit rule dialog box, you can change:
- The Title of the rule
- Create or edit conditions for the rule by clicking on the Edit conditions button.
- Change how the rule performs by changing details under Action. Actions will differ depending on the rule in use.
How to disable a rule
Disabling a rule means that the rule is not active but is still visible in the Rules pane. The rule can be activated at any time again by clicking on the toggle button.
-
Select the field that contains a rule, for example a button at the end of a form, or a field within a form that has rules attached.
-
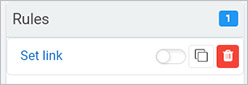
Under Rules in the right-hand pane, beside the given rule name slide the toggle button from ‘on’ to ‘off’ to view the rule details, for example a ‘Set form’ rule called ‘Set link’ as shown below.
-
To enable the rule at any time again follow the steps above and slide the toggle button into the ‘on’ position.

Where to place a rule in a list of rules
The rule order refers to the order of execution of multiple rules. To change the rule order:
-
Select the field with the rules attached.
-
Under Rules in the right-hand pane, drag and drop the rules in the order you want them.
-
The top-most rule is the first rule to be executed. By default buttons at the end of a form will automatically have Submit, Save, and Close rules. If you create rules you may wish to have these rules placed above these shutdown rules so that your rules are executed first before form shutdown.
Note: Rule order becomes important when the output of one rule impacts the execution of another, for example if a process remains ‘open’ because a user must perform a particular action, then it is useful to have an automated email reminder sent to the user while the process is open. For example the order of rules on a Submit button could be: Set Status, Send Email, Submit, Save, Close, whereby the status of the process instance is set first, before an automated email and then the form shutdown rules of Submit, Save and Close occur.
To read more about multiple rules, go to Multiple rules.
Conditions
Flexible and dynamic conditions form an important component to make forms fully dynamic. This feature enables you to create natural language conditions when rules should be triggered.
To configure a rule to conditionally execute an action:
- Select the field or form that the rule will be attached to.
- Under Add a rule in the left-hand pane, click on a category of rules, for example Workflow and then a rule itself, for example Process security.
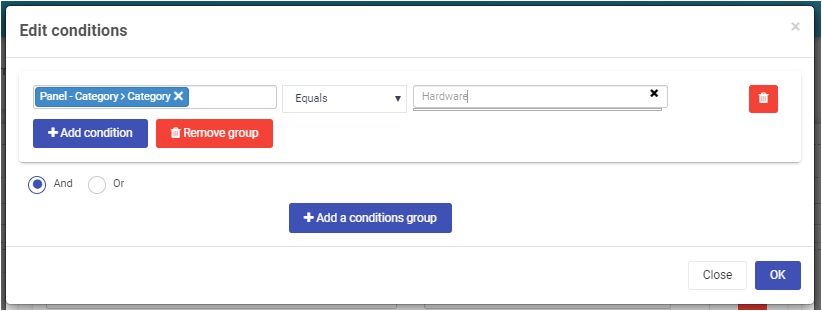
- Click on Edit conditions button within the rule.
- Add the conditions that satisfy your scenario. Multiple conditions can be grouped with condition groups.
For more information on Conditions, go to the Conditions page.
Custom rules
Under custom rules, you will find any custom-developed rules available under your developer section. Custom rules provide access to rules that are built for extensibility of Kianda capabilities. This is particularly used in situations when existing rules do not provide the required functionality.
Custom rules have the purpose of providing a user interface for the end-users. If you need to build a rule then you should use a custom rule widget.
It allows a developer to quickly build a reusable component that would then be used by process designers in real processes.
Check-out the development section for more details on how to build custom widgets in Kianda.
What’s next 
We have briefly introduced the key concepts of rules. Click on the links below to read more about rule concepts in detail:
Feedback
Was this page helpful?
Glad to hear it! Please tell us how we can improve.
Sorry to hear that. Please tell us how we can improve.