Success/Error Mapping
Introduction
Success and Error mapping is used to denote the success or failure of certain rules being executed where data is being transferred or a rule is connected to a data connector. As a user with an administrator or designer role, you can use Kianda Designer to populate fields within the Kianda form, using the Edit rule dialog box to set parameters for success and error mapping.
When to use
Success and Error mapping should be with rule execution, displaying values that you want for rule execution success or failure.
You can use mapping with the following rules:
- Data rules > Find items
- Data rules > Create item
- Data rules > Update item
- Data rules > Delete item
- All SharePoint rules, except Get attachments and Create anonymous link
How to use
-
Select the field that will have the rule attached, for example a button at the end of a form, or a field within a form.
-
Click on Add a rule in the left-hand pane and select one of the rules that uses mapping as shown in the When to use list above, for example the SharePoint rule called Create list, used to create a list in SharePoint dynamically using Kianda form data.
-
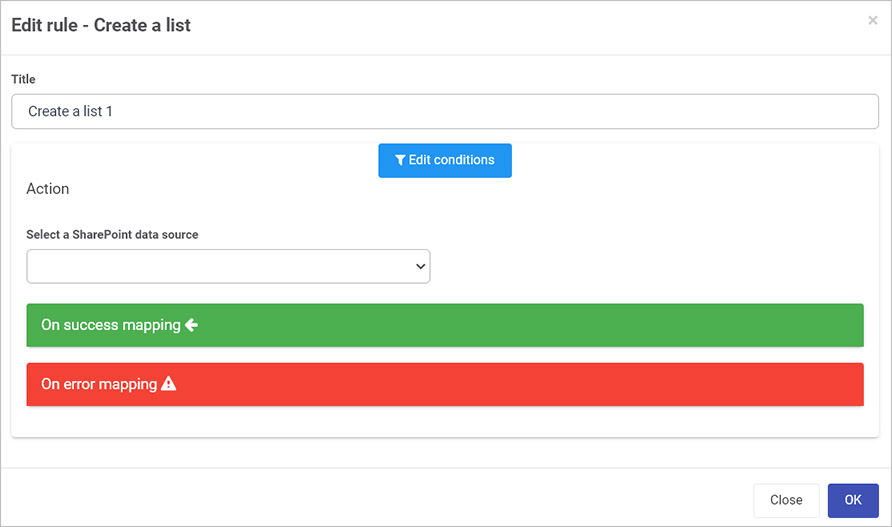
In the Edit rule dialog box, give the rule a Title.
-
If you want to add conditions for the rule, click on the Edit conditions button
 to create conditions for the rule, see Conditions for more details.
 -
Under Action, click on the field Select a SharePoint data source from the drop-down list.

-
Fill out any additional fields as necessary, for example to create a list the following fields must be completed:
-
List template - choose from a list of SharePoint list types
-
List name field - choose a form field that will be used the create a name for the list in SharePoint
-
List url field - choose a form field that will be used in the creation of a URL within SharePoint
-
List description field - choose a form field that describes what the list is about
-
Quick Launch menu - options are Yes or No. Choosing Yes allows the created list to be displayed in the Quick Launch menu, containing a link to the list.
-
-
To add success mapping, click on On success mapping and click on the Add mapping button. See On Success Mapping for more details.
-
For On error mapping and click on the Add mapping button. See On Error Mapping for more details.
-
you simply need to select the field within the form which will store the error message
-
When you are finished editing the dialog box, click on OK or click on Close at any time to exit the dialog box.
On Success Mapping
Success mapping is a concept of populating your form fields with data that is retrieved from a datasource using a data connector, to learn more about data connectors go to Data connectors. This retrieved data from the datasource is known as a response. Using this response data, you can populate a field within your form, for example you can retrieve a file which is stored in your SharePoint or Dropbox datasource and populate the retrieved file into a File field. This will give you the ability to access the retrieved file in your process.
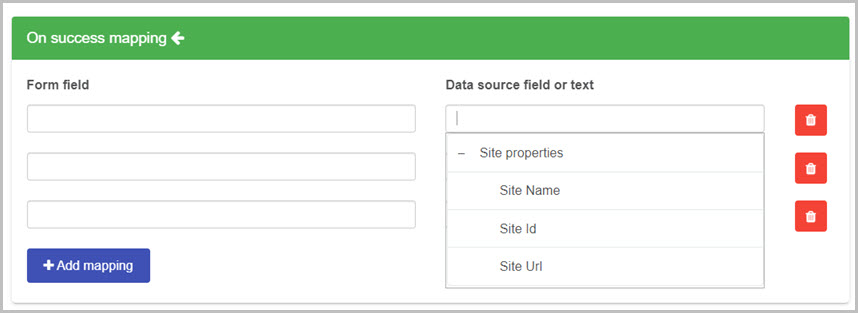
All data connectors within Kianda may have different response data that can be used to populate fields in a form. You can use the Success mapping in the rules mentioned in the When to use section. Take one of the SharePoint rules Create a site as an example. When all information is filled out in the rule, in the On success mapping section you can assess the data object (response) called Site properties. From the Site properties data object you can access three different pieces of data; Site Name, Site Id and Site URL. You can map (populate) those piece of data into fields in your form by selecting a field in the Form field section:
-
Form field - this field allows you to select a field in your form to store the value from the datasource.
-
Data source field or text - this field allows you to select which piece of data your want to retrieve from the datasource, and store it in a form field.
-
Add mapping - Click on the Add mapping to add more fields for mapping results from the datasource to form fields.
-
Bin/Trash
 - Click on the Bin/Trash button to delete a mapping.
On Error Mapping
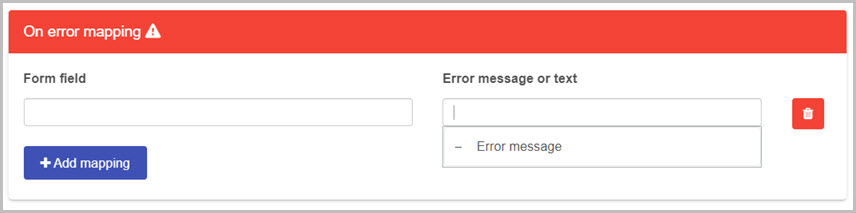
Error mapping is a concept of populating a form field in your Kianda process when using the rules from the When to use section. When using those rules, you get presented with the ability to map an error when there is an issue as the rule is executing, for example incorrectly filling out a parameter. It is useful to know the details of the error message that comes from the datasource your are connecting with. To see the error message, you need to create a separate Text box field in your form and map the error to that field. Open the On error mapping section and add a mapping by clicking on Add mapping button:
-
In the Form field, select a form field which will store the error message in your Kianda form.
-
In the Error message or text field, enter an error message that you want to appear in the event of errors or click on the text box and select the Error message option to use a system generated error indicating what has gone wrong when the rule executed.
-
Click on the Add mapping button to add further mappings.
-
Click on the Bin/Trash button
to delete a mapping.
What’s next 
To find out more about rule implementation, go to the main Rules page and then click on the links to the different rule categories.
Feedback
Was this page helpful?
Glad to hear it! Please tell us how we can improve.
Sorry to hear that. Please tell us how we can improve.