This is the multi-page printable view of this section.
Click here to print.
Return to the regular view of this page.
Table rules
Table rules is one category of rules to enable table operations such as sorting, copying table rows to another table, exporting and importing table data as .csv files and adding and removing table rows. These operations are useful to implement in external data sources, automating actions using Kianda processes.
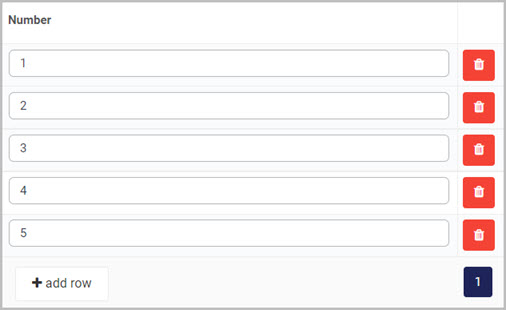
Take an example of a Sort table rule. Implementing this rule will result in a table being sorted in an ascending or descending manner depending on what column of the table you want to sort by. For an example, take the image below as your table.
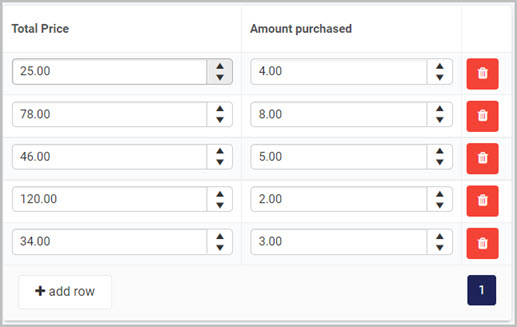
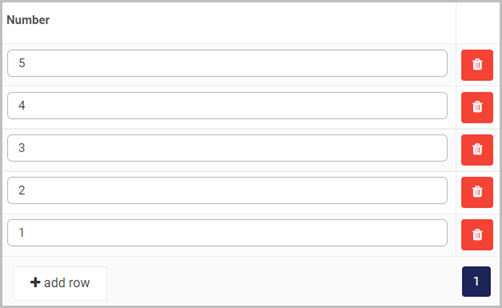
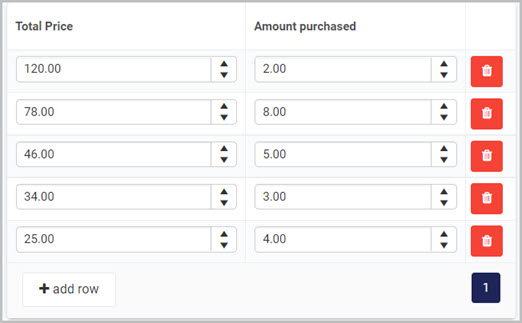
You can attach the Sort table rule to a button and selecting one of the columns available, for example Total Price, and the order of sorting for example descending. The result of the table after sorting will look as follows:
Getting started with Table rules
If you go to Administration > Designer and click on a process or create a new process, then click on Add a rule, the Table rules are found in the left-hand pane when you click on Tables.

There are 12 types of Table rules as follows:
-
Loop table - this rule loops through table rows, where other rules can be triggered and implemented.
-
Add table row - this rule adds a new row to a table.
-
Remove table row - this rule removes a current row from a table.
-
Import CSV - this rule imports .csv or .xlsx file data into a table, based on mapping provided within the rule.
-
Export CSV - this rule is export the contents of a table to a .csv file.
-
Copy table rows - this rule copies table rows from one table to another.
-
Clear table rows - this rule removes table rows that match given criteria.
-
Lookup value from table - this rule performs a lookup on a table value that match given criteria
-
Update table values -this rule updates table columns that match given criteria.
-
Sort table -this rule sorts table data based on multiple conditions.
-
Aggregate table - this rule aggregates table values.
-
Hide/Show column - this rule allows you to hide or show columns within a table
What’s next 
To read more about each of the rule types go to the links below:
1 - Loop table
Introduction
The Loop table rule allows you to loop through table rows within a table of choice from within your process. When selected the rule allows you to trigger fields or rules to perform a particular action within the specified table. For example if a button is added to the table with an associated action, you can then trigger that action while looping through the table.
For example in the table below, there is a Calculate total button in a Calculate total column. This button has a rule that will set a value in the field in the Total column. Using the Loop table rule every row is looped through and this Calculate total button rule is triggered, completing the fields for each row in the Total column.
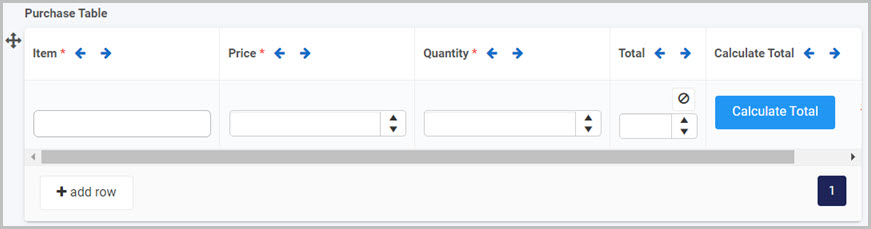
If the Loop table rule isn’t used, the user has to manually click on the Calculate Total button for each row, to populate the field in the Total column.
When to use
This rule is often used when the same action must be performed for multiple rows within a table.
You can add this rule:
Before you get started
To demonstrate this rule, we will loop through a simple Purchase table described in the introduction above, in which we will calculate the total price spent on each item bought. To learn more on how to add a table into your form go to In the table we will have the following columns:
-
Item - text box field representing the name of the item bought. To learn how to add a text box field go to Text box control.
-
Price - number field representing the price of the item. To learn how to add a number field go to Number control.
-
Quantity - number field representing the quantity of the item.
-
Total - number field representing the total quantity spent on the item.
-
Calculate total - a button with a Set form field rule attached. To learn more on how to add and how to use the Set form field go to Set form field rule.
The goal in this example is to loop though the table and trigger the Calculate total button so that for each item purchased, the total can be calculated depending on its quantity.
How to get started
-
Click on an existing process by going to Administration > Designer and decide which form, or field you will apply the rule to, by clicking on that item so that it is in edit mode so you can see the Edit/pen button, Pen button  .
.
-
Click on Add a rule > Table > Loop table.
-
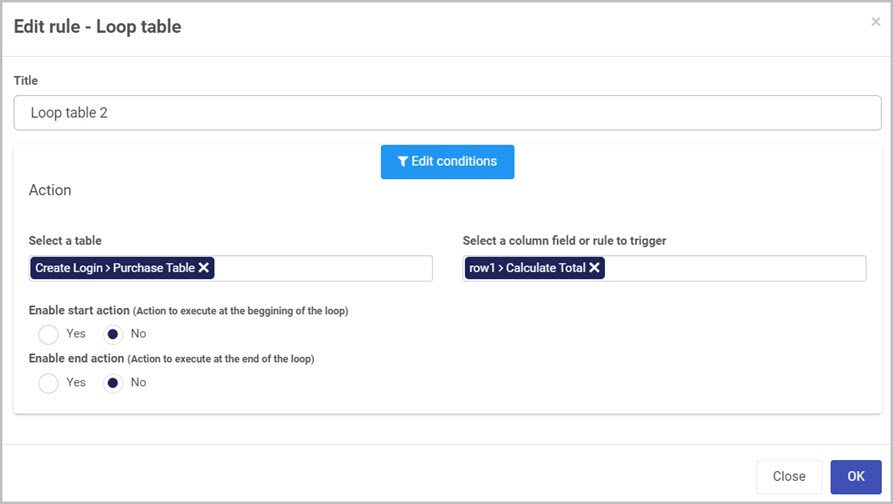
In the Edit rule - Loop table dialog box, give the rule a title in the Title field.
-
In the Select a table option, select the table you want to loop through.
-
In the Select a column field or rule to trigger option, select a field or rule you want to trigger when looping through the table. In this example, we will select the Calculate total button from the table column.
-
Enable start action gives you two options:
- Yes - allows you to select a field that will execute before the loop starts.
- No - means no changes are made, the loop will execute straight away.
-
Enable end action gives you two options:
- Yes - allows you to select a field that will execute after the loop finishes.
- No - means no changes are made, the loop will end without any action.
Editing, deleting or duplicating rules
When you have clicked on an existing rule, and the rule is visible in the right-hand pane under Rules, there are a number of options available to you.
- To disable a rule click the slider across beside the rule name.
- To copy a rule, click on the Duplicate button
 beside the rule name.
 - To delete a rule, click on the Bin/Trash button
 .
. - To view a rule, click on the rule name to open the Edit rule dialog box.
What’s next
To find out more about other Table rules go to Table rules.
To find out more about other rules go to Rules.
2 - Add table row
Introduction
The Add table row rule allows you to add rows within a specified table. You can set values for each field within the newly created row by mapping values into them. For assigning values to each field in a row, you can use manually typed text or use other fields from your process. By default you need to give a value to a field in the newly created row, but can also add rows with no values. You can do that by clicking on the Bin/Trash icon in the New row mapping as shown in the image below:
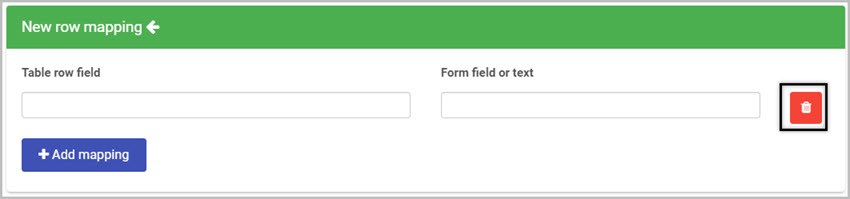
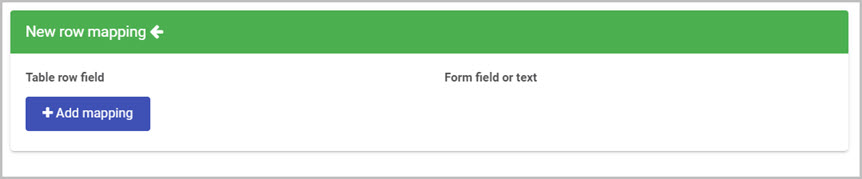
This will delete the mapping fields and allow you to add the rule without assigning values to a field in the new row. The new row mapping should look as follows:
When to use
You can use this rule if you want more dynamic and more automated tables. By removing the original add row button from the table and adding a new button with the Add table row rule attached, you can map specific row fields to automatically appear with values when adding the rows. Take a look below how to add and use the Add table row rule.
You can add this rule:
How to get started
-
Click on an existing process by going to Administration > Designer and decide which form, or field you will apply the rule to, by clicking on that item so that it is in edit mode so you can see the Edit/pen button, Pen button .
-
Click on Add a rule > Table > Add table row.
-
In the Edit rule - Add table row dialog box, give the rule a title in the Title field.
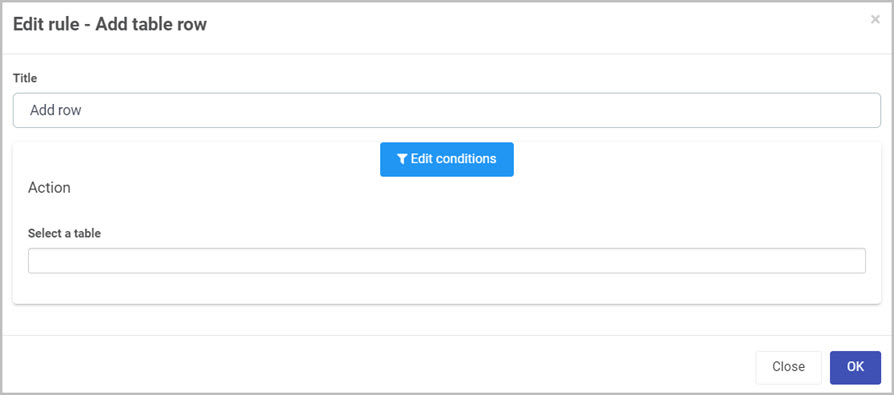
-
If you want to add conditions for the rule, click on the Edit conditions button  see Conditions for more details.
-
In the Select a table option, select the table you want to add a new row to. New mapping options are presented when you select a table.
-
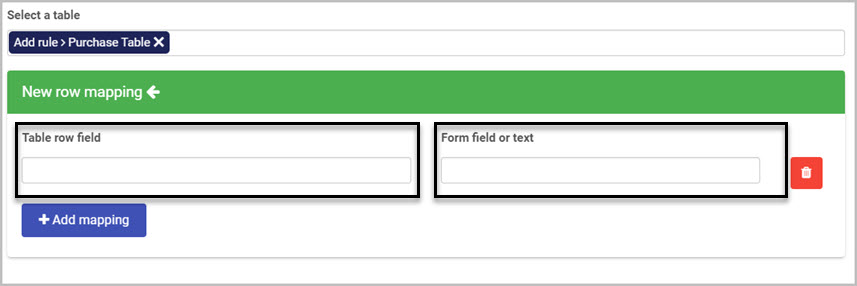
In the New row mapping you have the option to assign values to newly created rows and the fields within it.
-
Table row field - allows you to select a field from the row which you want to map a value to.
-
Form field or text - you can select a field within your form or type in text manually to represent the value you want your row field to contain.
-
Add mapping - you can choose to assign values to multiple row in your row by clicking on Add mapping button. You can also remove fields by clicking on the Bin/Trash icon . To add a row without any values, delete all mapping fields as shown below.
-
When you are finished editing the dialog box, click on OK or click on Close at any time to exit the dialog box.
Editing, deleting or duplicating rules
When you have clicked on an existing rule, and the rule is visible in the right-hand pane under Rules, there are a number of options available to you.
- To disable a rule click the slider across beside the rule name.
- To copy a rule, click on the Duplicate button beside the rule name.
- To delete a rule, click on the Bin/Trash button .
- To view a rule, click on the rule name to open the Edit rule dialog box.
What’s next
To find out more about other Table rules go to Table rules.
To find out more about other rules go to Rules.
3 - Remove table row
Introduction
The Remove table row rule allows you to remove rows within a specified table. The rule targets only the last row in a table and will do nothing when there are no rows present in a table. You can apply conditions to this rule which will allow you to perform checks and only remove rows when a certain condition is met.
When to use
You can use this rule paired up with the Add table row rule. The add table rule will allow you to add a row with data in its columns and remove table row rule could be applied to a button, used to remove a row if wrong data has been entered. This gives the user the ability to add a row and remove rows. Give the remove table row rule a condition to make sure not to delete valuable data, see Conditions for more detail. To learn more about Add table row rule go to Add table row.
You can add this rule:
Before you get started
For this rule to work you need to have one or more tables in your process. This will allow you to select a table that you want to target when removing rows. To learn how to add a table to your process go to Table control.
How to get started
-
Click on an existing process by going to Administration > Designer and decide which form, or field you will apply the rule to, by clicking on that item so that it is in edit mode so you can see the Edit/pen button, Pen button .
-
Click on Add a rule > Table > Remove table row.
-
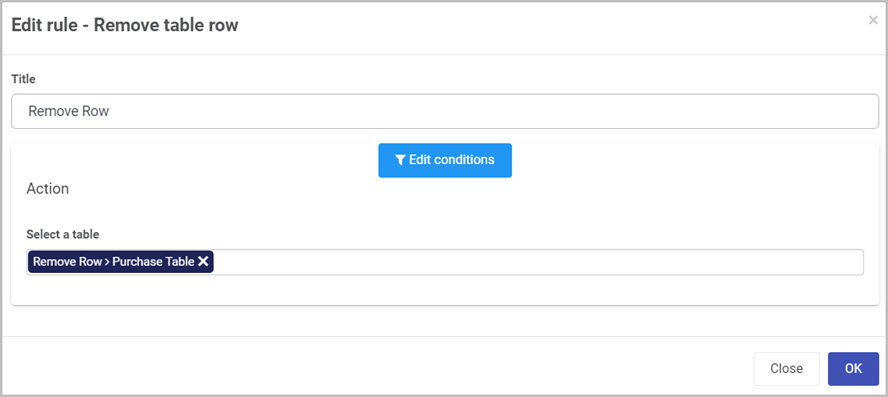
In the Edit rule - Remove table row dialog box, give the rule a title in the Title field.
-
If you want to add conditions for the rule, click on the Edit conditions button see Conditions for more details. It is a good idea to add condition to this rule to prevent deleting valuable information from the table.
-
In the Select a table option, select the table you want to remove a row from.
-
When you are finished editing the dialog box, click on OK or click on Close at any time to exit the dialog box.
Editing, deleting or duplicating rules
When you have clicked on an existing rule, and the rule is visible in the right-hand pane under Rules, there are a number of options available to you.
- To disable a rule click the slider across beside the rule name.
- To copy a rule, click on the Duplicate button beside the rule name.
- To delete a rule, click on the Bin/Trash button .
- To view a rule, click on the rule name to open the Edit rule dialog box.
What’s next
To find out more about other Table rules go to Table rules.
To find out more about other rules go to Rules.
4 - Import CSV or Excel into Table
Introduction
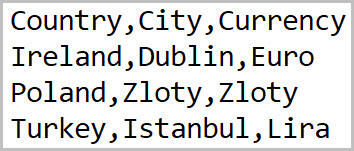
The Import CSV rule allows you import a Comma-Separated Values (CSV) file and populate a specified table within your process. Using this rule automates and speeds up the process of populating a table when a lot of data is present. CSV files may look different depending on what program you will open it with, here is an example of a CSV file opened with Excel:
Here is the same file opened using Notepad:
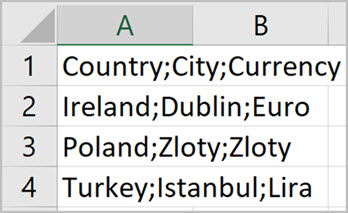
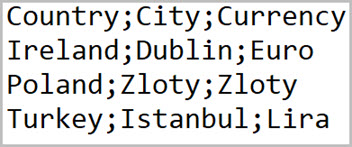
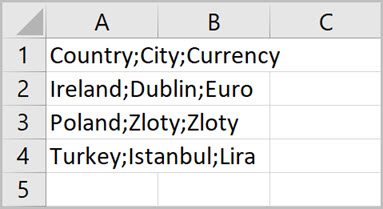
As shown in the two images above, the format changes depending on what program you open the file with. Using the Notepad, each column is separated with a comma and each new line is a row. Excel formats commas and new lines automatically and creates numbers for rows and letters for columns. The CSV file can be separated using different separators other than comma. For example you can use ; as a separator, keep in mind that Excel does not format non-comma separated values correctly and the file will look as follows when opened using Excel:
Here is the same file opened using Notepad:
When to use
You can use this rule to populate a table when there is a lot of data present in a CSV file. Apply this rule to a process so that your table is populated automatically when a process has been loaded.
You can add this rule:
Before you get started
For this rule to work there are a couple of prerequisites needed inside of your process:
- Table - needed to let the rule know which table will be populated using the csv file, for more detail on how to add a table go to Table control.
- File - needed as a container to hold your csv file. Using a file control, you can upload a csv file and use that csv file to populate a table. For more detail on how to add a file go to File upload control.
Keep in mind that in order to populate a table within your process correctly, you need to have the same amount of columns in the table as inside of the CSV file. For example a table looking as follows:

This indicates that the CSV file that we want to import should have three columns:
How to get started
-
Click on an existing process by going to Administration > Designer and decide which form, or field you will apply the rule to, by clicking on that item so that it is in edit mode so you can see the Edit/pen button, Pen button .
-
Click on Add a rule > Table > Import CSV.
-
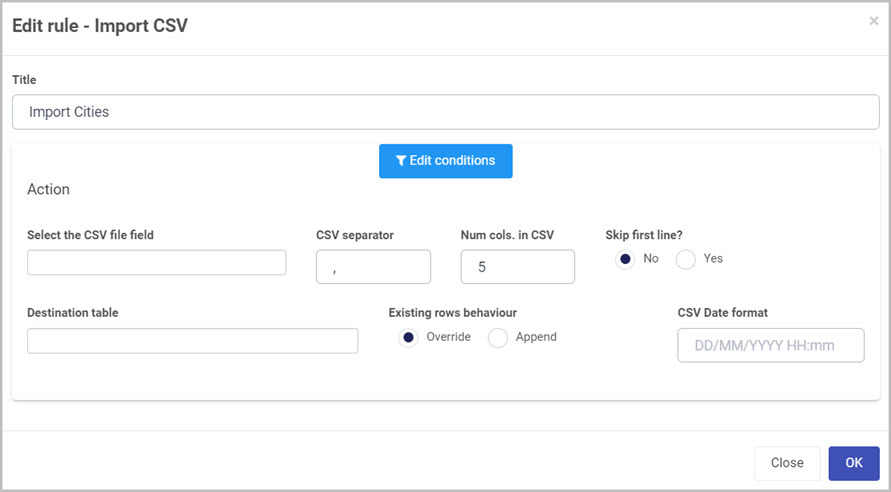
In the Edit rule - Import CSV dialog box, give the rule a title in the Title field.
-
If you want to add conditions for the rule, click on the Edit conditions button see Conditions for more details.
-
Under the Action section fill out the following:
-
Select the CSV file field - select a file field containing a csv file. This file field needs to be pre-created as it is a required field when using this rule. the csv file attached to this field will be used to populate the table.
-
CSV separator - the default separator is a comma ( , ) but you can set it to any character, number or symbol you want. Keep in mind that the separator fields separates each column of a row. For example you can have a file that looks as follows:
This image represents how a table looks like applying the Import CSV rule with a sample file and when the CSV separator is set to a comma ( , ) see below:

-
Num cols. in CSV - this field represents the number of columns in your CSV file. From the example and image above, this field is set to three.
-
Skip first line - radio button asking whether to skip the first line or add the first line of the CSV file. If the first line of your CSV file represents the title of the column, you can select Yes and the line will not be included in your table.
-
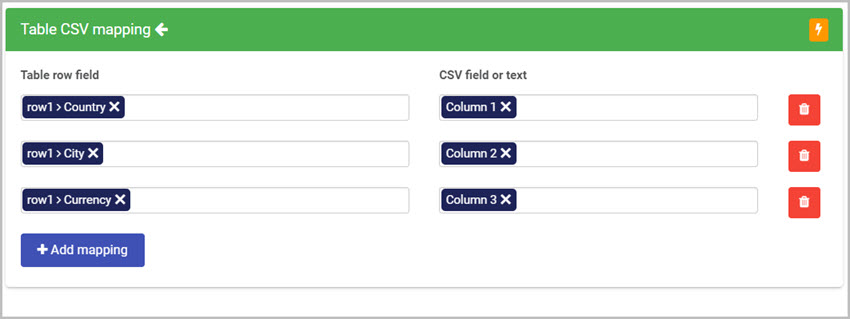
Destination table - field that allows you to select the table you want to target when populating data from the CSV file. New mapping options are presented when selecting a table.

-
Table row field - select the row you want to target when setting a value.
-
CSV field or text - you can select a field/column within your CSV file or type in text manually to represent the value you want your field to contain.
-
Add mapping - you can choose to assign values to multiple fields in your row by clicking on Add mapping button. You can also remove fields by clicking on the Bin/Trash icon .
Going back to the CSV separator example image, to achieve the correct mapping, we need to add three fields as shown below:
-
Existing rows behavior - you have two options when populating data into your selected table:
- Override - will override all existing rows of your table with the new data from your CSV file.
- Append - will ignore the existing rows inside of your table and simply append all the new rows from your CSV file to the end of the table.
-
CSV Date format - type in manually the data format that you have set in your CSV file. This applies to a column when it is of type Date. The formatting of the date specified in tis field must be the same as in your CSV file. For example when your date format in the CSV file is DD/MM/YYYY and CSV Date format option is set to YYYY/DD/MM, you can encounter date bugs in your table.
-
When you are finished editing the dialog box, click on OK or click on Close at any time to exit the dialog box.
Editing, deleting or duplicating rules
When you have clicked on an existing rule, and the rule is visible in the right-hand pane under Rules, there are a number of options available to you.
- To disable a rule click the slider across beside the rule name.
- To copy a rule, click on the Duplicate button beside the rule name.
- To delete a rule, click on the Bin/Trash button .
- To view a rule, click on the rule name to open the Edit rule dialog box.
What’s next
To find out more about other Table rules go to Table rules.
To find out more about other rules go to Rules.
5 - Export table as CSV
Introduction
The Export CSV rule allows you export a specified table from within your process into a CSV (Comma Separated Values) file. In the edit rule dialog box you can format how each value is separated and which columns to include and exclude when exporting. Keep in mind when exporting a table into a CSV format, it will export data for the following field types:
Any other field types will be ignored, for example all control types from within Layout and Actions will be ignored.
When to use
You can use this rule when you want to open the table with a notepad or excel. This rule is also useful when you want to share a table with other users, you can do that by exporting the table into a File field and attaching the file into an email using the Send email rule. To learn more about attaching a file into an email go to Attachments.
You can add this rule:
Before you get started
For this rule to work there are a couple of prerequisites needed inside of your process:
- Table - needed to let the rule know which table will be used to export into the CSV file, for more detail on how to add a table go to Table control.
- File - needed as a container to hold your exported CSV file. When the table is exported into this file field, you can downloaded by clicking on the file name. For more detail on how to add a file field go to File upload control.
How to get started
-
Click on an existing process by going to Administration > Designer and decide which form, or field you will apply the rule to, by clicking on that item so that it is in edit mode so you can see the Edit/pen button, Pen button .
-
Click on Add a rule > Table > Export CSV.
-
In the Edit rule - Export CSV dialog box, give the rule a title in the Title field.

-
If you want to add conditions for the rule, click on the Edit conditions button see Conditions for more details. It is a good idea to add condition to this rule to prevent exporting incomplete tables.
-
Under the Action section fill out the following:
-
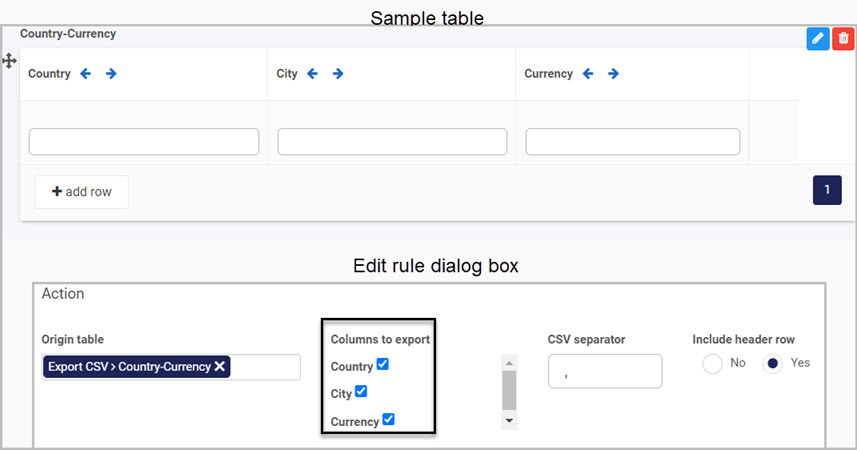
Origin table - field that allows you to select the table you want to target when exporting into a CSV file. When selecting a table, new options appear:
-
Columns to export - this is a checklist allowing you to select or deselect columns from a table that you want to keep or dismiss from exporting into the CSV file. These fields will correspond to field names given in your table, see below image for an example.
Table with three columns will correspond to Columns to export option in the export CSV edit rule dialog box.
-
CSV separator - the default separator is a comma , but you can set it to any character, number or symbol you want. Keep in mind that the separator fields separates each column of a row. For example you can have a file that looks as follows when setting this field with a semi-colon ;as shown with Notepad below:
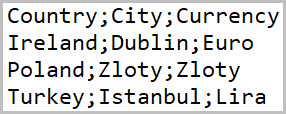
Keep in mind when exporting a table using a separator other than a comma , and open it in Excel, the data will not be formatted correctly within Excel as it recognises columns when only separated by commas , for example the above file is opened with Notepad while the image below shows the same exported file opened with Excel:
-
Include header row - radio button asking whether to include the header row meaning that the column title will be included or not.
-
Destination file field - field specifying the container which hold the csv file of the exported table. When the CSV file is present in the file field, the name of the file will be the same as the title of the table specified to export. For example if the title of a table is Countries, the file will be called Countrie.csv. You can download the file by clicking on the file name.
-
When you are finished editing the dialog box, click on OK or click on Close at any time to exit the dialog box.
Editing, deleting or duplicating rules
When you have clicked on an existing rule, and the rule is visible in the right-hand pane under Rules, there are a number of options available to you.
- To disable a rule click the slider across beside the rule name.
- To copy a rule, click on the Duplicate button beside the rule name.
- To delete a rule, click on the Bin/Trash button .
- To view a rule, click on the rule name to open the Edit rule dialog box.
What’s next
To find out more about other Table rules go to Table rules.
To find out more about other rules go to Rules.
6 - Copy table rows
Introduction
The Copy table rows rule allows you copy any field from within a specified table into another table within your process. You can select the same tables which will act similar to Add table row, see Add table row for more detail.
When to use
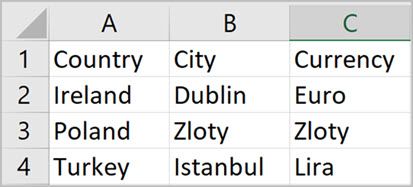
You can use this rule when you want to copy specific fields from one table to another. You do not need to copy all columns from a row. For example, from a table row that has Country, City, Currency columns, you can just copy the City column.
You can add this rule:
Before you get started
For this rule to work you need to have one or more tables in your process. This will allow you to select a table to copy from and to. It is possible to have only one table in your process but that will limit you to copy a row from the specific table to the same table.
How to get started
-
Click on an existing process by going to Administration > Designer and decide which form, or field you will apply the rule to, by clicking on that item so that it is in edit mode so you can see the Edit/pen button, Pen button .
-
Click on Add a rule > Table > Copy table rows.
-
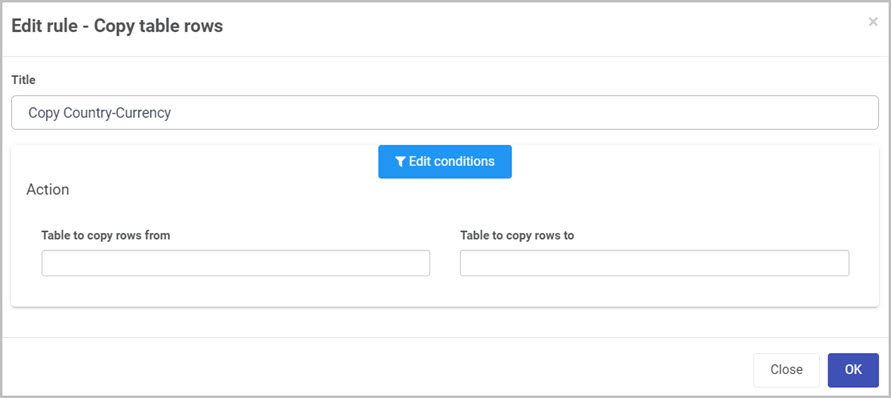
In the Edit rule - Copy table rows dialog box, give the rule a title in the Title field.
-
If you want to add conditions for the rule, click on the Edit conditions button see Conditions for more details.
-
Under the Action section fill out the following:
- Table to copy rows from - select the table you wish to copy fields from. This table needs to be pre-created before adding this rule. If no table is selected in this field, an error message will show.
- Table to copy rows to - select the table you wish to copy fields to. This field must be pre-created before adding this rule. You can select the same table as in the Table to copy from section. This will act similar to add table row rule, see Add table row for more detail.
When both the Table to copy rows from and Table to copy rows to are assigned, more options are presented.
-
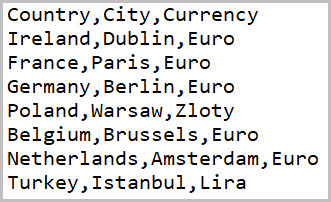
Copy row conditions - allows you to add conditions to the fields you want to copy into the new table. These conditions work like filters. For example if a table looks like this:
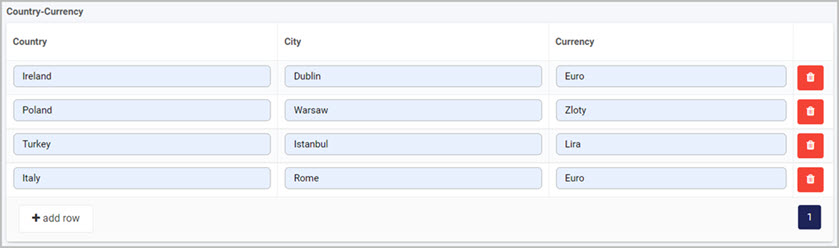
We can set a condition using the Copy row condition to copy only specific rows. For example we only want to copy the rows which contain the word “land” in the country field. To achieve this, the Copy row condition would look as follows:
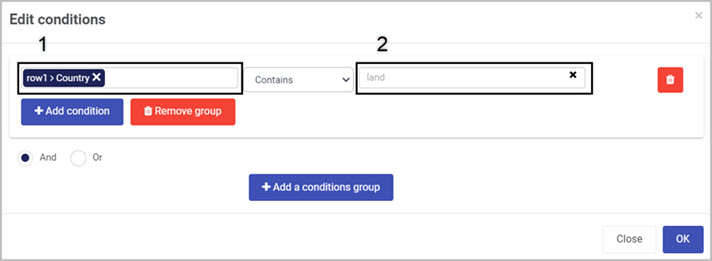
Box 1 represents the field from the table which you are copying from.
Box 2 represents the conditional check.
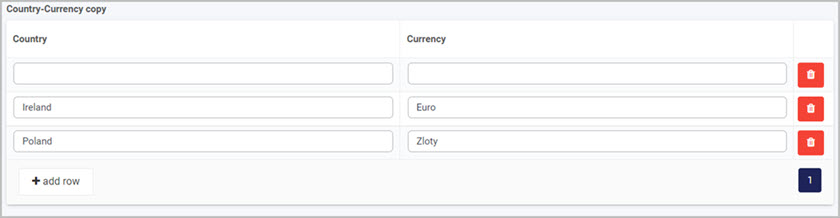
This is an example of the output using the conditions shown above. Note we are only copying the country and currency into the new table:
-
Column mapping - allows you to assign values from fields within your process into the newly copied row.
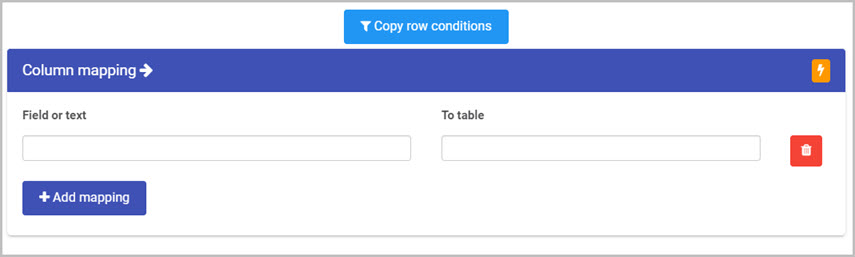
- Field or text - you can select a field within your form or type in text manually to represent the value you want your field in the new row to contain.
- To table - select the field from the table you are copying to, to contain the value specified in the Field or text section.
- Add mapping - you can choose to set multiple fields of a row by clicking on Add mapping button. You can also remove fields by clicking on the Bin/Trash icon .
-
When you are finished editing the dialog box, click on OK or click on Close at any time to exit the dialog box.
Editing, deleting or duplicating rules
When you have clicked on an existing rule, and the rule is visible in the right-hand pane under Rules, there are a number of options available to you.
- To disable a rule click the slider across beside the rule name.
- To copy a rule, click on the Duplicate button beside the rule name.
- To delete a rule, click on the Bin/Trash button .
- To view a rule, click on the rule name to open the Edit rule dialog box.
What’s next
To find out more about other Table rules go to Table rules.
To find out more about other rules go to Rules.
7 - Clear table rows
Introduction
The Clear table rows rule allows you clear/delete all or some rows from a specified table in your process. This rule acts similar to Remove table row except with the Clear table rows, you can delete multiple rows and filter out which rows to delete by adding conditions. To learn more about Remove table row go to Remove table row.
When to use
You can use this rule when you want clear all rows from a table or by adding criteria to delete rows, you can filter out which rows to clear from the table.
You can add this rule:
Before you get started
For this rule to work you need to have one or more tables in your process. This will allow you to select a table that you want to clear rows in. To learn how to add a table to your process go to Table control.
How to get started
-
Click on an existing process by going to Administration > Designer and decide which form, or field you will apply the rule to, by clicking on that item so that it is in edit mode so you can see the Edit/pen button, Pen button .
-
Click on Add a rule > Table > Clear table rows.
-
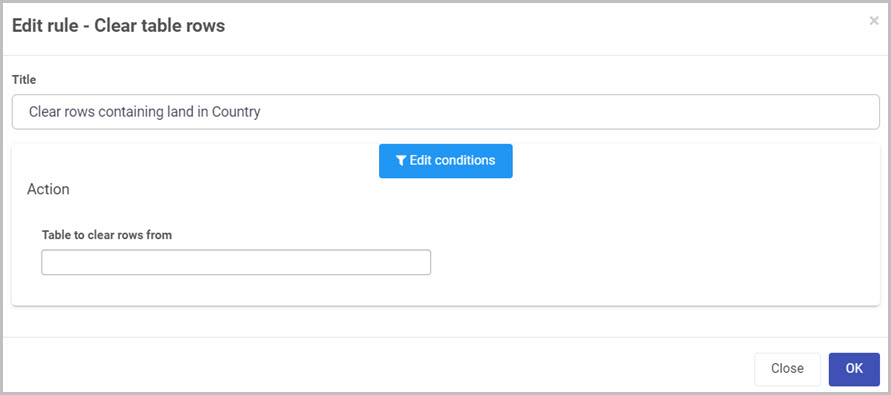
In the Edit rule - Clear table rows dialog box, give the rule a title in the Title field.
-
If you want to add conditions for the rule, click on the Edit conditions button see Conditions for more details.
-
Under the Action section fill out the following:
-
Table to clear rows from - select the table you wish target when clearing rows from. This table needs to be pre-created before adding this rule. If no table is selected in this field, an error message will show. When the Table to clear rows from is assigned, the Criteria to delete rows is presented.
-
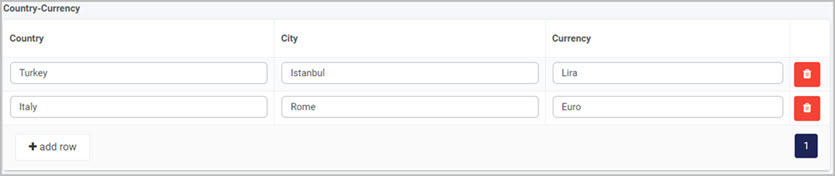
Criteria to delete rows - allows you to add a condition which works like a filter. Adding a condition will allow you to filter out which rows to delete and which to keep when using the Clear table rows rule. For example if a table looks like this:
We can set a condition using the Criteria to delete rows button. For example if we want to delete all rows in which the Country field contains the word “land”. To achieve this, the Criteria to delete rows would look as follows:
Box 1 represents the field from the table which you are clearing rows in.
Box 2 represents the conditional check.
This is an example of the output using the conditions shown above:
-
When you are finished editing the dialog box, click on OK or click on Close at any time to exit the dialog box.
Editing, deleting or duplicating rules
When you have clicked on an existing rule, and the rule is visible in the right-hand pane under Rules, there are a number of options available to you.
- To disable a rule click the slider across beside the rule name.
- To copy a rule, click on the Duplicate button beside the rule name.
- To delete a rule, click on the Bin/Trash button .
- To view a rule, click on the rule name to open the Edit rule dialog box.
What’s next
To find out more about other Table rules go to Table rules.
To find out more about other rules go to Rules.
8 - Lookup value from table
Introduction
The Lookup value from table rule allows you look for a column field within a row that contains a value specified in a lookup condition. When the lookup condition is met, you can extract any column value from that row and set a different field from within your process with that value.
When to use
You can use this rule when you want to extract values from the first row when a condition is met.
You can add this rule:
Before you get started
For this rule to work you need to have one or more tables in your process. This will allow you to select a table that you wanttarget when looking up values. To learn how to add a table to your process go to Table control.
How to get started
-
Click on an existing process by going to Administration > Designer and decide which form, or field you will apply the rule to, by clicking on that item so that it is in edit mode so you can see the Edit/pen button, Pen button .
-
Click on Add a rule > Table > Lookup value from table.
-
In the Edit rule - Lookup value from table dialog box, give the rule a title in the Title field.

-
If you want to add conditions for the rule, click on the Edit conditions button see Conditions for more details.
-
Under the Action section fill out the following:
-
Table to lookup value from - select the table you wish target when looking up values from. This table needs to be pre-created before adding this rule. If no table is selected in this field, an error message will show. When the Table to lookup value from is assigned, two more options are presented:
-
Table lookup conditions - allows you to add a condition that works like a filter. Adding a condition will allow you to target a column of a row and check if it has a specific value. For example checking if a currency column is equals to Euro, the condition will look as follows:
Box 1 represents the column from a row which you are looking up.
Box 2 represents the value you are making the check against.
-
Lookup mapping - allows you to extract a value from the row that met the lookup condition.
- Column to extract - select the specific column from the row to extract the value.
- Field to store extracted value - select a pre-created field to store the value from the selected column in the Column to extract section.
- Add mapping - you can choose to extract multiple values from a row by clicking on Add mapping button. You can also remove fields by clicking on the Bin/Trash icon .
-
When you are finished editing the dialog box, click on OK or click on Close at any time to exit the dialog box.
Editing, deleting or duplicating rules
When you have clicked on an existing rule, and the rule is visible in the right-hand pane under Rules, there are a number of options available to you.
- To disable a rule click the slider across beside the rule name.
- To copy a rule, click on the Duplicate button beside the rule name.
- To delete a rule, click on the Bin/Trash button .
- To view a rule, click on the rule name to open the Edit rule dialog box.
What’s next
To find out more about other Table rules go to Table rules.
To find out more about other rules go to Rules.
9 - Update table values
Introduction
The Update table values rule loops through a table allowing you to update column values. You can update all values in a selected column or update just the columns that match a condition.
When to use
You can use this rule when you want to update a column value in rows that match the condition specified inside the rule.
You can add this rule:
Before you get started
For this rule to work you need to have one or more tables in your process. This will allow you to select a table that you want to update values in. To learn how to add a table to your process go to Table control.
How to get started
-
Click on an existing process by going to Administration > Designer and decide which form, or field you will apply the rule to, by clicking on that item so that it is in edit mode so you can see the Edit/pen button, Pen button .
-
Click on Add a rule > Table > Update table values.
-
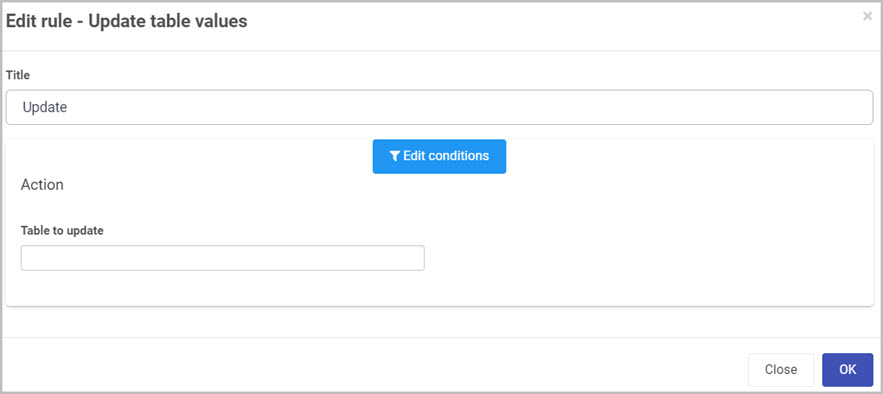
In the Edit rule - Update table values dialog box, give the rule a title in the Title field.
-
If you want to add conditions for the rule, click on the Edit conditions button see Conditions for more details.
-
Under the Action section fill out the following:
-
Table to update - select the table you wish target to update values in. This table needs to be pre-created before adding this rule. If no table is selected in this field, an error message will show. When the Table to update is assigned, three more options are presented:
-
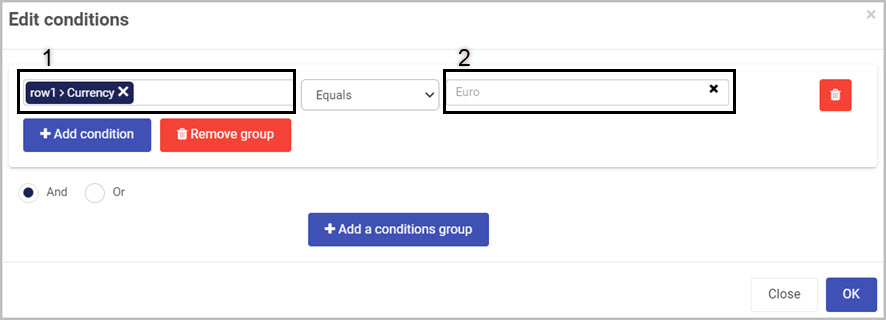
Table lookup conditions - allows you to add a condition that works like a filter. Adding a condition will allow you to target the specific row that the condition specifies. For example checking if a currency column is equal to Euro, the condition will look as follows:
Box 1 represents the column from a row which you are looking up.
Box 2 represents the value you are making the check against.
-
Table column to update - allows you to select a column you want to update when a condition in the Table lookup conditions option is met. This field will be updated with the value given in Field or text to update table column with section.
-
Field or text to update table column with - you can select a field within your form or type in text manually to represent the value you want your updated column to contain.
-
When you are finished editing the dialog box, click on OK or click on Close at any time to exit the dialog box.
Editing, deleting or duplicating rules
When you have clicked on an existing rule, and the rule is visible in the right-hand pane under Rules, there are a number of options available to you.
- To disable a rule click the slider across beside the rule name.
- To copy a rule, click on the Duplicate button beside the rule name.
- To delete a rule, click on the Bin/Trash button .
- To view a rule, click on the rule name to open the Edit rule dialog box.
What’s next
To find out more about other Table rules go to Table rules.
To find out more about other rules go to Rules.
10 - Sort table
Introduction
The Sort table rule loops through a table allowing you to sort data in an ascending or descending manner. In the rule options, you can select which column of the table to sort by. The column you select can be any of the Control input fields, the sorting algorithm takes the numerical or text value of each field and sorts it accordingly. For example if there is a User picker column in the table like shown below:
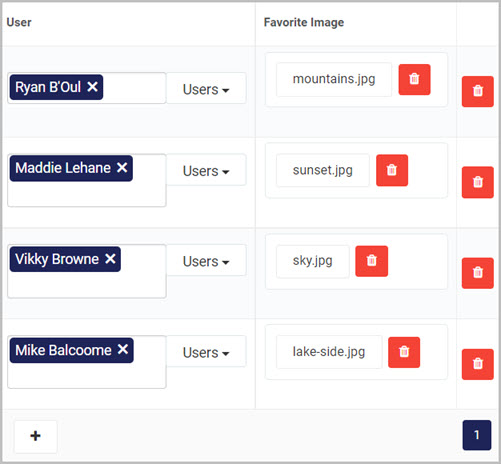
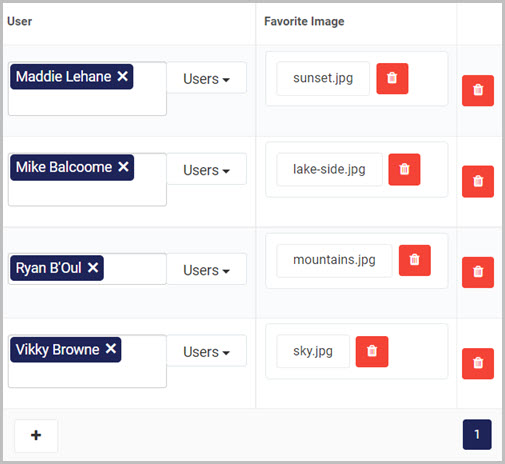
The sorting algorithm will use the text value or in this case the name of each user and sort it in an alphabetical order as the order is set to ascending. Take note that the Favorite Image column has also changes the order to the matching user as the sorting rule targets the whole row, not just the column. The result of the sort is as follows:
When to use
You can use this rule when you want to sort a table in an ascending or descending manner. The rule allows you to select the column by which you want to sort it, a field which identifies that column will make your table dynamic and very versatile. For example having a List field with options for all columns in your table.
You can add this rule:
Before you get started
For this rule to work you need to have one or more tables in your process. This will allow you to select a table that you want to be sorted. To learn how to add a table to your process go to Table control.
How to get started
-
Click on an existing process by going to Administration > Designer and decide which form, or field you will apply the rule to, by clicking on that item so that it is in edit mode so you can see the Edit/pen button, Pen button .
-
Click on Add a rule > Table > Sort table.
-
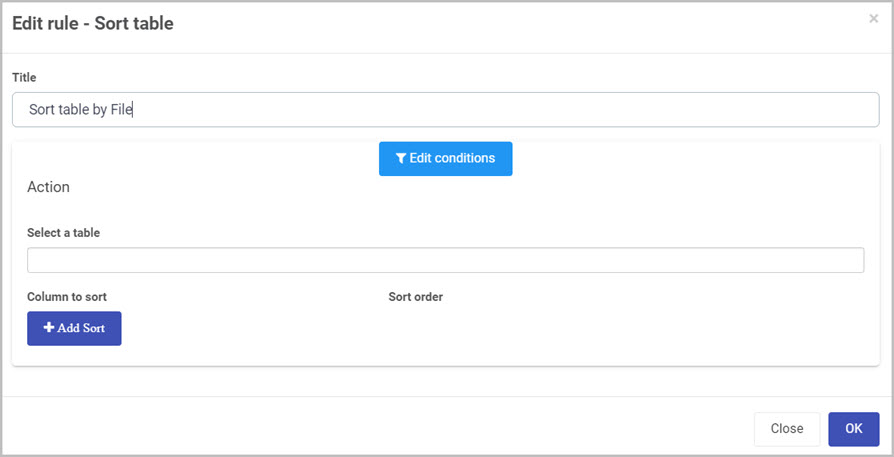
In the Edit rule - Sort table dialog box, give the rule a title in the Title field.
-
If you want to add conditions for the rule, click on the Edit conditions button see Conditions for more details.
-
Under the Action section fill out the following:
-
Select a table - select the table you wish target when sorting values in. This table needs to be pre-created before adding this rule. If no table is selected in this field, an error message will show.
-
Column to sort - allows you to select a column within your table you wish to sort by.
-
Sort order - radio button selection of the sorting order:
-
Add Sort - you can choose to set multiple columns to sort your table by clicking on Add Sort button. You can also remove fields by clicking on the Bin/Trash icon .
-
When you are finished editing the dialog box, click on OK or click on Close at any time to exit the dialog box.
Editing, deleting or duplicating rules
When you have clicked on an existing rule, and the rule is visible in the right-hand pane under Rules, there are a number of options available to you.
- To disable a rule click the slider across beside the rule name.
- To copy a rule, click on the Duplicate button beside the rule name.
- To delete a rule, click on the Bin/Trash button .
- To view a rule, click on the rule name to open the Edit rule dialog box.
What’s next
To find out more about other Table rules go to Table rules.
To find out more about other rules go to Rules.
11 - Aggregate table
Introduction
The Aggregate table rule loops through a table allowing you to aggregate a specific column and store the value in another field from within you process. There are three functions of the Aggregate table rule which are Sum, Average and Count. Sum and Average only work on number fields while Count will count the number of rows it looped through.
When to use
You can use this rule to sum up all the values in a column or get the average. Sum and Average functions of the aggregate rule work only on number fields. The Count function can be used to count the rows that the aggregate rule looped through.
You can add this rule:
Before you get started
For this rule to work there are a couple of prerequisites needed inside of your process:
- Table - needed to let the rule know which table will be used to aggregate columns together, for more detail on how to add a table go to Table control.
- Text box - needed as a container to hold the result from the aggregate. For more detail on how to add a text box field go to Text box control.
How to get started
-
Click on an existing process by going to Administration > Designer and decide which form, or field you will apply the rule to, by clicking on that item so that it is in edit mode so you can see the Edit/pen button, Pen button .
-
Click on Add a rule > Table > Aggregate table.
-
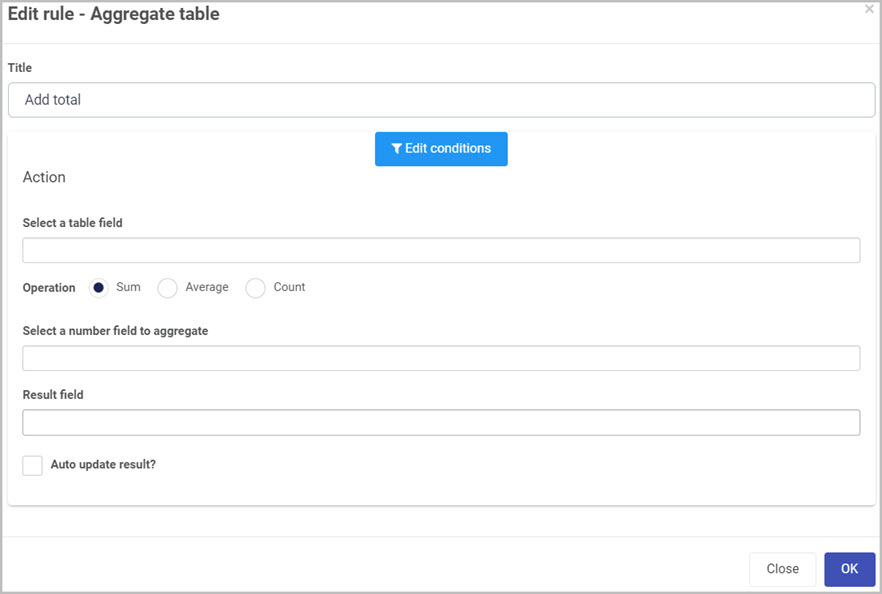
In the Edit rule - Aggregate table dialog box, give the rule a title in the Title field.
-
If you want to add conditions for the rule, click on the Edit conditions button see Conditions for more details.
-
Under the Action section fill out the following:
-
Select a table field - select the table you wish target when aggregating values. This table needs to be pre-created before adding this rule. If no table is selected in this field, an error message will show.
-
Table aggregate conditions - allows you to add a condition that works like a filter. Adding a condition will allow you to target the specific row that the condition matches. For example, you want to aggregate all rows that the avarage score is more than 50%.
-
Operation - radio selection of the operation that you want performed on the aggregate rule:
- Sum - counts all fields together and outputs the total(only works with numbers). Requires a Number field within your table. To lean more on Number field, got to Number control.
- Average - gets the average from all the values provided in a column(only works with numbers). Requires a Number field within your table. To lean more on Number field, got to Number control.
- Count - counts all row instances that the aggregate rule looped through.
- Select a number field to aggregate - allows you to select a number field within your table. It is only used with the Sum and Average operations.
-
Result field - select the field you want to store the value of the aggregation.
-
Auto update result - checkbox allowing you to enable or disable auto update. This will determine if the result field will be updated when more rows are added after the aggregation.
-
When you are finished editing the dialog box, click on OK or click on Close at any time to exit the dialog box.
Editing, deleting or duplicating rules
When you have clicked on an existing rule, and the rule is visible in the right-hand pane under Rules, there are a number of options available to you.
- To disable a rule click the slider across beside the rule name.
- To copy a rule, click on the Duplicate button beside the rule name.
- To delete a rule, click on the Bin/Trash button .
- To view a rule, click on the rule name to open the Edit rule dialog box.
What’s next
To find out more about other Table rules go to Table rules.
To find out more about other rules go to Rules.
12 - Hide or Show table column
Introduction
The Hide / Show column rule allows you change the visibility of a selected column within a table in a process. You can either disable or enable the property, you can also toggle between both of the visible states.
When to use
You can use this rule to hide or show specific columns in your table. This rule is often used when hiding private data from users that do not need access to it. For example you can choose to show total earning column of a table to your managers but not other employees. You can also apply this rule to a button and give it the toggle function which will allow you to toggle the visible property of a column.
You can add this rule:
Before you get started
For this rule to work you need to have one or more tables in your process. This will allow you to select a table in which you want to hide or show a column in. To learn how to add a table to your process go to Table control.
How to get started
-
Click on an existing process by going to Administration > Designer and decide which form, or field you will apply the rule to, by clicking on that item so that it is in edit mode so you can see the Edit/pen button, Pen button .
-
Click on Add a rule > Table > Hide/Show column.
-
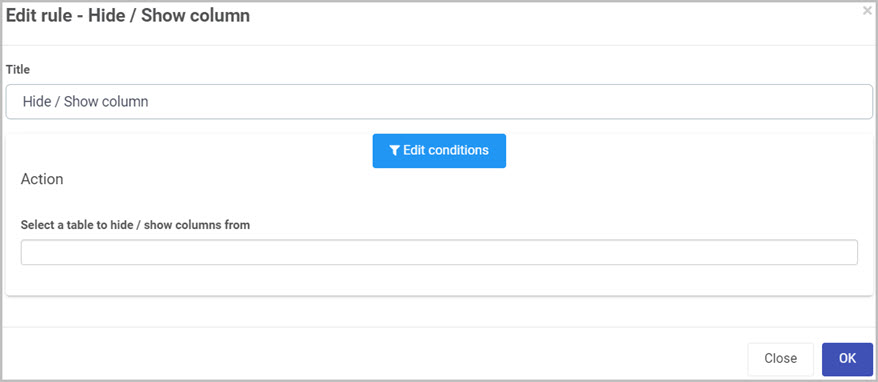
In the Edit rule - Hide/Show column dialog box, give the rule a title in the Title field.
-
If you want to add conditions for the rule, click on the Edit conditions button see Conditions for more details.
-
Under the Action section fill out the following:
-
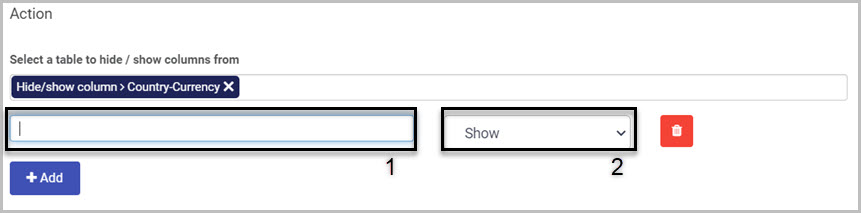
Select a table to hide / show columns from - select the table you wish target. This table needs to be pre-created before adding this rule. If no table is selected in this field, an error message will show. When the table is selected, an + Add button appears. Click on it to add a field where you can select the column you wish to hide or show.
-
[1] Column to hide / show - select the column you want to target you want the hide / show rule to apply to.
-
[2] Visible - select to which visible property you want the column to be set to.
- Hide - will set the visible property to disabled.
- Show- will set the visible property to enabled.
- Toggle visible - will set the visible property as the opposite of what it is. For example if the current state of the visible property is enabled, when this rule is triggered, it will set the visible property to disabled.
-
Add - you can choose to change visibile property of multiple columns in your table by clicking on + Add button. You can also remove fields by clicking on the Bin/Trash icon .
-
When you are finished editing the dialog box, click on OK or click on Close at any time to exit the dialog box.
Editing, deleting or duplicating rules
When you have clicked on an existing rule, and the rule is visible in the right-hand pane under Rules, there are a number of options available to you.
- To disable a rule click the slider across beside the rule name.
- To copy a rule, click on the Duplicate button beside the rule name.
- To delete a rule, click on the Bin/Trash button .
- To view a rule, click on the rule name to open the Edit rule dialog box.
What’s next
To find out more about other Table rules go to Table rules.
To find out more about other rules go to Rules.