Add table row
Introduction
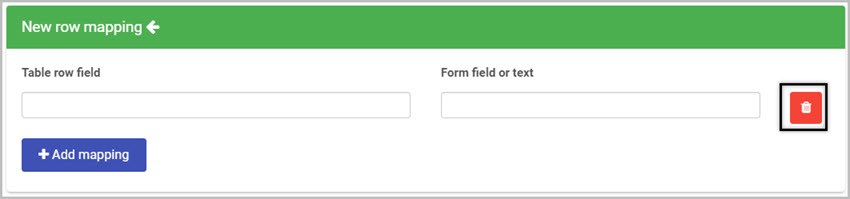
The Add table row rule allows you to add rows within a specified table. You can set values for each field within the newly created row by mapping values into them. For assigning values to each field in a row, you can use manually typed text or use other fields from your process. By default you need to give a value to a field in the newly created row, but can also add rows with no values. You can do that by clicking on the Bin/Trash icon  in the New row mapping as shown in the image below:
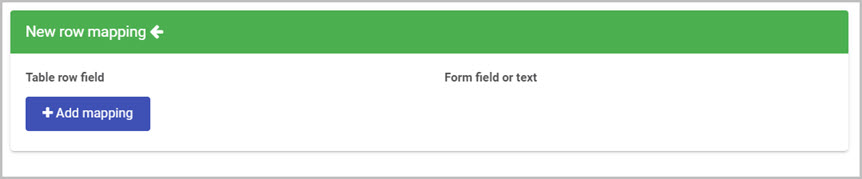
This will delete the mapping fields and allow you to add the rule without assigning values to a field in the new row. The new row mapping should look as follows:
When to use
You can use this rule if you want more dynamic and more automated tables. By removing the original add row button from the table and adding a new button with the Add table row rule attached, you can map specific row fields to automatically appear with values when adding the rows. Take a look below how to add and use the Add table row rule.
You can add this rule:
- to a field
- to a form
- to a process (the rule will run on load)
How to get started
-
Click on an existing process by going to Administration > Designer and decide which form, or field you will apply the rule to, by clicking on that item so that it is in edit mode so you can see the Edit/pen button, Pen button
 .
. -
Click on Add a rule > Table > Add table row.
-
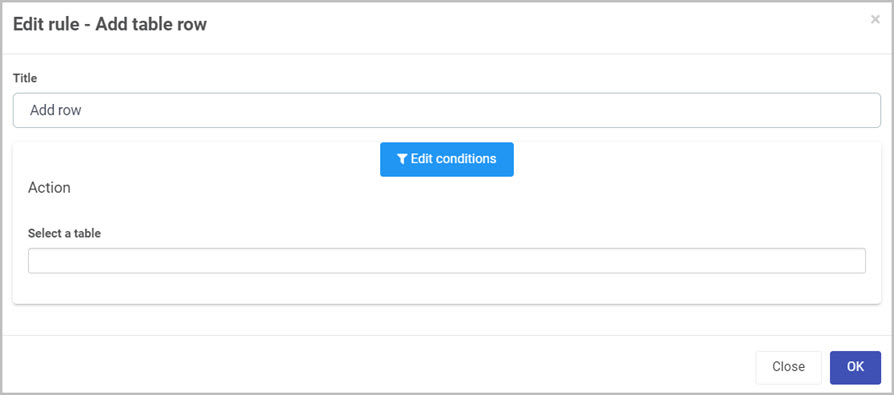
In the Edit rule - Add table row dialog box, give the rule a title in the Title field.
-
If you want to add conditions for the rule, click on the Edit conditions button
 see Conditions for more details.
 -
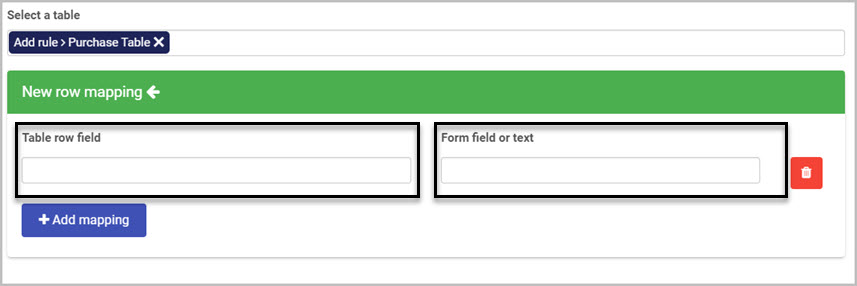
In the Select a table option, select the table you want to add a new row to. New mapping options are presented when you select a table.
-
In the New row mapping you have the option to assign values to newly created rows and the fields within it.
-
Table row field - allows you to select a field from the row which you want to map a value to.
-
Form field or text - you can select a field within your form or type in text manually to represent the value you want your row field to contain.
-
Add mapping - you can choose to assign values to multiple row in your row by clicking on Add mapping button. You can also remove fields by clicking on the Bin/Trash icon
. To add a row without any values, delete all mapping fields as shown below.
-
-
When you are finished editing the dialog box, click on OK or click on Close at any time to exit the dialog box.
Editing, deleting or duplicating rules
When you have clicked on an existing rule, and the rule is visible in the right-hand pane under Rules, there are a number of options available to you.
- To disable a rule click the slider across beside the rule name.
- To copy a rule, click on the Duplicate button
 beside the rule name.
 - To delete a rule, click on the Bin/Trash button .
- To view a rule, click on the rule name to open the Edit rule dialog box.
What’s next 
To find out more about other Table rules go to Table rules.
To find out more about other rules go to Rules.
Feedback
Was this page helpful?
Glad to hear it! Please tell us how we can improve.
Sorry to hear that. Please tell us how we can improve.