Export table as CSV
Introduction
The Export CSV rule allows you export a specified table from within your process into a CSV (Comma Separated Values) file. In the edit rule dialog box you can format how each value is separated and which columns to include and exclude when exporting. Keep in mind when exporting a table into a CSV format, it will export data for the following field types:
- Text box
- Number
- Date
Any other field types will be ignored, for example all control types from within Layout and Actions will be ignored.
When to use
You can use this rule when you want to open the table with a notepad or excel. This rule is also useful when you want to share a table with other users, you can do that by exporting the table into a File field and attaching the file into an email using the Send email rule. To learn more about attaching a file into an email go to Attachments.
You can add this rule:
- to a field
- to a form
- to a process (the rule will run on load)
Before you get started
For this rule to work there are a couple of prerequisites needed inside of your process:
- Table - needed to let the rule know which table will be used to export into the CSV file, for more detail on how to add a table go to Table control.
- File - needed as a container to hold your exported CSV file. When the table is exported into this file field, you can downloaded by clicking on the file name. For more detail on how to add a file field go to File upload control.
How to get started
-
Click on an existing process by going to Administration > Designer and decide which form, or field you will apply the rule to, by clicking on that item so that it is in edit mode so you can see the Edit/pen button, Pen button
 .
. -
Click on Add a rule > Table > Export CSV.
-
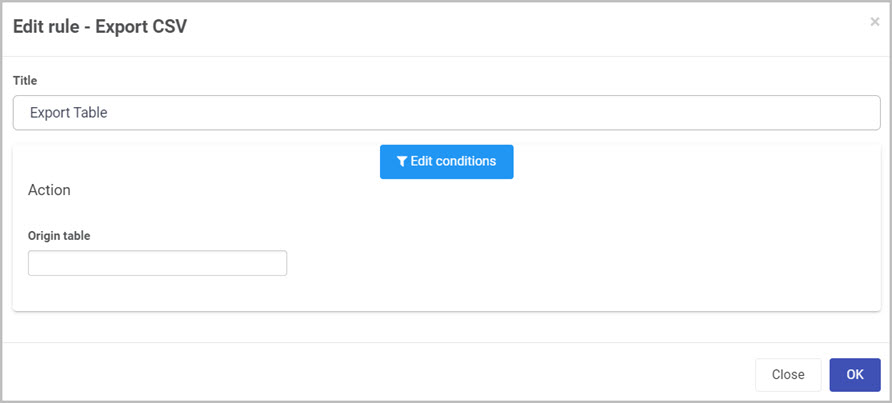
In the Edit rule - Export CSV dialog box, give the rule a title in the Title field.
-
If you want to add conditions for the rule, click on the Edit conditions button
 see Conditions for more details. It is a good idea to add condition to this rule to prevent exporting incomplete tables.
 -
Under the Action section fill out the following:
-
Origin table - field that allows you to select the table you want to target when exporting into a CSV file. When selecting a table, new options appear:
-
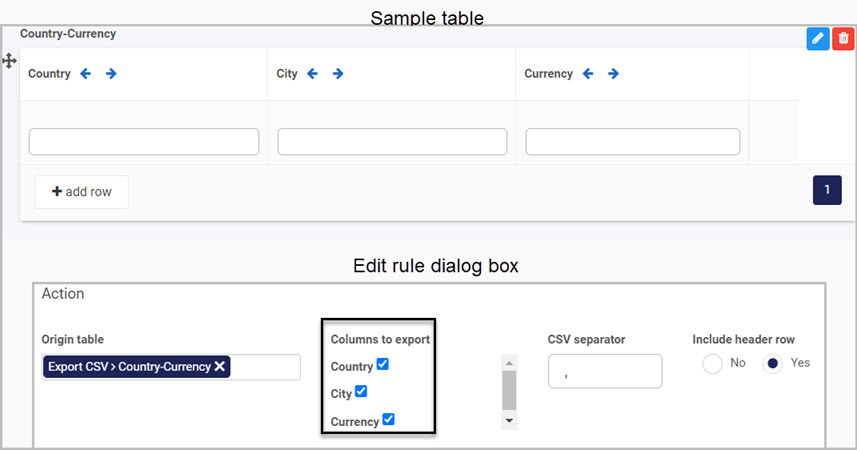
Columns to export - this is a checklist allowing you to select or deselect columns from a table that you want to keep or dismiss from exporting into the CSV file. These fields will correspond to field names given in your table, see below image for an example.
Table with three columns will correspond to Columns to export option in the export CSV edit rule dialog box.
-
CSV separator - the default separator is a comma
,but you can set it to any character, number or symbol you want. Keep in mind that the separator fields separates each column of a row. For example you can have a file that looks as follows when setting this field with a semi-colon;as shown with Notepad below: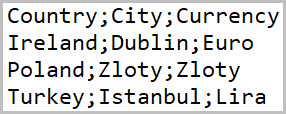
Keep in mind when exporting a table using a separator other than a comma
,and open it in Excel, the data will not be formatted correctly within Excel as it recognises columns when only separated by commas,for example the above file is opened with Notepad while the image below shows the same exported file opened with Excel: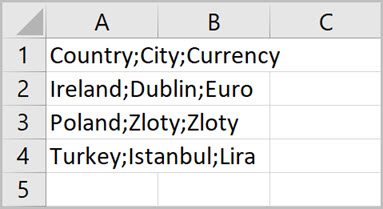
-
Include header row - radio button asking whether to include the header row meaning that the column title will be included or not.
-
Destination file field - field specifying the container which hold the csv file of the exported table. When the CSV file is present in the file field, the name of the file will be the same as the title of the table specified to export. For example if the title of a table is Countries, the file will be called Countrie.csv. You can download the file by clicking on the file name.
-
-
When you are finished editing the dialog box, click on OK or click on Close at any time to exit the dialog box.
Editing, deleting or duplicating rules
When you have clicked on an existing rule, and the rule is visible in the right-hand pane under Rules, there are a number of options available to you.
- To disable a rule click the slider across beside the rule name.
- To copy a rule, click on the Duplicate button
 beside the rule name.
 - To delete a rule, click on the Bin/Trash button
 .
. - To view a rule, click on the rule name to open the Edit rule dialog box.
What’s next 
To find out more about other Table rules go to Table rules.
To find out more about other rules go to Rules.
Feedback
Was this page helpful?
Glad to hear it! Please tell us how we can improve.
Sorry to hear that. Please tell us how we can improve.