Sort table
Introduction
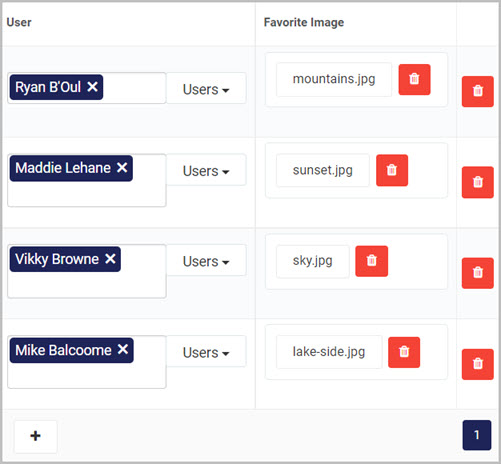
The Sort table rule loops through a table allowing you to sort data in an ascending or descending manner. In the rule options, you can select which column of the table to sort by. The column you select can be any of the Control input fields, the sorting algorithm takes the numerical or text value of each field and sorts it accordingly. For example if there is a User picker column in the table like shown below:
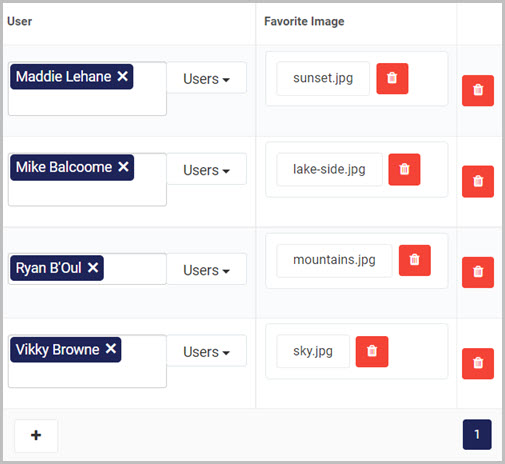
The sorting algorithm will use the text value or in this case the name of each user and sort it in an alphabetical order as the order is set to ascending. Take note that the Favorite Image column has also changes the order to the matching user as the sorting rule targets the whole row, not just the column. The result of the sort is as follows:
When to use
You can use this rule when you want to sort a table in an ascending or descending manner. The rule allows you to select the column by which you want to sort it, a field which identifies that column will make your table dynamic and very versatile. For example having a List field with options for all columns in your table.
You can add this rule:
- to a field
- to a form
- to a process (the rule will run on load)
Before you get started
For this rule to work you need to have one or more tables in your process. This will allow you to select a table that you want to be sorted. To learn how to add a table to your process go to Table control.
How to get started
-
Click on an existing process by going to Administration > Designer and decide which form, or field you will apply the rule to, by clicking on that item so that it is in edit mode so you can see the Edit/pen button, Pen button
 .
. -
Click on Add a rule > Table > Sort table.
-
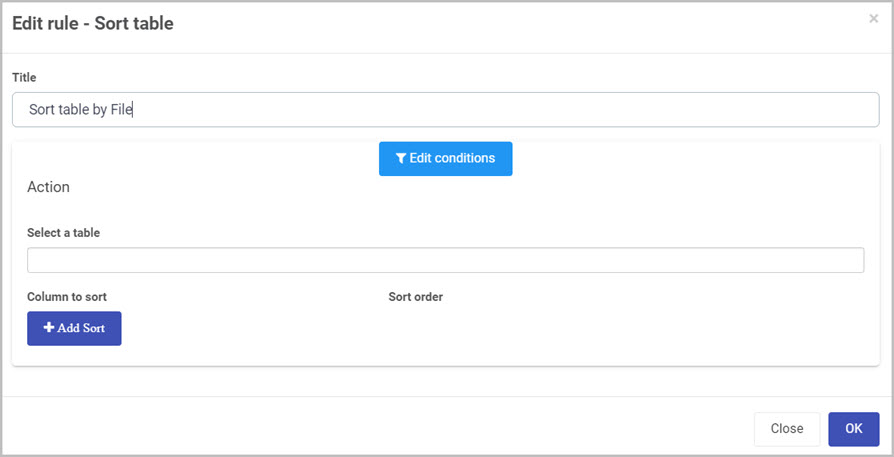
In the Edit rule - Sort table dialog box, give the rule a title in the Title field.
-
If you want to add conditions for the rule, click on the Edit conditions button
 see Conditions for more details.
 -
Under the Action section fill out the following:
-
Select a table - select the table you wish target when sorting values in. This table needs to be pre-created before adding this rule. If no table is selected in this field, an error message will show.
-
Column to sort - allows you to select a column within your table you wish to sort by.
-
Sort order - radio button selection of the sorting order:
-
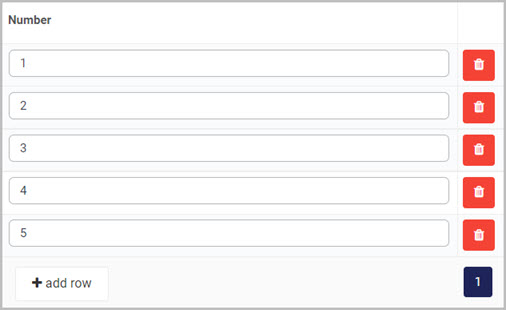
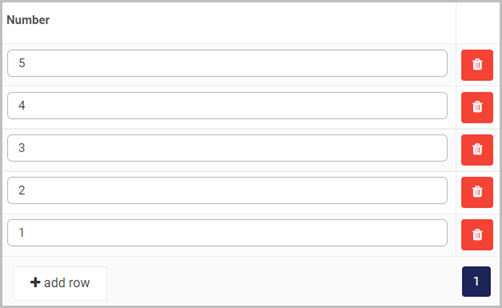
Asc - Ascending order. For example sorting number in an ascending order will look as follows:
-
Desc - Descending order. For example sorting number in an descending order will look as follows:
-
-
Add Sort - you can choose to set multiple columns to sort your table by clicking on Add Sort button. You can also remove fields by clicking on the Bin/Trash icon
 .
.
-
-
When you are finished editing the dialog box, click on OK or click on Close at any time to exit the dialog box.
Editing, deleting or duplicating rules
When you have clicked on an existing rule, and the rule is visible in the right-hand pane under Rules, there are a number of options available to you.
- To disable a rule click the slider across beside the rule name.
- To copy a rule, click on the Duplicate button
 beside the rule name.
 - To delete a rule, click on the Bin/Trash button .
- To view a rule, click on the rule name to open the Edit rule dialog box.
What’s next 
To find out more about other Table rules go to Table rules.
To find out more about other rules go to Rules.
Feedback
Was this page helpful?
Glad to hear it! Please tell us how we can improve.
Sorry to hear that. Please tell us how we can improve.