Assign form
Introduction
The Assign form rule is used to assign a form to a user or to a group of users, making them the form owners. This means that when a process instance is created, a form owner can edit the form in the process instance, for example a manager who needs to add comments on an appraisal form that has been submitted by an employee.
You can use this rule to override the existing form owners, or to add users or groups to the list of existing form owners. When assigning forms you can choose from:
-
Any user - choose from any user, groups or partners defined in the system
-
Current user - make the current form user, the form owner
-
Defined in a user field - use a selected user/group/partner chosen in a user picker field
-
Form owner(s) - existing form owners as defined in the form configuration
When to use
You can add this rule:
- to a field
- to a form
- to a process (the rule will run on load)
How to get started
To dynamically assign a form to a user:
-
Click on an existing process by going to Administration > Designer and decide which form, or field you will apply the rule to, by clicking on that item so that it is in edit mode so you can see the Edit/pen button, Pen button
 .
. -
Click on Add a rule > Workflow > Assign form.
-
In the Edit rule - Assign form dialog box, give the rule a title in the Title field.
-
If you want to add conditions for the rule, click on the Edit conditions button
 to create conditions for the rule, see Conditions for more details.
 -
Under Action, create one or more actions for the rule by filling out the following:
-
Select form - click on the field and select a form from the process. Click on the Plus/Add button
 to add more forms to assign. If you change your mind and want to delete a form, click on the Bin/Trash button
  .
. -
Assign to - choose from the radio buttons:
- Any user - choose from Users, Groups and/or Partners in the drop-down list. All users and groups must be predefined in the system, see Users and Groups for more details. Partners must also be predefined within the Invite partners section under Administration.
- Current user - make the current user of the form, whoever is submitting or saving information, as the person that the form(s) is/are assigned to.
- Defined in a user field - choose a user picker field from the process, where the selected users, groups or partners will have the forms assigned to them.
- Form owner(s) - selecting this option means that the form owner(s) defined during form creation/editing will have the form(s) assigned to them, see Form owners for more details on what form ownership is and how to create form owners.
-
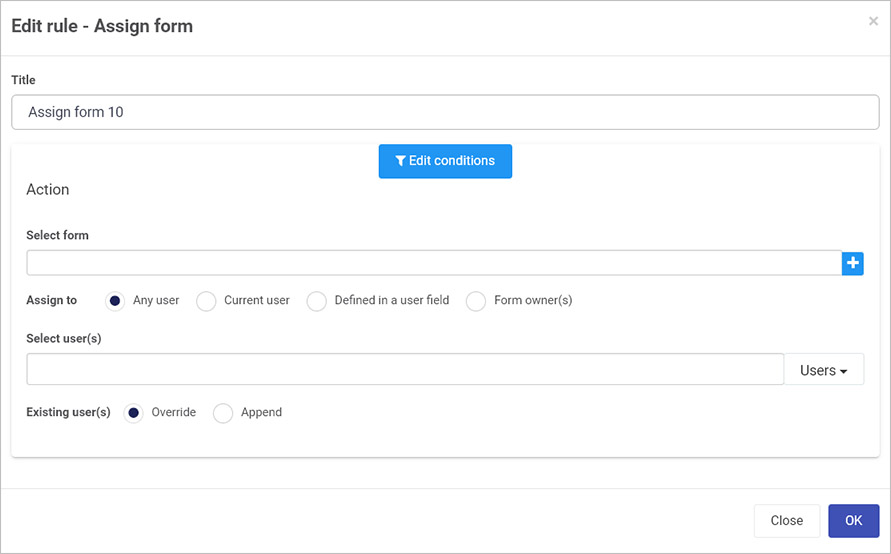
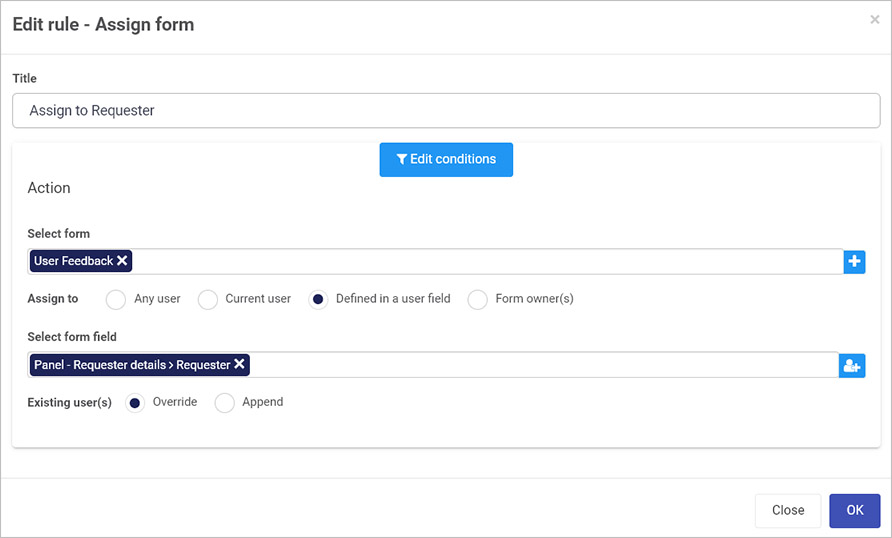
Depending on the option chosen for Assign to, different fields will display. For example if Any user is chosen, then a Select user(s) field appears as shown in the image above. If Defined in a user field or Form owner(s) is chosen then a Select form field appears prompting you to select a user picker field for the former, and a form with form owners for the latter. For example, in the image below a user from a field called Requester will become the form owner of a form called User Feedback.
-
Existing user(s) - choose from:
- Override - this means that this rule will override form ownership, making those referenced in the Edit rule dialog box, the form owners.
- Append - this means that for a current list of form owners, for example those defined during form creation, that list will be appended with any users referenced in the Edit rule dialog box.
-
-
When you are finished editing the dialog box, click on OK or click on Close at any time to exit the dialog box.
-
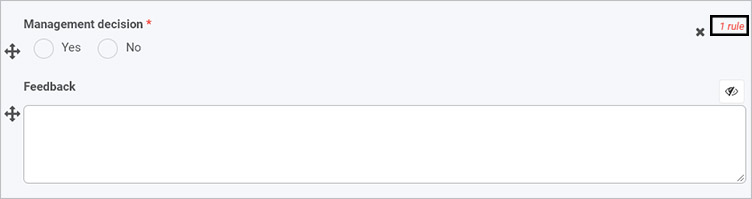
If the rule is attached to field within a form, a notification will appear within the form design, for example the field Management decision as shown in the image below.
-
When you click on the field or form that has the rule attached, the rule will appear in the right-hand pane under Rules.
The next section will cover how to use the buttons visible in the right-hand pane to manipulate the rule.
Editing, deleting or duplicating rules
When you have clicked on an existing rule, and the rule is visible in the right-hand pane under Rules, there are a number of options available to you.
-
To disable a rule, click the slider across beside the rule name.
-
To copy a rule, click on the Duplicate button
 beside the rule name.
 -
To delete a rule, click on the Bin/Trash button
. -
To view a rule, click on the rule name to open the Edit rule dialog box.
User tip 
This rule can be used multiple times in sequence. A typical use case is that the first rule overrides the existing users and the following rule(s) appends users.
To view the default owners for the form, click on the form itself within the process in Designer and in the Edit form dialog box, see named owners in the Default owner(s) field. See Form owners for more details.
Note: a form displays in edit mode if:
- The user is the owner of the form, and
- The selected form is the current form, and
- The form is not submitted or in a completed state, that is being worked on. The Go to form rule can reset the submitted state of a form, see Go to form for details.
What’s next 
To find out more about other workflow rules go to Workflow.
To find out more about other rules go to Rules.
Feedback
Was this page helpful?
Glad to hear it! Please tell us how we can improve.
Sorry to hear that. Please tell us how we can improve.