Go to form
The Go to form rule is used to control how a user moves between forms. As mentioned in Form basics, by default the first form in a process is the current form. Once submitted, control passes to the next form and the user is not allowed to go back to the previous form. The Go to form rule allows you to redirect the user to any form. The user can then navigate back and forth between those forms.
When to use
This rule can only be added to a button.
Warning!
The Close form and Go to form rules cannot be applied to the same button as both rules control which form comes next.
The Save form rule must be used and must appear before the Go to form rule in the list of rules.
How to get started
To dynamically redirect a user to a form:
-
Click on an existing process by going to Administration > Designer and decide which form, or field you will apply the rule to, by clicking on that item so that it is in edit mode so you can see the Edit/pen button, Pen button
 .
. -
Click on Add a rule > Workflow > Go to form.
-
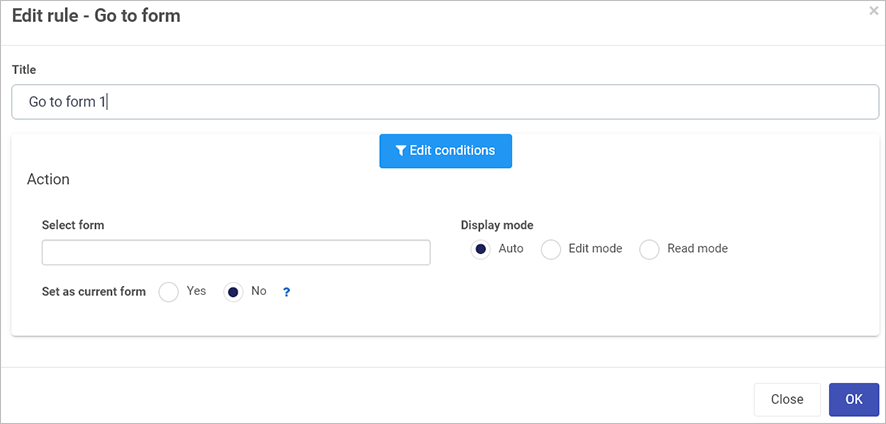
In the Edit rule - Go to form dialog box, give the rule a title in the Title field.
-
If you want to add conditions for the rule, click on the Edit conditions button
 to create conditions for the rule, see Conditions for more details.
 -
Under Action, create one or more actions for the rule by filling out the following:
-
Select form - click on the field and select a form from the process.
-
Display mode - choose from:
-
Auto - the display mode will be either edit or read as determined by the system. If the destination form is the next form in the process workflow, and if the user is an owner of the form, and the form is not completed, then the form will be displayed in edit mode. Otherwise the form will appear in read mode.
-
Edit mode - the user will be able to edit the destination form.
-
Read mode - the user will be able to read, but not edit, the destination form.
-
-
Set as current form - choose from the radio buttons Yes or No. If you choose Yes this will change the process flow, forcing the selected form to become the current, active form.
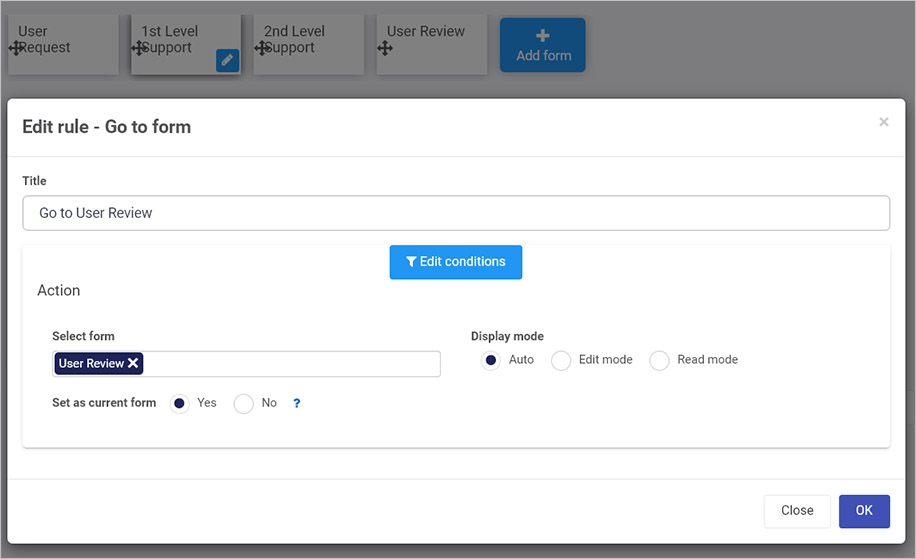
For example in the image above of an IT Support process, there are a number of forms, one of which is User Review. In Kianda Designer, the Go to form rule is assigned to a Resolved button in the 1st Level Support form, meaning that the User Review form becomes the next active form, not the 2nd Level Support form although it is the next form in the process workflow.
-
-
When you are finished editing the dialog box, click on OK or click on Close at any time to exit the dialog box.
-
Remember this rule can only be attached to a button. When you click on the button, the rule will appear in the right-hand pane under Rules.
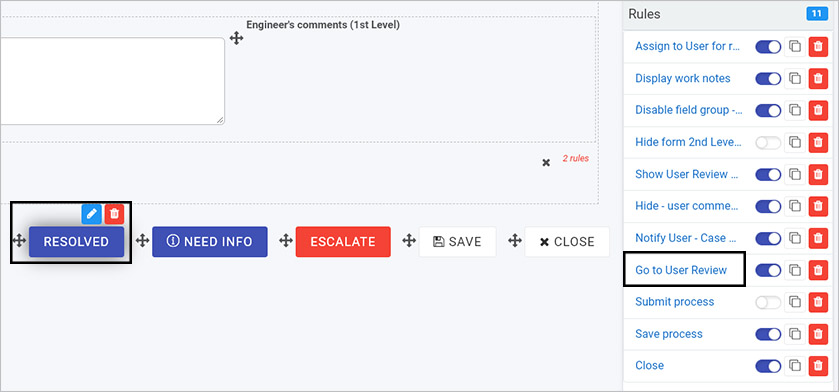
See example above, for a Go to form rule, called ‘Go to User Review’ for a resolved button. Note there are 11 rules attached to that button so the order of execution is important, go to Multiple rules to learn more about how to change rule order.
The next section will cover how to use the buttons visible in the right-hand pane to manipulate the rule.
Editing, deleting or duplicating rules
When you have clicked on an existing rule, and the rule is visible in the right-hand pane under Rules, there are a number of options available to you.
-
To disable a rule, click the slider across beside the rule name.
-
To copy a rule, click on the Duplicate button
 beside the rule name.
 -
To delete a rule, click on the Bin/Trash button
 .
. -
To view a rule, click on the rule name to open the Edit rule dialog box.
What’s next 
To find out more about other workflow rules go to Workflow.
To find out more about other rules go to Rules.
Feedback
Was this page helpful?
Glad to hear it! Please tell us how we can improve.
Sorry to hear that. Please tell us how we can improve.