Single Sign On (SSO)
Single Sign-On (SSO) is an authentication process that allows a user to log in with a single ID to any of several related, yet independent, software systems. Single sign-on allows the user to log in one time and access services without re-entering authentication factors.
On Kianda, Single-Sign-On allows the user to login via Single Sign-On connector. This connector for example could be SharePoint, Office365 or Salesforce.
How to get started
To enable Single-Sign-On, follow the steps below:
-
Login to Kianda with an Administrator account.
-
From the left-hand side pane, click on Administration > Subscription > Details.
-
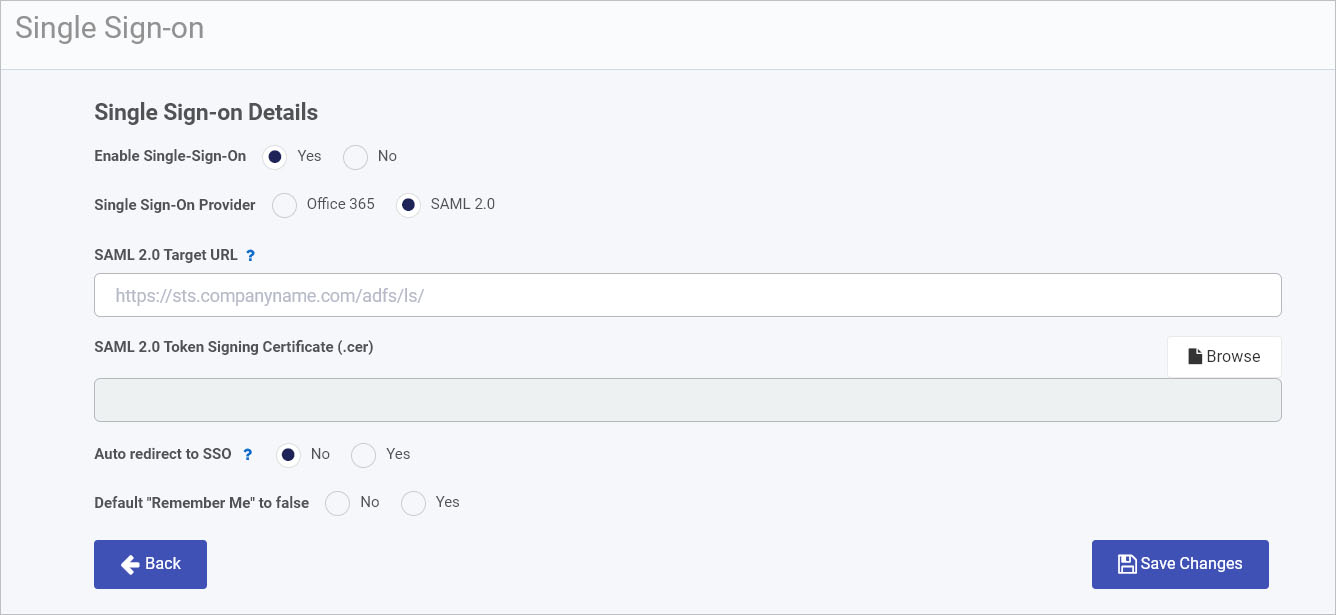
In the Single Sign-On Details page, beside Enable Single Sign-On click on Yes to enable Single Sign-On. If Single-Sign-On is already enabled and if you wish to disable it, click on No and then clear the cache memory and login to Kianda by entering your password first and then the username.
-
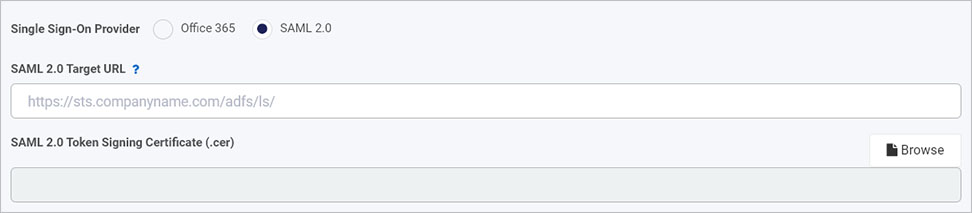
Choose a Single Sign-On Provider by choosing Office 365 or SAML.
Office 365 allows Office enterprise users to Single Sign-On into their Office 365 account with a single username and password and from there to access web and Software as a Service (applications) like Kianda.
Secure Assertion Markup Language (SAML) 2.0 enables individuals to access numerous web applications using one set of login credentials. It works by passing authentication data between an identity provider (IdP) and a service provider such as Kianda.
-
If you choose Office 365, you must choose an Office 365 Connector from a dropdown list. This will show Office 365 datasources already created in the Data sources function under Administration. Go to Office 365 data connector to learn how to create a data source if one doesn’t exist.

-
If you choose SAML 2.0, you must provide the SAML 2.0 Target URL. This is the identify provider (Idp ) URL. You can also provide the SAML 2.0 Token Signing Certificate (.cer) by clicking on Browse to navigate, find and add the cert, a .cer file to the details page.
-
-
For Auto redirect to SSO choose from No or Yes. If you choose Yes then users cannot login with their Kianda username and password directly, and are automatically redirected to the configured SSO provider for authentication.
- However if you have an external set of users, for example contractor who need access to Kianda, you can set a SSO bypass group. You must define a group of users in advance, using the group creation option within the Users function under Administration. From here you can define a group of users that can login using Kianda’s username and password. Use this option for users that are external for the configured SSO provider, so they can go directly to the workspace login page to login.
-
For the option Default “Remember Me” to false choose from No or Yes, to remember the login credentials.
-
When you have completed your edits, click on Save Changes or click on the Back button at any time to exit the page without saving.
SAML assertion attributes
For successful authentication the following attributes must be passed to Kianda. Kianda will primarly validate the NameID and the UPN in second place while authentication a SAML 2.0 response.
- NameID The existance of the NameID property with emailAddress format is required.
- UPN The upn (user principal name) is recommended.
- Emailaddress The emailaddress property is recommended
Feedback
Was this page helpful?
Glad to hear it! Please tell us how we can improve.
Sorry to hear that. Please tell us how we can improve.