Microservice Creation
What is a Microservice
A microservice is a self contained independent service, usually hosted in the cloud, which can integrate with applications through REST APIs. Microservices allow developers to focus on developing a service without worrying about dependencies.
A microservice can be developed using almost any programming language.
Prerequisites
Before you get started, check that the following prerequisites are in place:
- Ability/permissions to create resources with a cloud platform, for example, Google Cloud, AWS or Azure
- Administration role or permissions within an Admin group within Kianda, see Users and Groups for more information
- Visual Studio installed or other text editor for your chosen programming language
Microservice Requirements
Your microservice should implement the following three functions:
It is required that the microservice uses security best practices, to encrypt sensitive data using AES encryption and verify that each request and response is secure using a HMAC signature.
Microservice Development
The following steps for development will use Microsoft Azure cloud as an example, however, other cloud computing platforms with similar features can be used resulting in different naming conventions. The key steps are:
-
Create a serverless Azure function app in Visual Studio by creating a new project, searching for Azure functions and using this as a template to get started. As well as the pre-defined libraries in the template, you must also add the following:
using System.Security.Cryptography; using System.Text; using Newtonsoft.Json.Linq; using System.Collections.Generic; using System.Linq; -
Implement the functions for Test, Metadata and Query. Click on each of the links to read more. The steps highlighted in bold are unique to the specific function, while the other steps are repeated in all three functions.
-
Debug locally and test using a tool such as Postman or download Kianda Cloud Connect.
-
Deploy to Azure.
Test
The Test function ensures that the user is authorized to use the datasource. If they are not authorized then this function can be used to authorize the user and retrieve an access token for any further requests.
The steps involved in creating the test function are as follows:
-
Deserialize the data in the custom connector request - see schema for details and Test sample code.
-
Decrypt the encrypted settings property bag using the shared secret key and the Decrypt function, see Encryption/Decryption sample code for an example.
-
Authorize the user and retrieve bearer token for subsequent requests and save the token to the settings property bag.
-
Add the oauth token to the settings property bag and encrypt using your secret key.
-
Create custom connector response and include success message to indicate test succeeded/failed.
-
Sign the response using the EncryptdatawithHMACSHA256 method and include in the custom connector response, see Encryption/Decryption sample code for an example.
To help you get started, see sample code for the Test function by going to Test sample code.
Metadata
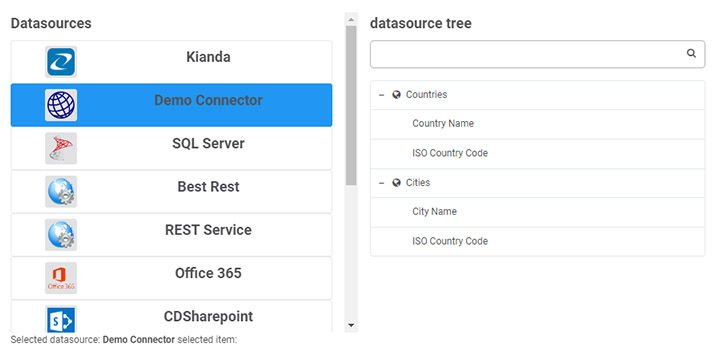
The Metadata function provides the list of available endpoints in the microservice and is called when selecting the datasource in a Kianda process, for example use a particular datasource to populate a List field in a Kianda form.

The steps involved in creating the metadata function are as follows:
-
Deserialize the data in the custom connector request - see schema for details.
-
Decrypt the encrypted settings property bag using the shared secret key and the Decrypt function see Encryption/Decryption sample code for an example.
-
Create a JSON tree structure similar to the one found at Tree schema.
-
Create custom connector response and include success message to indicate success/failure.
-
Create a signature string using the EncryptdatawithHMACSHA256 method and include in the custom connector response, see Encryption/Decryption sample code for an example.
To help you get started, see sample code for the Metadata function by going to Metadata sample code.
Query
The Query function is where the execution of the datasource methods occurs, the metadata function provides the list of available methods.
The steps involved in creating the query function are as follows:
-
Deserialize the data in the custom connector request - see schema for details.
-
Decrypt the encrypted settings property bag using the shared secret key and the Decrypt function - see Encryption/Decryption sample code for an example.
-
Get the query object from the request - see schema for details, and call the function related to the query in the datasource .
-
Create custom connector response and include success message to indicate query succeeded/failed.
-
Create the query result object - see schema for details, and include in the custom connector response.
-
Sign the response using the EncryptdatawithHMACSHA256 method and include in the custom connector response, see Encryption/Decryption sample code for an example.
To help you get started, see sample code for the Query function by going to Query sample code.
Security
AES256
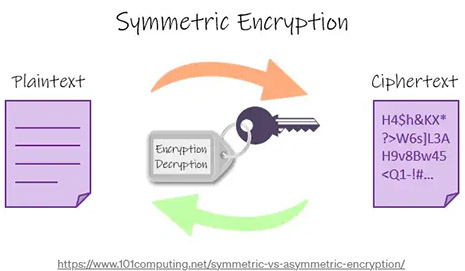
Advanced Encryption Standard (AES) is the technique used to encrypt sensitive data. This is a symmetric encryption technique, which means the same key is used to encrypt and decrypt the data, it is also a 2-way encryption algorithm.

HMAC
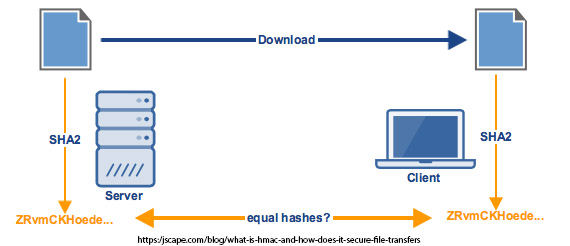
Hash based Message Authentication Code (HMAC) is used to ensure query responses are coming from the correct end point. HMAC is also an encryption algorithm but unlike AES it’s one-way encryption, meaning it isn’t decrypted on the other side. It is used for verification, for example if we encrypt a secret key using HMAC with a request id and then do the same in the response, we can verify that we have got the response back from the correct endpoint and know that it has not been tampered with because both hashes will match. The hash used is SHA256.
With AES we are encrypting and decrypting data and this method is fast and secure for large data, while with HMAC we use it to simultaneously verify both the data integrity and authenticity of a message.

Schemas required for Custom Connectors
Custom Connector Request
	public class CustomConnectorRequest
        {
            public string subscriptionId { get; set; }
            public string userId { get; set; }
            public string requestId { get; set; }
            public string action { get; set; }
            public string encryptedSettingsPropertyBag { get; set; }
        	public byte[] iv { get; set; }
            public Query query { get; set; }
        }
Request Query Object
   public class Query {
        public string id { get; set; }
        public string action { get; set; }
        public JObject info { get; set; }
        public string orderBy { get; set; }
        public bool orderAscending { get; set; }
        public string paging { get; set; }
        public int rowLimit { get; set; }
        public List<string> fields { get; set; }
        public Dictionary<string, object> mappings { get; set; }
        public string filter { get; set; }
        public string filterBy { get; set; }
        public string filterMode { get; set; }
        public string signature { get; set; }

    }
Custom Connector Response
public class CustomConnectorResponse
    {
        public string requestId { get; set; }
        public string signature { get; set; }
        public string encryptedSettingsPropertyBag { get; set; }
    	public byte[] iv { get; set; }
        public QueryResult queryResult { get; set; }
    }
Response QueryResult
public class QueryResult
        {
            public bool success { get; set; }
            public string message { get; set; }
            public JObject data { set; get; }
            public List<JObject> items { get; set; }
            public string resultCount { get; set; }
            public string signature { get; set; }
        }
Retrieving URLs for Custom Connector settings
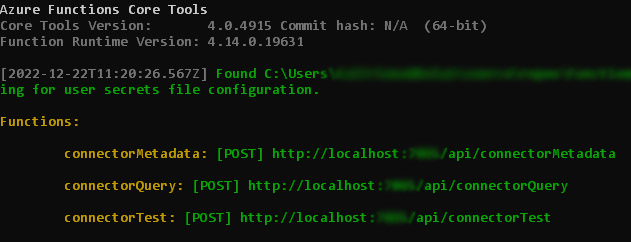
When you have created the Test, Metadata and Query functions and your microservice is running, you should receive an output similar to the following shown using Azure functions:

These URLs will be used in the Connector Settings tab when creating the Custom Connector.
What’s next 
Once your Microservice is deployed, you are ready to start creating a custom connector go to steps to create a custom connector.