Page (Dashboard) Widget Development
Kianda provides several predefined dashboard widgets that make it easy to visualize process performance metrics at a glance. These widgets give you the building blocks you need to create informative, interactive dashboards that help end users understand the state of their processes in real-time. The existing 7 predefined widgets include:
While these widgets cover many common needs, there may be times when you want a custom dashboard element—something that fetches specific data, applies unique formatting, or interacts with the user in a specialized way. Kianda’s low-code platform lets you create custom page widgets using open web technologies you already know, like CSS, JavaScript, and Handlebars. By leveraging these familiar tools, you can display large datasets, integrate external APIs, or design dynamic user interactions with minimal friction.
Why Create Custom Dashboard Widgets?
Predefined dashboard widgets provide a quick, no-code way to visualize process data. However, your organization might have unique reporting requirements or require more complex interactions that are not fully addressed by the standard widgets. Custom dashboard widgets allow you to:
- Display large or complex datasets in a tailored format that meets your business needs.
- Integrate with external services or APIs, pulling in real-time data for end users.
- Enhance user interaction with custom buttons, filters, or drill-down features.
- Maintain a consistent brand experience, applying custom CSS or layouts to match your company’s style.
In short, custom dashboard widgets give you full control over the data presented to end users, enabling you to deliver clear insights and improve decision-making processes.
Getting Started with Custom Page Widgets
To develop custom dashboard widgets, you need the Administrator or Developer role. For details on roles and permissions, see Users & Groups.
Once you have the appropriate privileges:
-
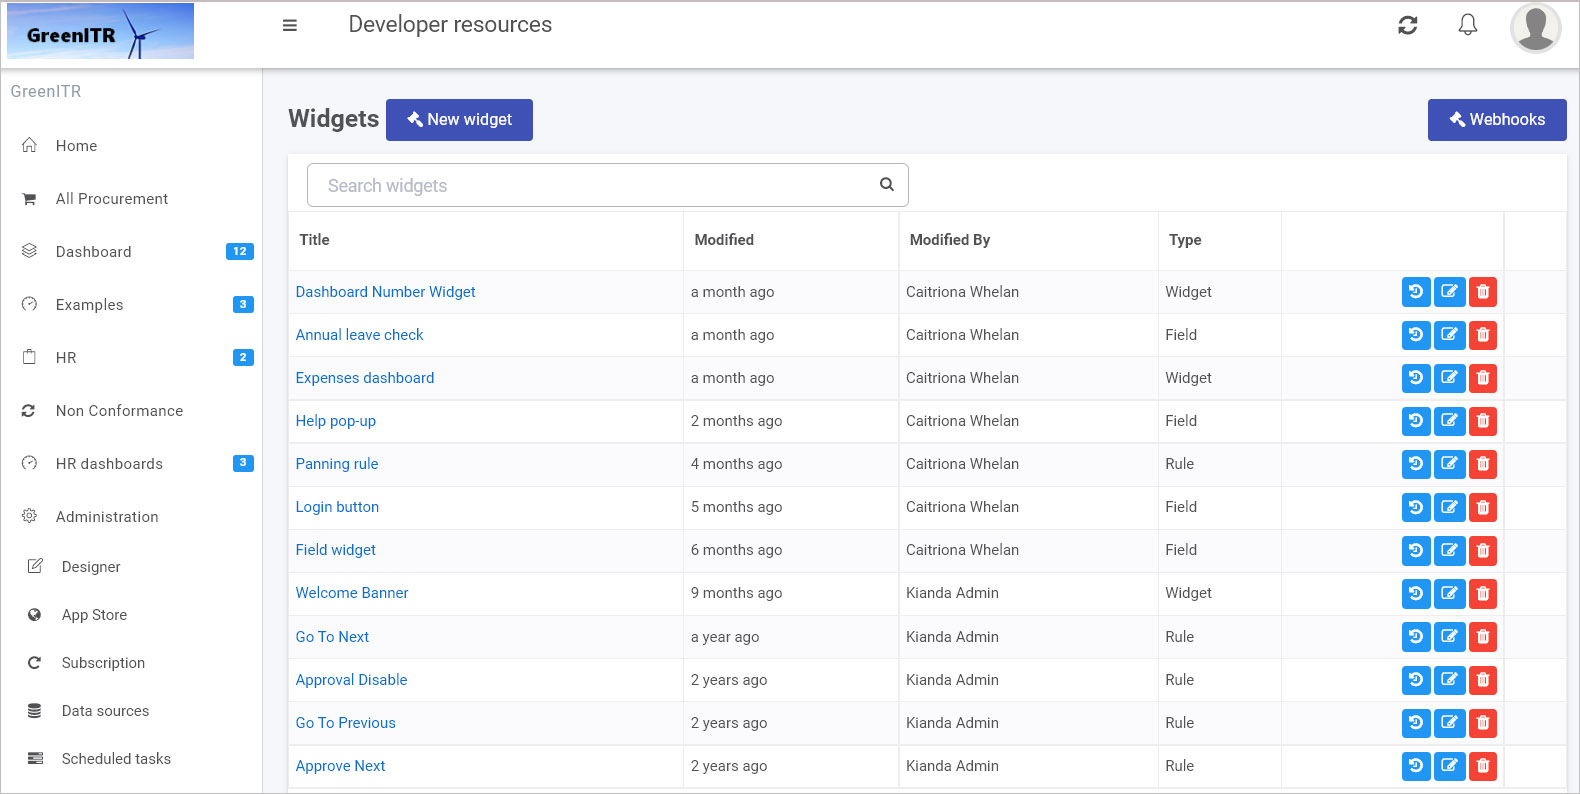
Access the Developer Resources: In the Kianda main menu, go to Administration > Developer. This page shows all widgets—field, rule, dashboard, and data connectors—in one place.

-
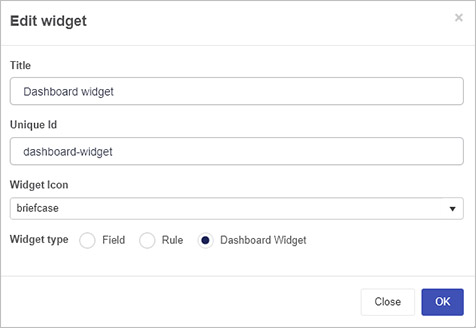
Create a New Widget: Click New widget to open the widget creation dialog. Enter:
- Title: A clear name that describes what your widget does.
- Unique Id: Automatically generated from the title but can be adjusted.
- Widget Icon: Choose an icon that best represents your widget.
- Widget Type: Select Widget for a dashboard widget.

-
Define the Widget UI and Code: After saving, you’ll see two tabs for your widget:
- Widget UI (Handlebars template): This defines the widget’s appearance and how users interact with it. You can create settings views for configuration and runtime views for end-user interaction. For example, you might add text inputs, dropdowns, or buttons that trigger custom actions.
- Widget Code (JavaScript): This is where you implement your logic. You can fetch data from external sources, manipulate the DOM, handle user events, and create dynamic content that updates in real time.
Example Dashboard Widget UI:
{{#if (eq displayMode "settings")}}
  <!-- Configuration view: Let users set up the widget -->
  <div class="form-group">
    <label class="control-label">Your Message</label>
    {{input type="text" value=widget.settings.message class="form-control"}}
  </div>
{{else}}
  <!-- Runtime view: Display data to end users -->
  <div class="col-sm-12">
    <h2>Welcome {{widget.settings.message}}</h2>
    <button class="btn btn-sm btn-primary" {{action "customAction1"}}>Action 1</button>
    <button class="btn btn-sm btn-default" {{action "customAction2"}}>Action 2</button>
  </div>
{{/if}}
Example Dashboard Widget Code:
{
  actions: {
    customAction1: function() {
      // Implement logic for Action 1
    },
    customAction2: function() {
      // Implement logic for Action 2
    }
  }
}
In this example, the configuration view (displayMode “settings”) lets an administrator set a message. The runtime view uses that message and adds interactive buttons. In your own widget, you could replace these controls with a data visualization, a list of records, or any other output that suits your requirements.
-
Manage Your Widgets: Back in the Developer resources view, you can:
- Edit: Update the widget’s UI or code.
- Delete: Remove widgets you no longer need.
- Version Control: Restore previous versions if you make changes you want to roll back.
-
Use the Widget in Your Dashboard: Once saved, the custom widget appears in your dashboard pages. Administrators can:
- Go to Home and Create a new page or edit an existing dashboard page.
- Click Edit current page to reveal the widget menu.
- Select your custom widget from the dropdown menu.

With the widget now placed on the page, adjust settings, connect it to data sources, and customize the display. Check Edit dashboard page settings for more details on configuring your page.
Unlock New Insights Through Custom Dashboards
By building custom dashboard widgets using familiar open web technologies, you can surface the exact data and interactions your users need. Whether you’re integrating an external reporting service, displaying aggregated metrics from multiple processes, or providing an interactive interface for exploring large datasets, custom widgets put you in the driver’s seat.
Kianda’s low-code approach blends the speed and ease of drag-and-drop configuration with the flexibility and power of full web development. As a result, you can quickly create dashboards that go beyond static charts and tables—delivering dynamic, user-friendly interfaces that help your team make better, data-driven decisions.
Embrace Kianda’s flexibility, leverage your CSS and JavaScript expertise, and start building custom dashboard widgets that enhance your organization’s insights and performance. If you need more guidance, explore the provided links, refer to the Ember inspector for debugging, and use your existing web development skills to make the most out of Kianda’s low-code platform.