Rule widget development
Kianda provides 60 predefined rules organized into various categories—including Workflow, Communications, and Data—so you can easily automate key tasks in your forms and processes. These out-of-the-box rules cover a wide range of scenarios, from sending notifications to manipulating data, managing files, interacting with SharePoint, and more. To learn about each category, simply follow the relevant links above.
When you need functionality beyond what these predefined rules offer, Kianda’s low-code platform lets you build your own custom rule widgets. Because Kianda is built on open web technologies (CSS, JavaScript, and templating with Handlebars), you can apply your existing web development knowledge to create powerful, tailor-made logic. This ensures that you’re never limited by predefined options—you can innovate and adapt to your organization’s evolving business needs, all while working in a familiar development environment.
Why Create Custom Rule Widgets?
While predefined rules handle many common use cases, your organization may have unique requirements that aren’t covered. For example, you may need a custom rule that:
- Integrates with a specialized external API,
- Applies advanced transformations to your form data before submission,
- Enforces specific business policies that evolve over time, or
- Dynamically updates fields based on complex conditions that fall outside existing patterns.
Custom rule widgets give you direct control over the logic that drives your automated processes. You’ll use standard web technologies—HTML, CSS, and JavaScript—within the Kianda platform, making it easy to write, maintain, and scale your custom logic as requirements change.
How to Get Started
To build custom rule widgets, you need an Administrator or Developer role. If you’re unsure about your role, check out Users & Groups for details.
Once you have the right permissions:
-
Access the Developer Resources: Go to Administration > Developer in the left-hand menu. This page lists all existing widgets, including field, rule, dashboard, and data connector widgets.
-
Create a New Rule Widget: Click New widget to open the widget creation dialog. Fill in the required details:
- Title: Give your widget a clear, descriptive name.
- Unique Id: Auto-generated from the title, but you can adjust if needed.
- Widget Icon: Select an icon that represents your widget’s purpose.
- Widget Type: Choose Rule for a custom rule widget.
Click OK to confirm. Your new widget will now appear in the Developer resources list.
-
Widget UI and Code: Open your new widget to see two tabs:
- Widget UI (Handlebars template): Defines the widget’s configuration UI within Kianda Designer. Here, you can add form fields, dropdowns, and other elements to help process designers configure the rule’s settings. Use Handlebars to dynamically bind data and handle user input.
- Widget Code (JavaScript): Implements the logic executed when the rule runs. Here, you’ll use JavaScript to manipulate process data, call APIs, set field values, or perform calculations.
By separating UI from logic, Kianda keeps your code organized and easy to maintain.
Example: Custom Warning Message Rule
Below is an example that demonstrates how to create a simple custom rule widget. This widget allows a designer to set a warning message and choose a target field where the message will appear when the rule executes.
Rule Widget UI (Handlebars)
<div class="form-group">
  <label class="control-label">Warning message to display</label>
  {{input type="text" required=true class="form-control" value=rule.settings.message}}
</div>
<div class="form-group">
  <label class="control-label">Field to display warning message in</label>
  {{field-picker process=process required=true allowText=false value=field.settings.field}}
</div>
In this template, {{input}} and {{field-picker}} components let the process designer specify a message and select the field in the form that will display the warning. This empowers business users (or other designers) to configure the rule without writing code.
Rule Widget Code (JavaScript)
{
  execute: function() {
    var rule = this.get('rule');
    var process = this.get('process');
    var field = process.findFieldByName(rule.get("settings.field.name"));
    var message = rule.get("settings.message");

    if(field) {
      process.setField(field, message);
    }
  }
}
Here, the execute function is the core logic that runs whenever the rule is triggered in a workflow. It retrieves the configured field and message, then updates that field’s value. This logic is concise, relying on standard JavaScript patterns and Kianda’s built-in APIs to interact with process data.
Managing Your Custom Rule Widgets
After creating and saving your custom rule widget:
-
Edit or Delete: From the Developer resources page, you can edit the widget’s UI or code at any time. If a widget is no longer needed, you can delete it.
-
Version History: Restore older versions of your widget if necessary, ensuring you can roll back changes without losing previous work.
-
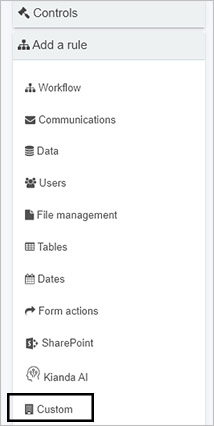
Use in Designer: Once finalized, your custom rule widget appears under Rules > Custom when adding a rule in Kianda Designer. This makes your new logic available to any process designer in your organization.

Unlocking New Possibilities
By creating your own rule widgets, you tailor Kianda’s automation capabilities to match your exact needs. Combine your JavaScript skills, CSS styling, and open web development experience with Kianda’s low-code environment to build a powerful library of custom logic. Over time, you’ll develop a suite of custom rules that streamline workflows, enforce business policies, and integrate with other systems—all while leveraging familiar standards and straightforward developer tools.
Embrace Kianda’s open, flexible architecture to quickly deliver tailored business process automation. If you have any questions or need further guidance, explore the platform’s documentation or inspect existing widgets with the Ember inspector. With Kianda, experienced web developers can easily extend the platform’s rule system, enabling dynamic and evolving business processes with minimal friction.