This is the multi-page printable view of this section. Click here to print.

Return to the regular view of this page.

Task Automation with Kianda

Introduction

Automation in Kianda happens at various level and in various ways, all of which you can control using the click of a button, or configuring a parameter. To help you recognise how automation can happen, we’ve broken it down for you into different sections:

  1. Process level automation
  2. Field level automation

Process level automation

Process level automation, means that new process instances are created automatically without requiring a user action to initiate the process.

This can happen in a number of ways:

Scheduled tasks function

As an administrator you can use Kianda to automate any tasks in few simple steps. Tasks could be something like sending reminder emails, having a background check, action with respect data source or scheduling a sub-process.

Scheduled tasks list

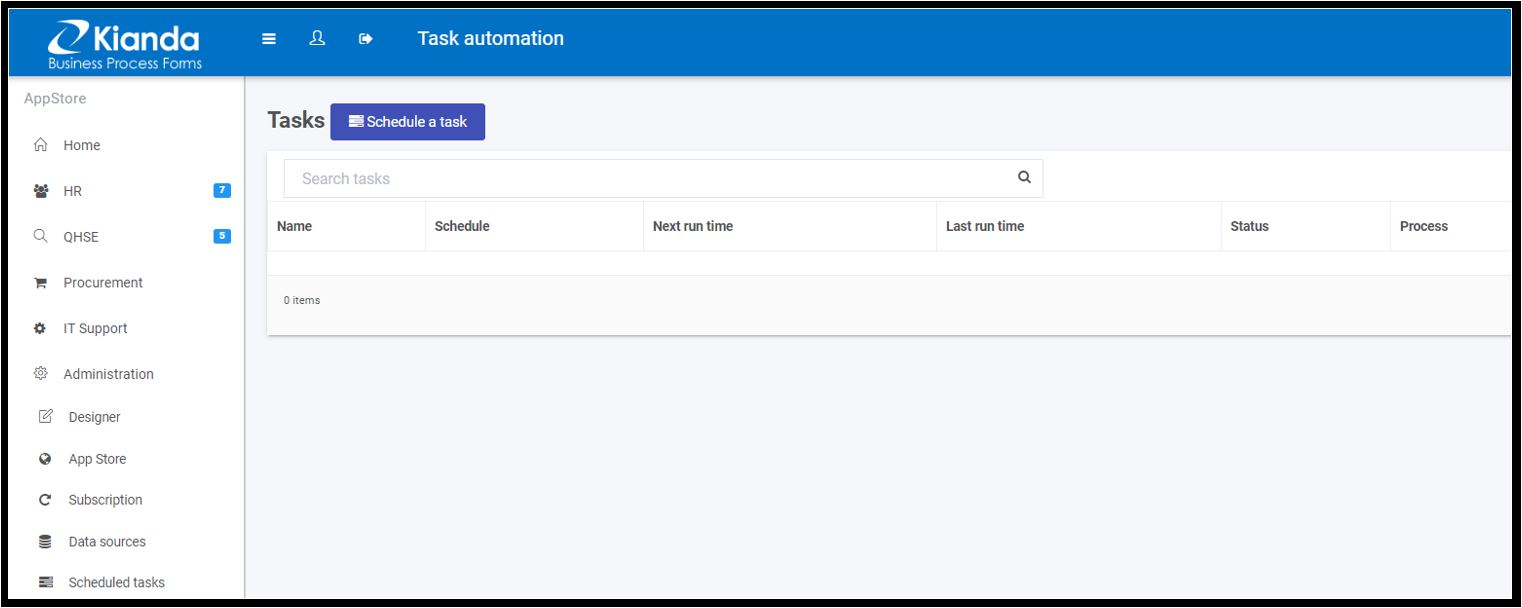
Scheduling a task from the left navigation panel in a few simple steps:

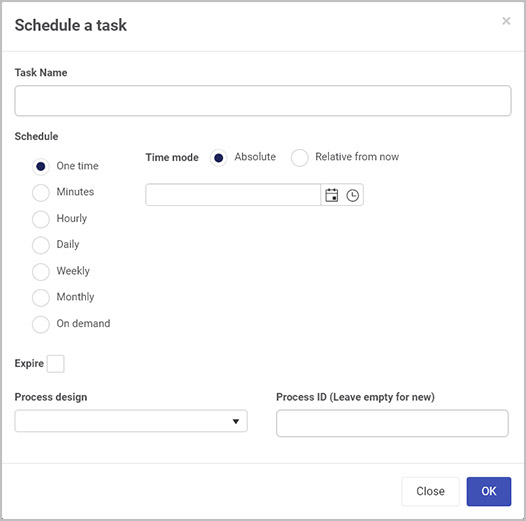
  1. Click on ‘Scheduled tasks’ and click ‘Schedule a task’ to create a new task.

    Scheduled task settings

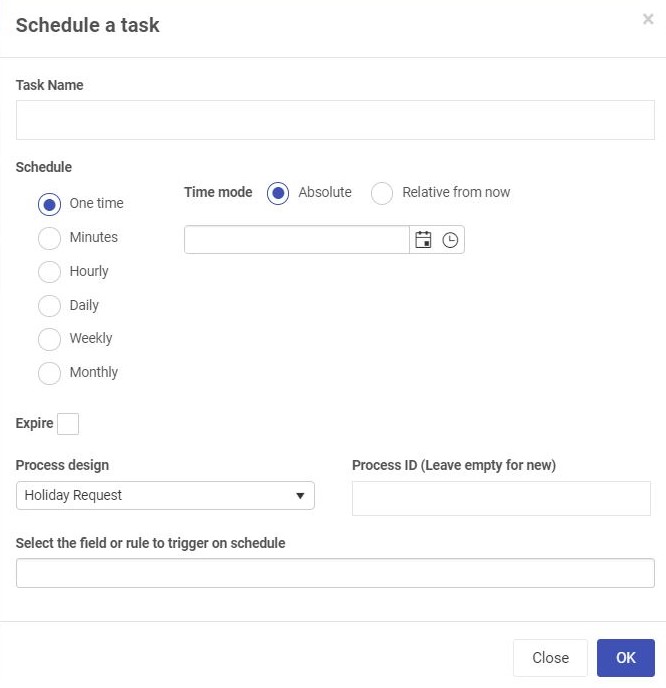
  2. Type in a task name.

  3. Schedule: This field defines when does the schedule run.

  4. Time mode: Choose an Absolute time or define a Relative time from now.

  5. Process design: The process we are looking to automate.

  6. Process ID: If we want to restrict the scheduled task on one particular instance of the process, then we could define the unique process ID of the instance in the Process ID field.

  7. Select the field or rule: Selecting which rule or field to automate.
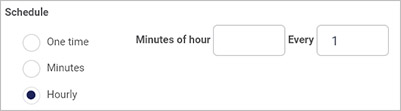
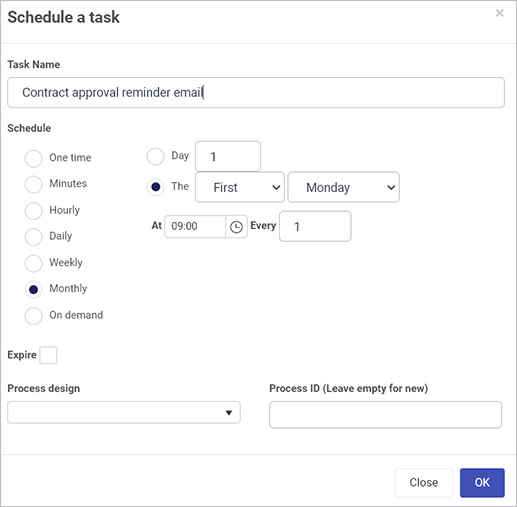
Re-occurrence

The Kianda schedule tasks can be triggered for re-occurrence. The re-occurrence could be by minutes, hours, days, weeks or months. Further, the schedule tasks could be configured easily to run at a specific minute of the hour, weekdays only, specific day of the week or specific day of the month.

1 - Scheduled tasks

The Scheduled tasks function is available to administrators and is found in the left-hand side pane, or on the top right toolbar depending on the chosen orientation, under Administration. The Scheduled tasks function allows you to schedule a task, that could be a process or a rule for example to send reminder emails.

How to get started

To use the Scheduled tasks function:

  1. Click on Administration in the left-hand side pane and then click on Scheduled tasks.

  2. You can view scheduled tasks via this function in the Task automation main tasks view. The current tasks listed is a subset of all tasks, see Step 4 below.

    Scheduled tasks view

    In this main view you can see:

    • the Name of the task
    • the Schedule for example weekly or monthly
    • when the task was last run
    • when the task will next run
    • the status of the task such as ‘Complete’
    • the name of the associated process and process instance where relevant, and
    • who is the administrator of the task/who has created the task.

    The buttons beside each task are:

    • Trigger task manually Trigger task manually - 
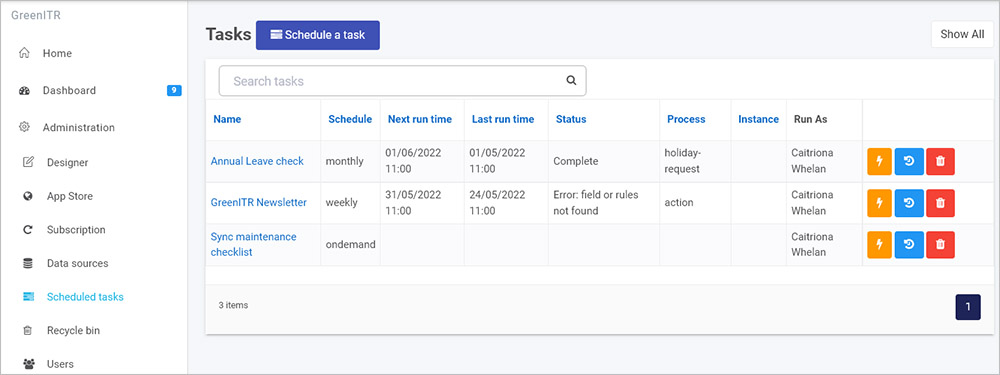
clicking on this button instantly creates a new process instance/record by executing the task or process. This process instance can be viewed in a list widget in a dashboard.
    • Show task history Show task history - when you click on this button, a dialog box opens showing a list of all the past executions of the task, listed by date and time and status, for example if there was an error or if the task completed.
    • Delete task Delete task - to delete a task from the list, click on this button. A popup will appear asking you to confirm if you want to remove the task or not. To continue with the deletion click on OK, otherwise click on Cancel.
  3. Click on the name of a task to see the details of the task.

  4. To see a complete list of scheduled tasks click on Show All Show All button. This list will include all tasks that are running as a result of processes, for example scheduled reminders that are running as a result of rules in a process. Each item listed is a process instance related to a process, for example as shown in the image below. The process instances can be viewed in a list widget in a dashboard.

    Scheduled tasks list

    To see the shorter list again of tasks created via this function, click on Show All again.

Scheduling a task

  1. To schedule a new task, click on the Schedule a task button Schedule a task button.

  2. In the Schedule a task dialog box, select a Task name for the task and then a schedule choosing from One time, or a periodic schedule from: Minutes, Hourly, Daily, Weekly, Monthly or On demand.

    Scheduled tasks view

  3. Depending on which option you choose, different time modes or ways of scheduling the task will be presented:

    • One time - choose from Absolute or Relative from now as shown in the image above. Choosing Absolute means the time starts at the date and time entered into the date and time field, choosing Relative from now means you can choose that the schedule starts in X number of days, hours and mins.

    • Minutes - enter a numeric value into the minutes box

    • Hourly - enter a numeric value into the minutes and Every field, to set a recurring schedule, see image below:

      Hourly schedule option

    • Daily - enter a time in the At field, a numeric value in the Every field, to set a recurring schedule and check the checkbox for Week days only to only schedule the task on weekdays.

    • Weekly - enter a day of the week in the Week day field, a time in the At field, and a numeric value in the Every field.

    • Monthly - enter a numeric value in the Day field to set what day of the month, or choose values to set when the task should happen for example, the First Monday of a month, as shown in the image below. Also select a time in the At field, and a numeric value in the Every field.

      Monthly schedule option

    • On demand - if you choose this option then a Task Webhook URL field will appear. If you click on OK the URL is generated by the system. This will send a POST request to the generated URL to trigger the task on demand. If you add an optional instanceID parameter you can run the task on a specific instance.

  4. For each time mode chosen, you can check the Expire checkbox, and from there set if you want the schedule to end By a particular date and time or After a set number of occurrences.

    Set task expiry

  5. For each time mode chosen, select a process from the Process design dropdown list.

  6. For each time mode chosen, for Process ID leave the field empty if it is a new task or enter the process ID for a given record/process instance.

  7. When you have finished editing the Schedule a task dialog box, click on OK or click on Close at any time to exit the dialog box.

What’s next Idea icon

To read more about how to create processes and forms go to Application Designer.

To find out about help and support, go to Help.