A Field group control is a convenient way to mirror a group of fields that are in another form within your process and reference those fields in your new form, making process design sleeker and more efficient.
For example, in an Education Request Process - where employees can request training in a ‘Training Request’ form and their manager can either approve or reject that request in a ‘Training Approval’ form - we may want to mirror some of the fields from the first form in the process, ‘Training Request’, into the second form ‘Training Approval’. We will keep this example in mind as we learn more about using the Field group control.
How to get started
-
To add a Field group to a form, first open the relevant process - in our case, we will open the Education Request Process.
-
Then select the form within that process that you want to add the field to (so that the Edit Form button
 is visible) - we will select the ‘Training Approval’ form. Go to Create First Process to learn how to create your first process.
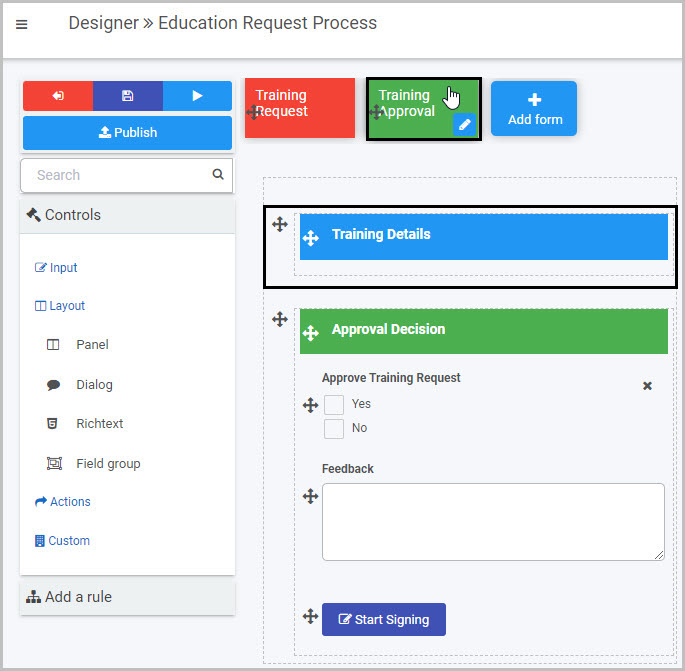
Our Training Approval form contains two Panels - the first Panel currently only contains the Richtext field titled ‘Training Details’, the second Panel contains fields related to the approval decision. Panels are sections within your form - to learn more, go to Panel control. We will use the Field group control to add fields from the ‘Training Request’ form to the first panel.
-
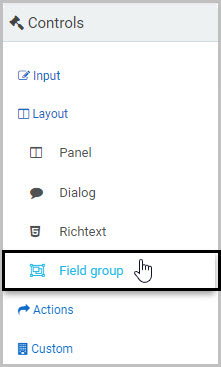
Insert the Field group by clicking on Controls in the left-hand pane to expand the Controls menu, then select Layout to view the range of Layout controls and click on Field group.
-
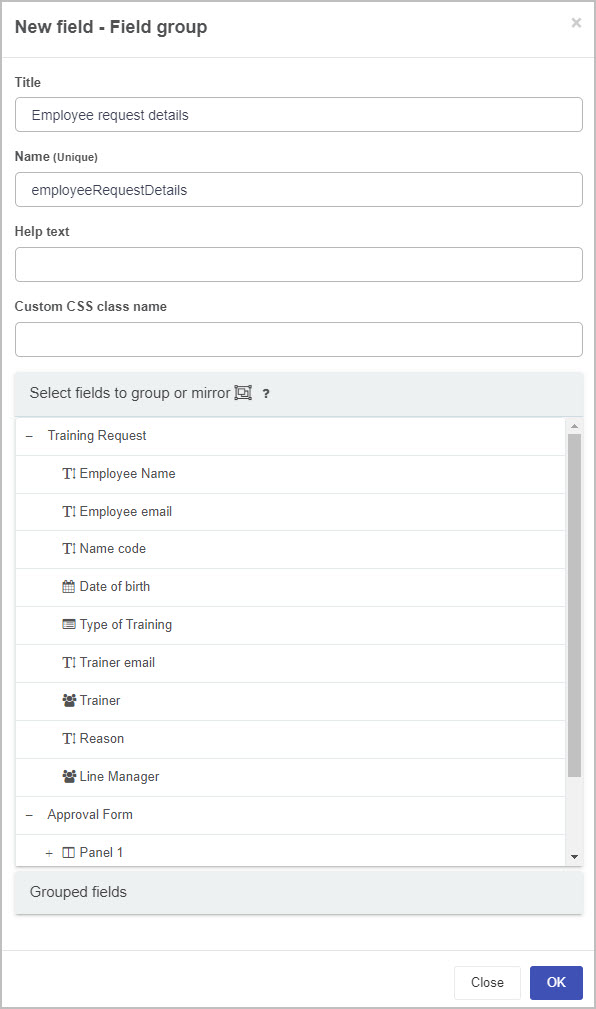
A New field - Field group dialog box will open with a range of options you can choose from for your new Field group:
-
Title - You can change the title of the Field group from the default title of ‘Field group 1’.
-
Name - This is a unique name for the field and inherits a camel case version of the entered Title.
-
Help text - You can insert text to help the form user to complete the Field group - if you add help text, a question mark
 icon will appear next to the field title and, if the user clicks on this, they will see the help text you have inserted.
 -
Custom CSS class name - You can type the name of a CSS class to allow the Field group to inherit specific styles defined in the Global CSS file.
-
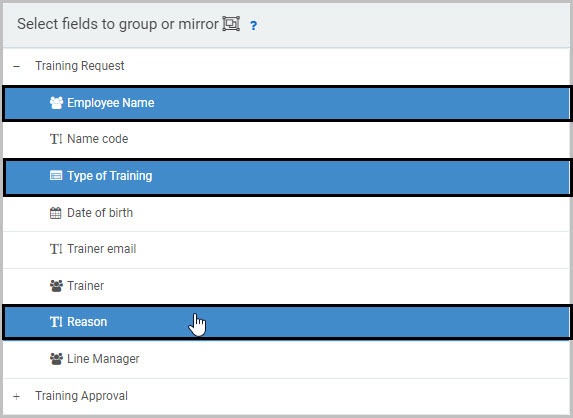
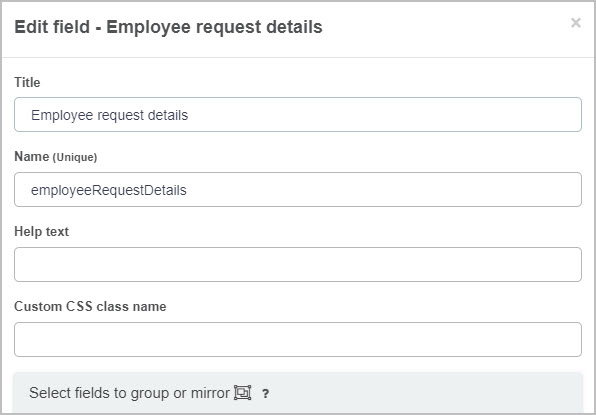
Select fields to group or mirror - You can choose one or more fields from the current process to group or mirror by clicking on the field or fields to select them. You can expand forms (listed with a plus sign beside them) to view all of the fields within them by clicking on the form title in the list. Select as many fields as you want.
In our example, we will select three fields in the ‘Training Request’ form that we want to be shown on the ‘Training Approval’ form - Employee Name, Type of Training and Reason:
-
Grouped fields - The field(s) you select will automatically be grouped together in the Grouped fields section at the bottom of the dialog box - click on Grouped fields so that it expands to show the list of fields you have chosen:

The fields you have chosen being ‘grouped’ together will mean that you will be able to edit them and move them around your form as a group (rather than as individual fields).
If there is a field or fields you do not want to be grouped, simply click on the Bin/Trash icon
 to the right and that field will no longer be grouped with the others.
You can also change the order of the fields within the Field group by simply clicking on the field’s drag handle button and dragging and dropping the field where you want it to be.

Note that selected fields grouped under the current field group are not copied only referenced.
-
Once you have completed the New field - Field group dialog box, click OK and the new Field group will be added to your form.
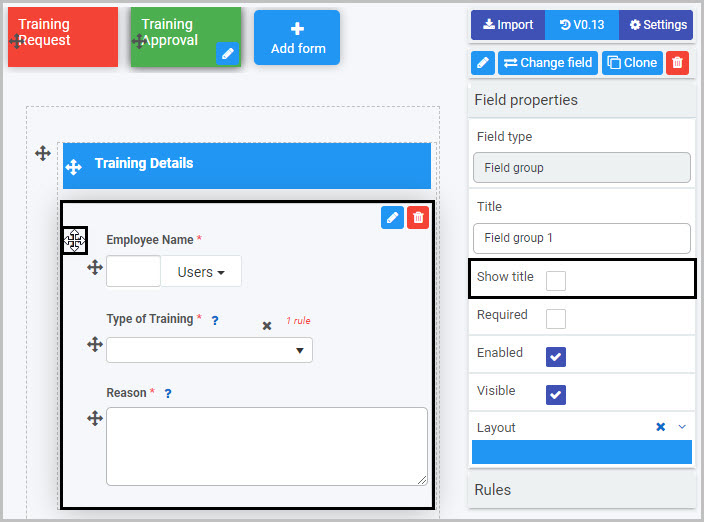
By default, the Title of the new Field group will not be shown (unless you choose to display it, by selecting the Show title checkbox in the Field properties menu to the right).
In our example, our new Field group contains the three fields we chose:
How to edit, move and delete Field groups
To edit a Field group:
- Select the field (by either clicking on the field title or on the field’s Drag handle button
 ).
). - Click on the Edit field button (Pen icon)
 .
.
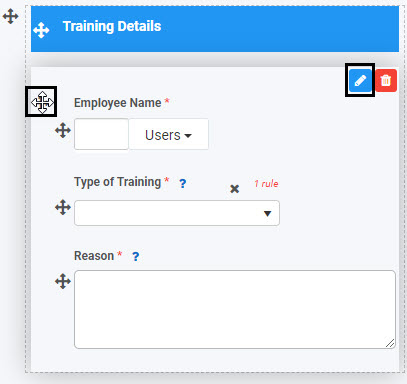
- The Edit field - Field group dialog box will open, enabling you to choose from the same range of options as appear in the New field - Field group dialog box (as already discussed in How to get started).
To move a Field group:
- Select the field’s Drag handle button
 .
. - Drag and drop the field wherever you want to move it to within your form. Note that the grouped fields are available to move and edit as a group within the form.
To delete a Field group from your form:
- Select the group by clicking on the group’s Drag handle button
 .
. - Click on the Bin/Trash button
 .
. - Click on OK to confirm (or click on Cancel if you wish to cancel the deletion).
How to edit Field group properties
To view or edit the field properties associated with a Field group, select the field (by clicking on the field title or field drag handle button  ) - the Field properties menu will appear in the right-hand pane.
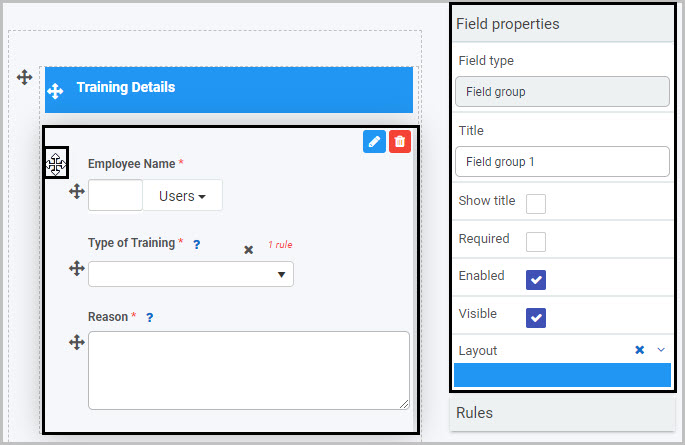
For example, the Field Properties associated with a Field group field titled ‘Field group 1’ are shown here and include:
-
Field type - The type of field, in this case a Field group.
-
Title - The Title of the field, in this case ‘Field group 1’.
-
Show title - If this is selected, the Field group title will be shown in the form. In this case, the ‘Show title’ checkbox has not been selected, so it won’t be shown in the form.
-
Required - If this is selected, the field will be mandatory for form users to complete.
-
Enabled - If this is selected, the user will be able to edit or interact with the field.
-
Visible - If this is selected, the Field group will be visible in the form.
-
Layout - The width of the blue bar can be adjusted to change the width of the Field group as it appears on a PC or mobile phone (to view the Mobile layout, click on the expand button
 to the right).
To learn more about the different options within the Field properties menu, go to Field Properties.
Saving changes and version history
Make sure to save any changes you make by clicking on the Save button  . You will always have the option to revert back to previous versions of your form by clicking the Design Version History
  button in the top right corner.
What’s next 
Now that you’ve learned about the Field group control, find out more about the other types of Layout fields you can add to a Kianda process: