Form quick actions menu
Introduction
The Form quick action menu will appear to designated users as a quick action menu option in the top right-hand corner of a form.
Depending on what type of quick actions are enabled and if you are assigned quick actions as a form user,, then you will see options when you click on the quick action button  , for example to reassign a form to someone else, or to perform a custom action like signing off on a purchase order.

How to get started
To enable quick actions, click on a process with Kianda Designer and then a form of choice so that the Edit (Pen) icon is visible.
-
Click on the
 to edit a form.
 -
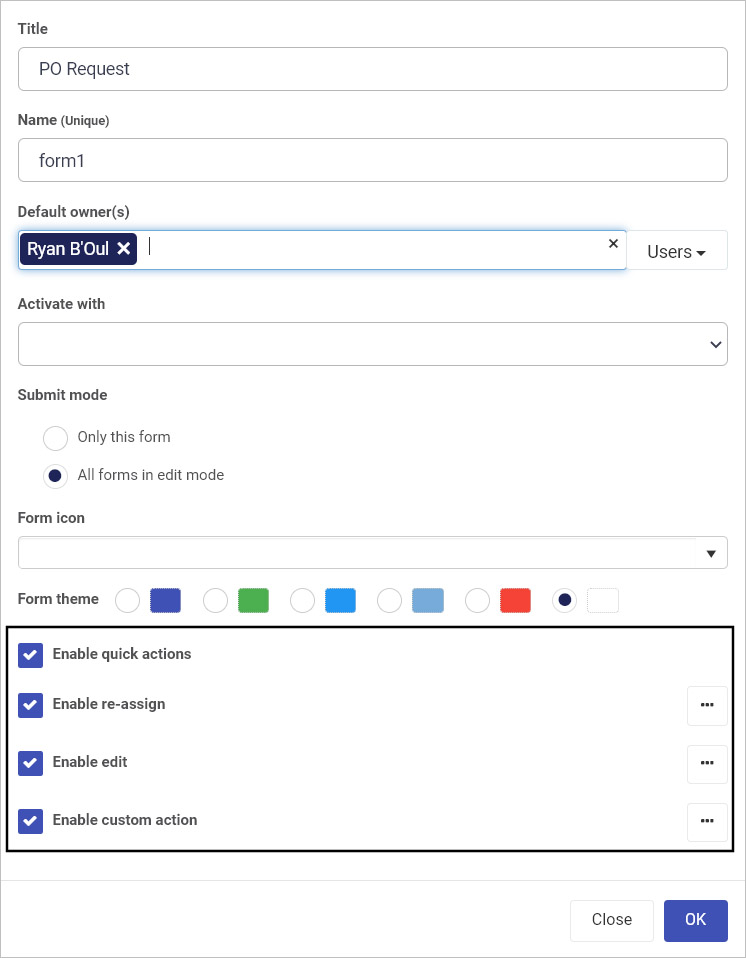
In the Edit form dialog box, check the checkbox beside Enable quick actions.
-
When you select Enable quick actions then you have three options to select:
- Enable re-assign - allows a form in a process instance to be reassigned to a by a designated person/group
- Enable edit - allows a form in a process instance to be edited by a designated person/group
- Enable custom action - allows a form in a process instance to have customised actions associated with it, and these actions are assigned to a designated person/group

Check the checkbox beside the desired action as necessary. Each option is further explored below.
Enable reassignment
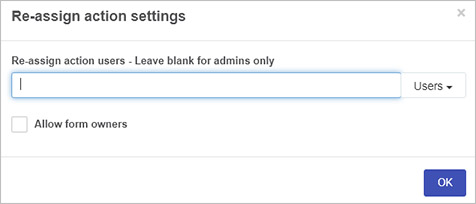
When you check a checkbox for example Enable re-assign then you can click on the Ellipsis button 

Enable edit
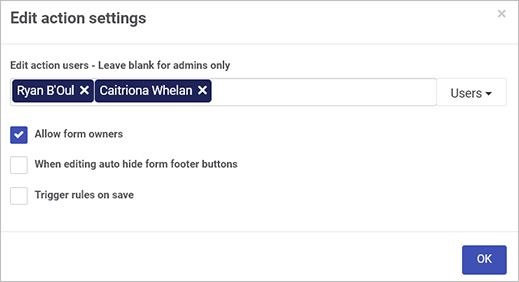
This opens the Action settings dialog box, such as the Edit action settings box shown in the image below.

-
Choose from the options in the action settings dialog box:
- Edit action users - select the Users, Groups or Partners who will use the action
- Allow form owners - allows form owners to use the action
- When editing auto hide form footer buttons - hides form footer buttons when users are editing forms in a process instance
- Trigger rules on save - allows rules to be triggered when a form is saved/submitted. In this case, select the button name used as the trigger in the Save action field
-
Click on OK when complete or Close to exit the dialog box.

Enable custom action
If you check Enable custom action users who have been selected using the Users, Groups and Partners option, will be able to perform a customised action on a form, defined using the dialog box within this section.
What’s next 
To read more about how to create processes and forms go to Application Designer.
To find out about help and support, go to Help.