Process settings
Introduction
There are a number of properties and settings that you can implement to your process and forms.
Settings and properties
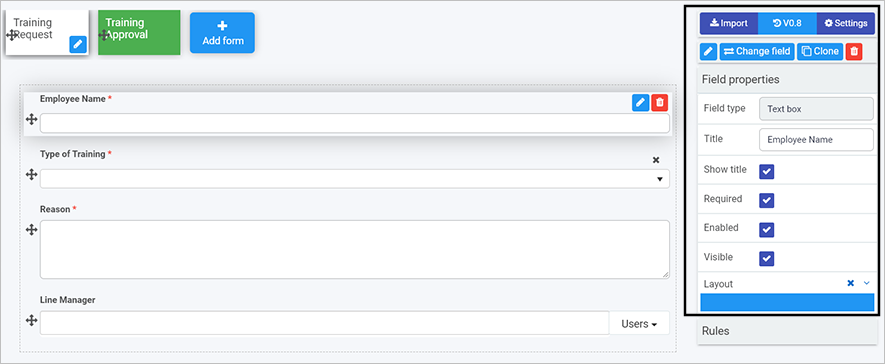
Settings are available from the right-hand pane and give you the ability to:
-
View Version history
-
Change Process settings
 .
. -
Edit form information by selecting a form and clicking on the Pen button
 .
. -
Change a field to another field by clicking on Change field
-
Create a duplicate form by selecting a form, clicking on the Clone button
 and then click on Ok. A version called ‘Form Name Copy’ is created and available to edit on the canvas. The Clone button can also be used to clone form elements like controls or buttons.
 -
Delete a form by selecting a form, clicking on the Bin/Trash button
 and then click on Ok after you have reviewed the form title and you are sure this is what you want to delete. Click on Cancel if you wish to cancel the deletion.
 -
View and edit Form properties and rules.
Process settings
You can edit process settings by clicking on the Settings button  in the right-hand pane.
Within process settings, there are four tabs to navigate to:
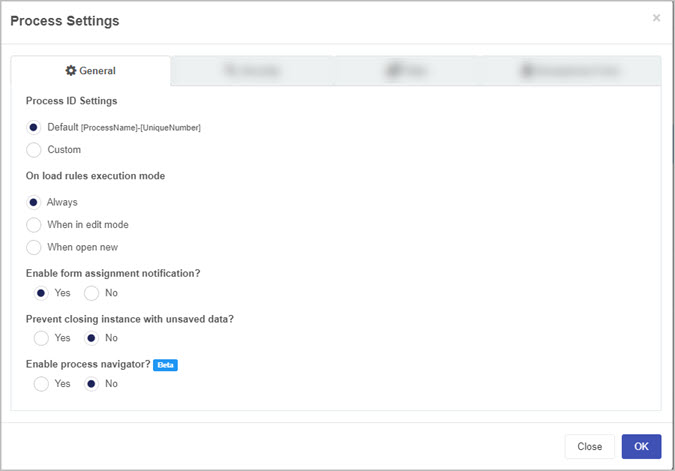
1. General:
-
Process ID Settings - choose from a) Default or b) Custom and use a combination of [ProcessName]-[UniqueNumber]-[FieldName]
-
On load rules execution mode - options are a) Always b) When in edit mode or c) When open new. The default setting is Always.
-
Enable form assignment notification? - options are a) Yes or b) No
-
Prevent closing instance with unsaved data? - options are a) Yes or b) No
-
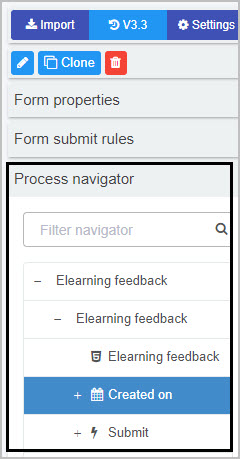
Enable process navigator? - options are a) Yes or b) No. If you select Yes, the Process navigator tab will appear in the right hand panel, allowing you to quickly snap to and view desired form controls and rules.

2. Security:
-
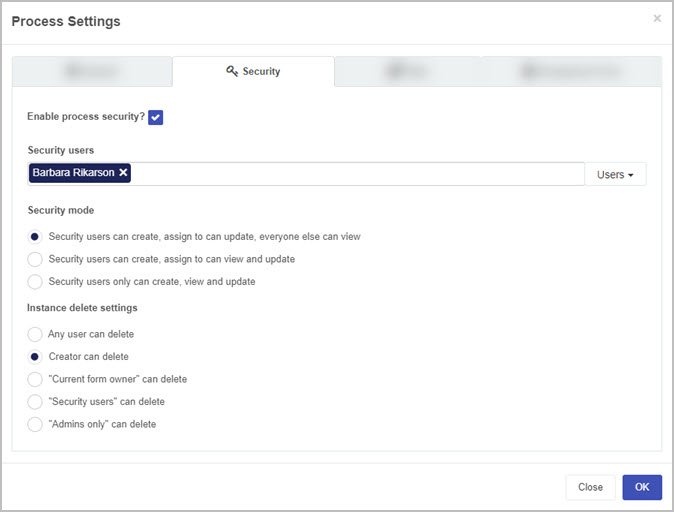
Enable process security - if you tick the checkbox, can allow certain Users, Groups or Partners to have certain privileges related to the radio button options to create, assign and view as shown below. The default setting is Security users can create, assign to can update, everyone else can view.
-
Instance delete settings - options are a) Any user can delete b) Creator can delete c) “Current form owner” can delete d) “Security users” can delete e) “Admins only” can delete. The default setting is Creator can delete.
3. Tabs:
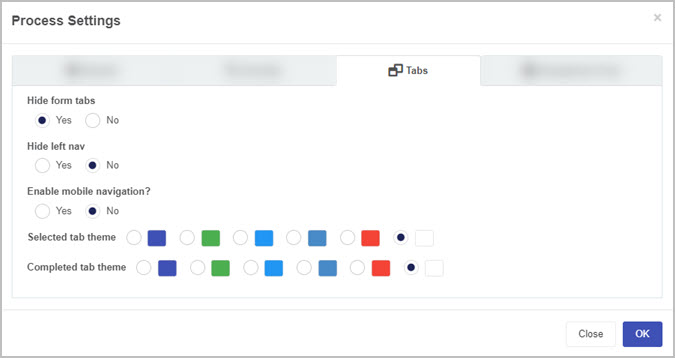
-
Hide form tabs - gives you the ability to hide form tabs, options are a) Yes or b) No
-
Hide left nav - gives you the ability to hide navigation elements, options are a) Yes or b) No
-
Enable mobile navigation? - options are a) Yes or b) No
-
Selected tab theme - choose from Navy, Green, Blue, Amber, Red or White as a colour when a form is selected.
-
Completed tab theme - choose from Navy, Green, Blue, Amber, Red or White as a colour when a form is completed.
4. Anonymous Form:
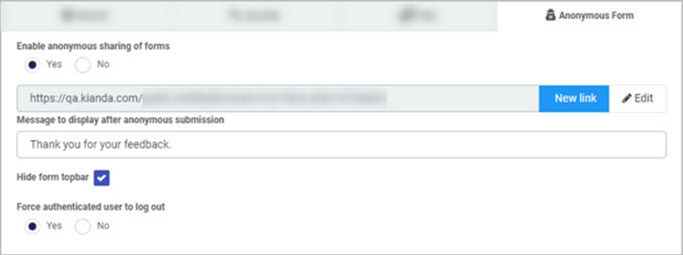
-
Enable anonymous sharing of forms - gives you the ability to share forms with people outside your organisation for example a feedback form or GDPR subject access request. Options are a) Yes or b) No. If you click on Yes there are various options that you can add:
- Click on New link to generate a new anonymous form link to share with users and click on Edit to change the link.
- Message to display after anonymous submission - to add a display message.
- Hide form topbar - checkbox to hide the form topbar.
- Force authenticated user to log out - options are a) Yes or b) No to force the authenticated user to log out once the form is submitted. If No is selected, you can choose to Redirect authenticated user to:
- Process URL
- Workspace Home
- The result is a globally available link to allow external users to create a new instance. You can use the Anonymous form link Rule to generate a new anonymous link at runtime that will point to an existing process instance that can be shared with external users.
When you are finished editing the process settings:
- Click on the OK button
 to save your changes or click on Close to exit the dialog box without saving.
 - Click on the Exit button
 to go back to the process list, the Save button
  to save your work, the Preview button
  to preview what you have created and the Publish button
  to publish your work.
What’s next 
- To learn more about rules and controls that can be applied to forms go to Controls and Rules.
- To learn more about properties, go to Properties.