Excel workbook add-in
Introduction
You can generate excel workbooks within Kianda processes and populate the workbooks with data captured within each process instance. This could be useful, for example, when working with a lot of table data within Kianda. The add-in will automatically populate excel cells with the data from a table within your process. Each time value changes inside of a table, those values will be reflected in the Excel workbook every time you generate a new workbook.
Before you get started
In advance of creating a template, you need to install Kianda add-in for word. Go to Installing Kianda add-in for Word or Excel and follow the steps of installation. You also need to create a template outline before starting, to learn more about what a template outline is, go to template outline.
Using the Kianda Add-in for Excel
-
On the right-hand side of the Home tab, click on the Kianda Add-in.

-
In the Kianda pane, log in using your Kianda username and password, select your subscription and press Continue.
-
Click on the process link button
 to get a drop-down list of Kianda processes that you have access to.
 -
Select a relevant process and a relevant form that you want to create a template for.
-
Select a cell in the Excel workbook that you want to use to store the data from your process.
-
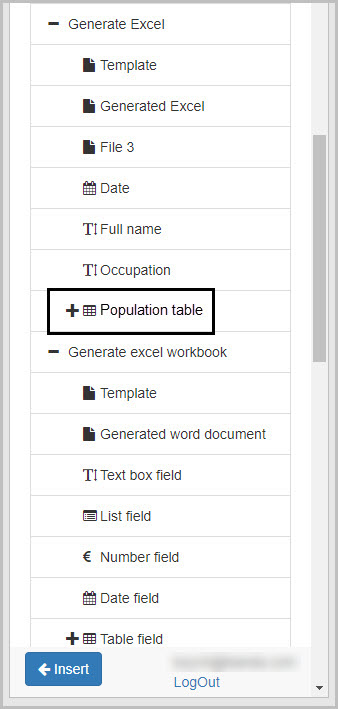
Select the Kianda form field you would like to add to the Excel template. For example Population table field in the Generate Excel form as shown below.
-
Click on
 at the bottom of Kianda task pane to add the form field into the template. Note that when you select a Table into the template, only the Title columns appear. This is because the add-in will look for all rows with the specific column name and insert the values into the excel workbook. See below for an example:
When you add in the above table into Excel as a template smart tag, it will look as follows:
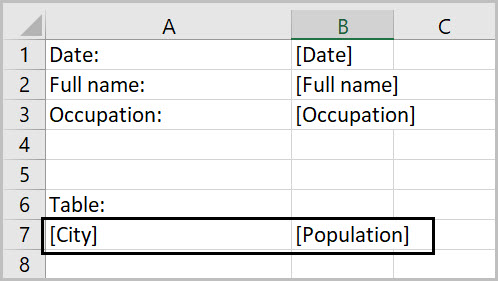
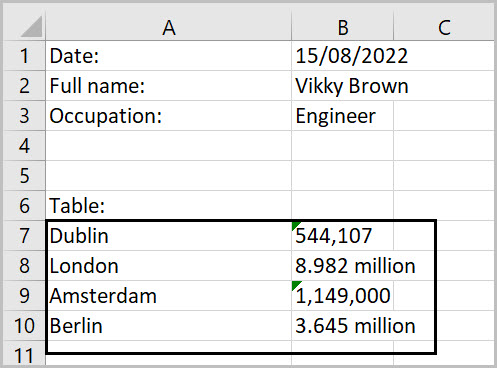
The resulting excel workbook of the above table and template is shown below:
-
Repeat steps 9 - 11 for as many form fields as needed and format the workbook as necessary.
-
Save the template. You can then add in the template as a File field within the process in Kianda.
List of field types accessible by Excel add-in
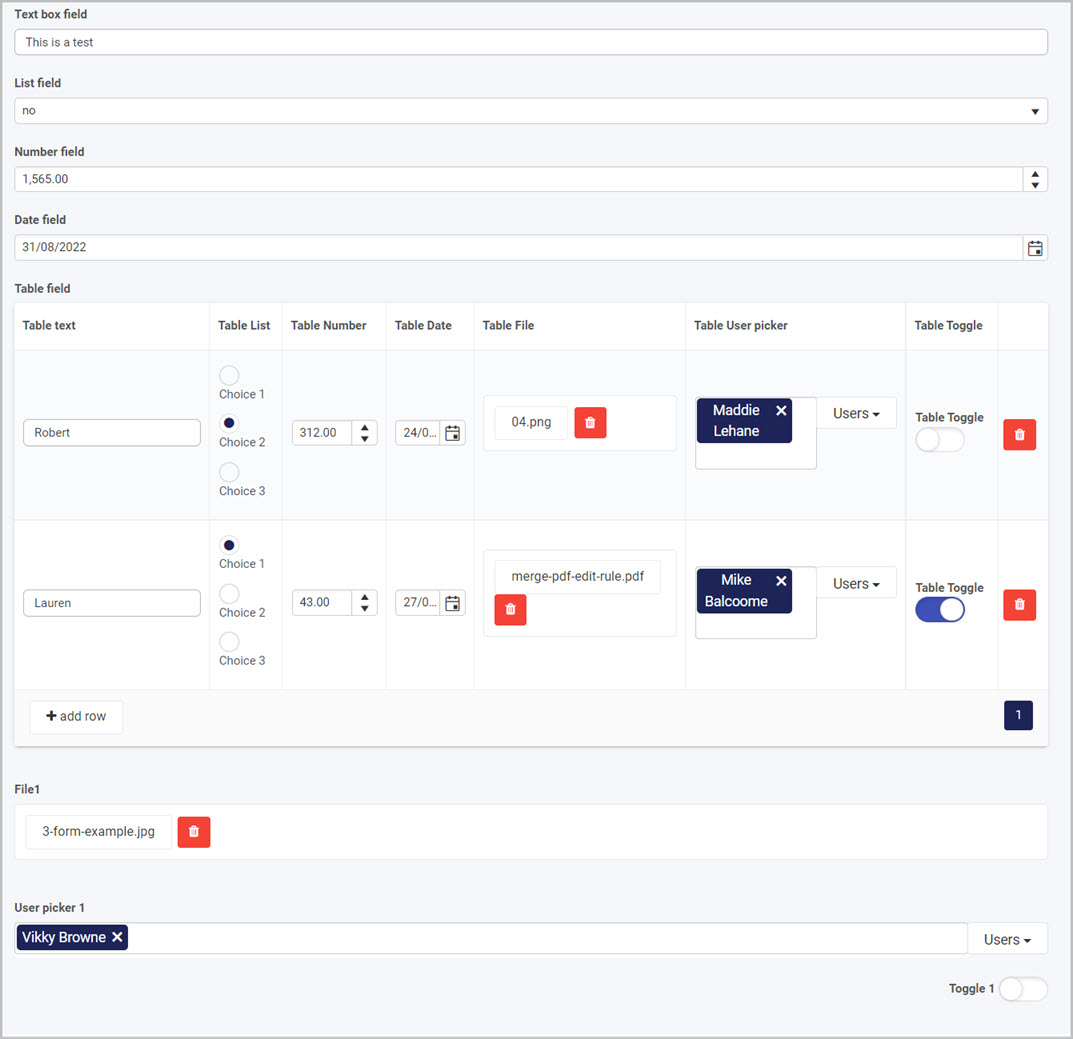
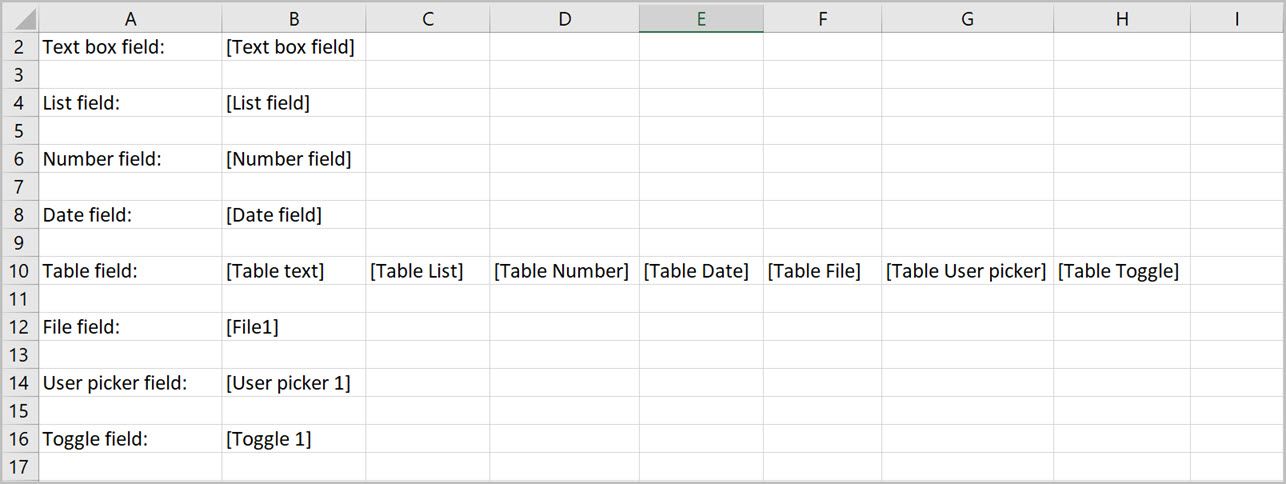
You can use different types of input controls when creating your template for an Excel workbook, the images below represents the value pulled from the form into an Excel workbook for each of the input controls that are available in Kianda:
Example form with all input controls in Kianda.
Excel template used to represent all values from the above form.
Excel workbook result for the example values from the above form.
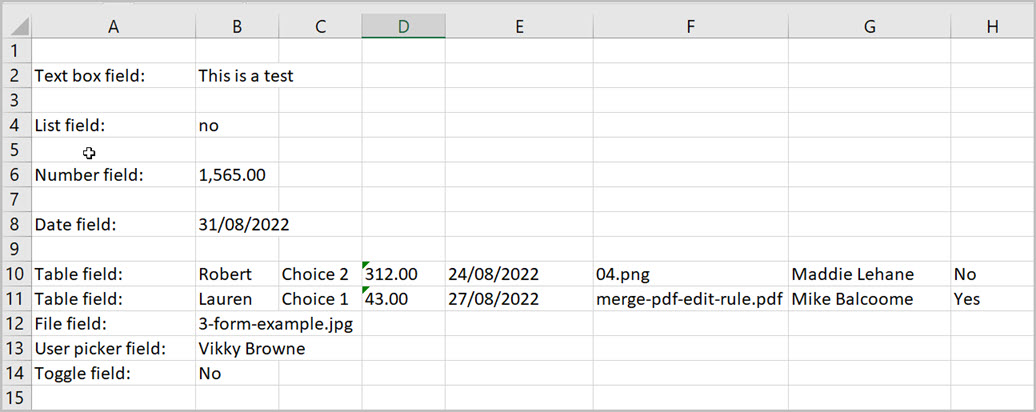
- Text box control - retrieves the value from the text box into the cell that the smart tag was inserted.
- List control - retrieves the value from the list field into the cell that the smart tag was inserted.
- Number control - retrieves the value from the number field into the cell that the smart tag was inserted.
- Date control - retrieves the value from the date field into the cell that the smart tag was inserted.
- Table control - retrieves the values for each row inside of the table. Note that when the smart tag is inserted, only the column name is presented.
- File control - retrieves the name of the file that is stored in the file field, not the actual file therefore you cannot view any files that are retrieved from file fields.
- User picker control - retrieves the name of the user as a value.
- Toggle control - retrieves a No value when the toggle is turned off, and a Yes value when the toggle is turned on.
What’s next 
With Kianda Excel add-in you can create templates which can be then used to generate dynamic Excel workbooks, to learn more on how to generate a Excel workbooks go to Generate excel workbooks.
There is a Kianda Add-in for Word that is added in the same way as the Kianda Add-in for Excel. Usage is very similar allowing you to connect a Word document to Kianda processes to create a templates that can pull data from specific process instances. To learn more about adding Kianda to excel go to Word document add-in.