Adding Conditions
Conditions are a key component of Kianda rules. They are the triggers that result in fully dynamic forms. Conditions enable you to create natural language conditions when rules should be triggered.
The Conditions button  is found within all rules as well as dashboard widgets. Conditions can also be set when setting data source security levels for B2B portals.
Conditions add an important level of interactivity, creating dynamic pathways within a process. These pathways could result from user interaction or from other events that happen.
Conditions work on the ‘if…then’ principle: ‘if’ the condition exists ‘then’ an action happens, and where applicable, if the condition does not exist, then another action can happen. You can use these principles as steps to implementing conditions:
- Create the condition(s)
- Create the action(s) that will be applied as a result of the first condition being in place.
- Where applicable, create the otherwise action(s) based on other conditions being in place.
Create the condition
-
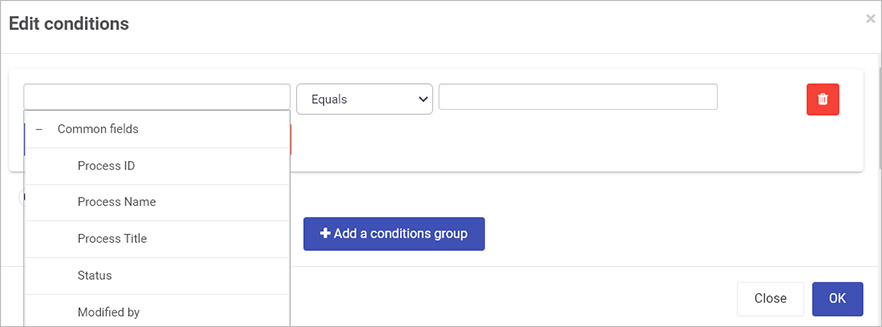
To create conditions, first choose the process element you want the condition to apply to – such as a form, set of forms, a field/control or set of fields. This could also be a set of common fields associated with all process instances, such as Process ID, Status or Modified by, see image below.

-
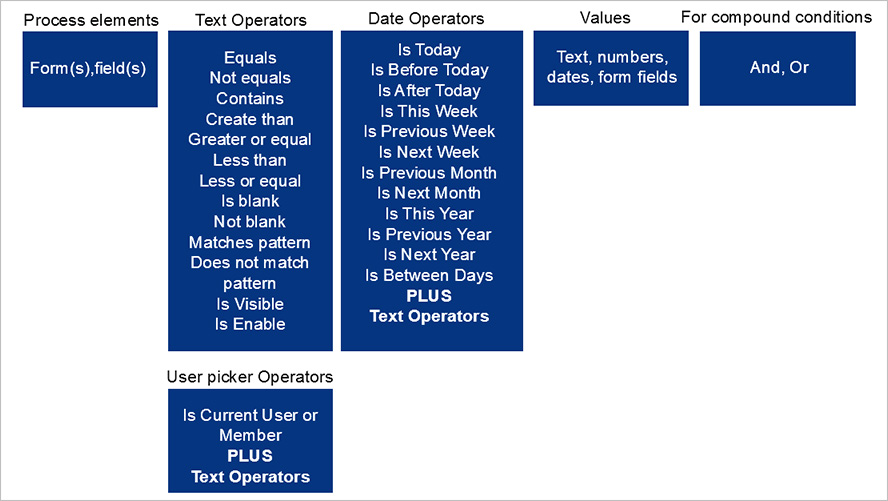
Next, depending on whether the rule is applied to text-based fields, date fields or user picker fields, choose from 13 text operators, 25 date operators and one additional user picker operator, as shown in the image below.
-
Then choose a value, this could be typed in text, number(s), date(s), form(s) or field(s).
Condition elements

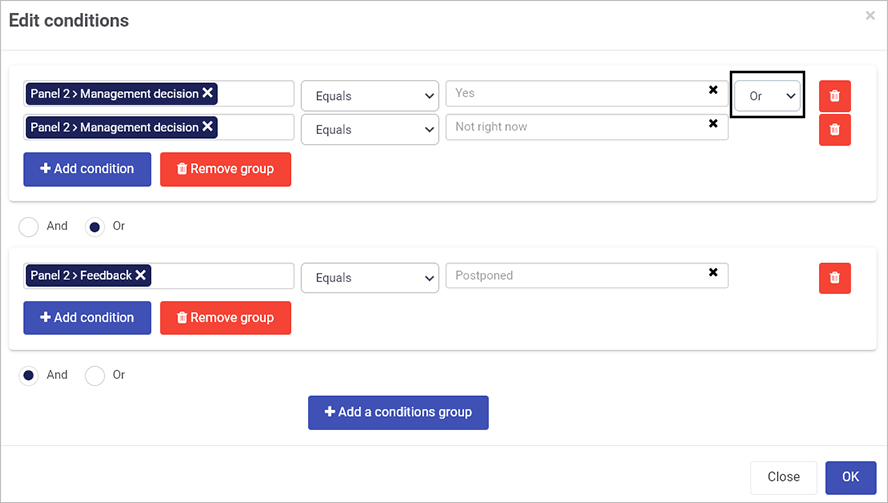
In the case of multiple conditions, you can use And or Or to create a group of compound conditions:

The result is a flexible process workflow that will result in desired actions based on any number of conditions.
Rule action(s) – example Hide or Disable rule
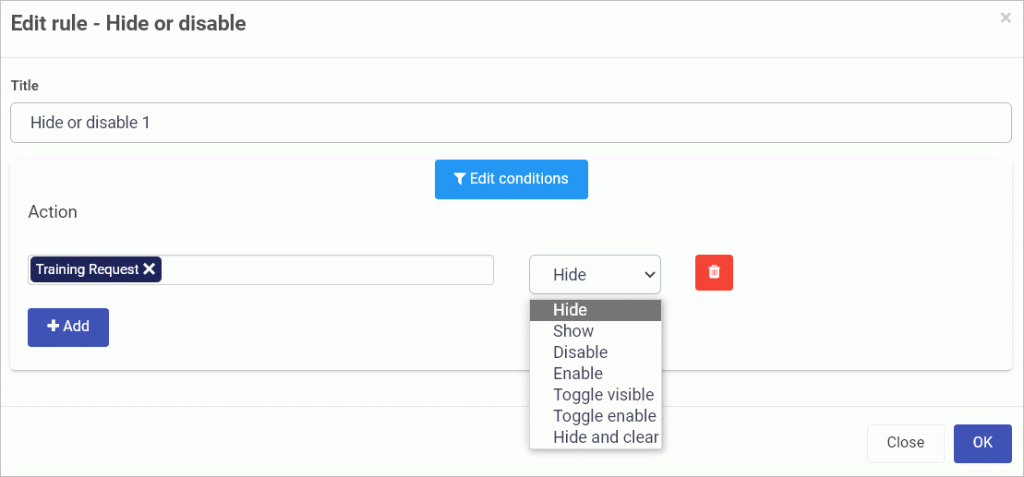
To create actions and where applicable, otherwise actions, the action will depend on the rule that is chosen. All Kianda rules use a natural language structure to make it is easy to apply actions. For example, for the Workflow rule, Hide or Disable, you can choose forms and fields from your process and then apply seven possible actions (as shown below).
Action elements for Hide or Disable

The actions within Hide or disable are:
- Hide will hide a process element (forms or fields) from view.
- Show will show the element.
- Disable blocks a user from editing an element.
- Enable allows a user to add a value to an element.
- Toggle visible will toggle between showing an element or not, based on subsequent clicks of a field that the rule is applied to.
- Toggle enable will toggle between allowing an element to be edited or not, based on subsequent clicks of a field that the rule is applied to.
- Hide and clear will allow you to hide a process element and clear the details. For example, if a toggle button has this rule applied, with an otherwise action of show on a textbox, then if one value is chosen on the toggle button, the user is allowed enter details into the textbox. The otherwise action is that the field is hidden and cleared of data, so that no data can be retrieved. This might be useful, for example, when sensitive information is used, like a social security number on a form.
Note: You can use rules to create actions without conditions too. In this case the rule will simply execute, for example when a form or field is clicked on.
What’s next 
Depending on how the rule is applied, for example to a Submit button, the rule order is important to consider, see Multiple rules.
To find out more about rule implementation, go to the main Rules page and then click on the links to the different rule categories.