As a subscription owner you will gain access to the portal at portal.kianda.com. The portal subscription is created in mind of all subscription owners where they can manage their own subscription environments. A subscription owner is one individual which is the main owner of a Kianda subscription.
Each subscription gets a Production environment along with two extra ones, the Development and Quality Assurance environments. Portal is used to manage those environments by allowing you to transfer assets such as processes, dashboards and widgets from one environment to another.
Production Environment
Production is used as the main environment by your employees. They will be able to use process designs which are working to your standards and that match all your process requirements. The users of this environment also will be able to view dashboards which represent data from your processes.
Development Environment
The Dev environment is used as your testing grounds, here your will be able to start developing new process designs, new dashboards and new widgets. You can also experiment and learn with how kianda works, update or make changes to any existing process designs.
Quality Assurance Environment
The QA environment is used by a certain amount of your employees which will use the newly created process designs, dashboards and widgets made in the Dev environment. The employees will be able to test the flow in new processes, see if dashboards display correct information and check if widgets are working in the correct way. When those tests are complete and no issues are found, you can push all assets into the Production environment.
How to create a new workspace
With your subscription you can create up to five workspaces which can be used by external customers and suppliers.
To create a workspace:
-
Go to Home > Create New Workspace
-
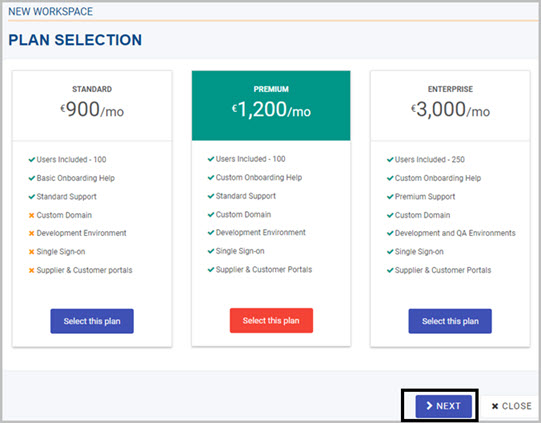
In the new workspace dialog box, select a plan which is most suited to your needs.
-
Click on Next to continue to the Details dialog.
-
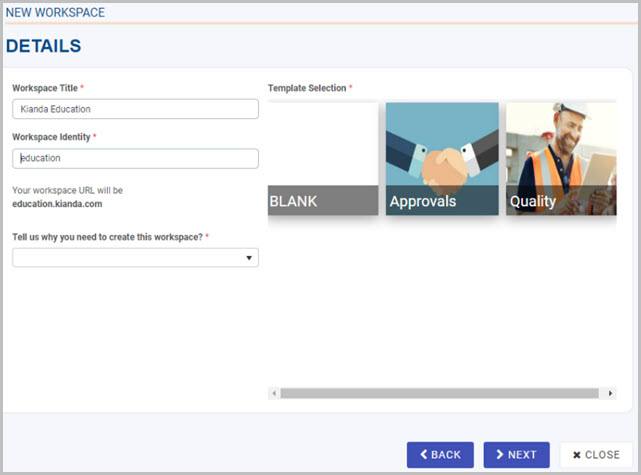
In the detail dialog fill out the following:
- Workspace Title - title of the workspace.
- Workspace Identity - identity is used as the URL for your workspace.
- Reason for creating the workspace - select a reason from the provided drop-down list.
- Template selection - select the template you want to use for your
-
Click on Next to continue to Payment.
-
In the payment dialog, fill out the following:
- Company Details - fill in the details of your company.
- Users - select the number of users are allowed to be created in the workspace.
- Portals - select the amount of portals of the workspace you can create, for example, Development or QA
- Payment Method - select the payment method.

-
Click on Submit to create your new workspace.
-
You will receive a success message and you will now see your workspace in the Home dashboard.
How to create Dev and QA Environments
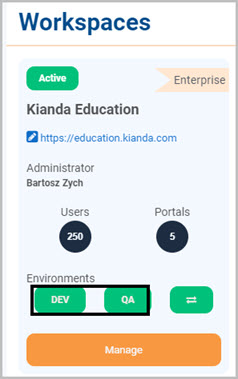
When you first sign up for subscription, you will gain the Production environment by default. You will need to create your own Dev and QA environments, this can be done in portal.kianda.com. Go to the home page of portal and scroll down to the Workspaces section. Here you will see all available workspaces and their environments. 
To create Dev or QA environment, follow the steps below:
-
In the available workspace, click on either the DEV or QA button. In this example we will create a Dev environment.
-
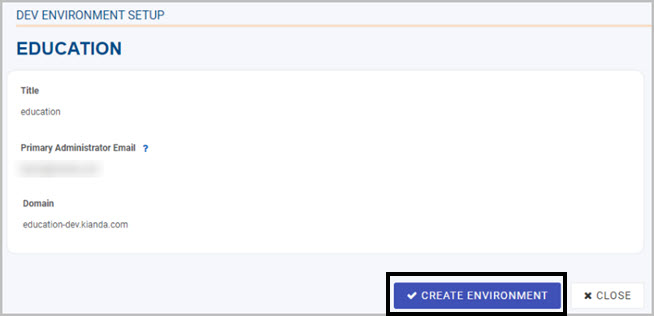
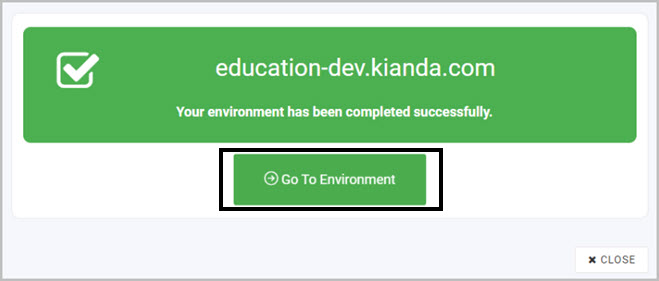
In the dialog box that will open, click on the Create Environment button.
-
You will be prompted with a success message when the environment is created. You will be able to open the environment by clicking on the Go To Environment button.
-
To create the QA environment, follow the same steps as creating Dev.
How to transfer assets between Environments
Portal allows you to transfer process designs, dashboards and widgets between all of your environments, whether its from. Production to QA, QA to Dev. You can transfer between environments in which ever way you need. To do so follow the steps below:
-
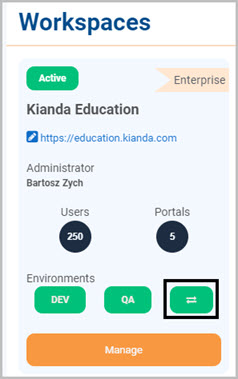
In the portal, go to the Home page and scroll down to the workspaces section. In the available workspace, click on the transfer button.
-
When you click on this button for the first time, a dialog box will prompt you to sign into your workspace for authentication. After successful authentication, you will see the following screen where you can manage your assets.
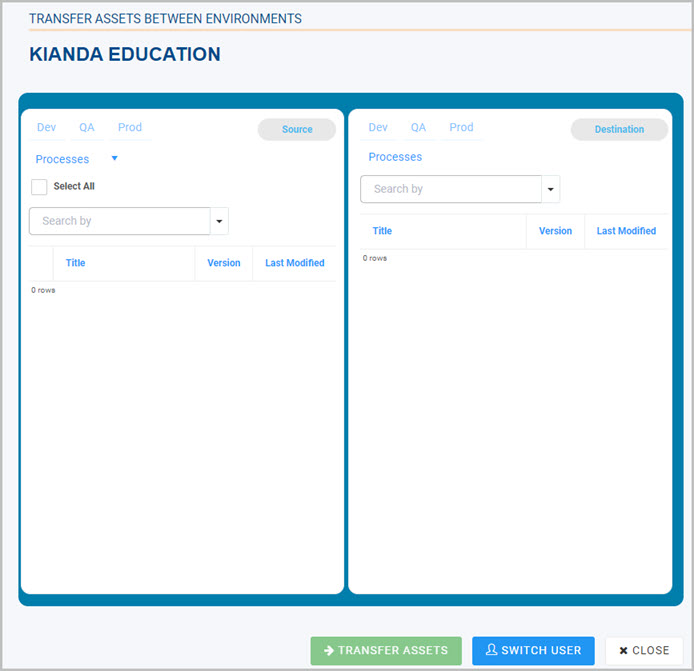
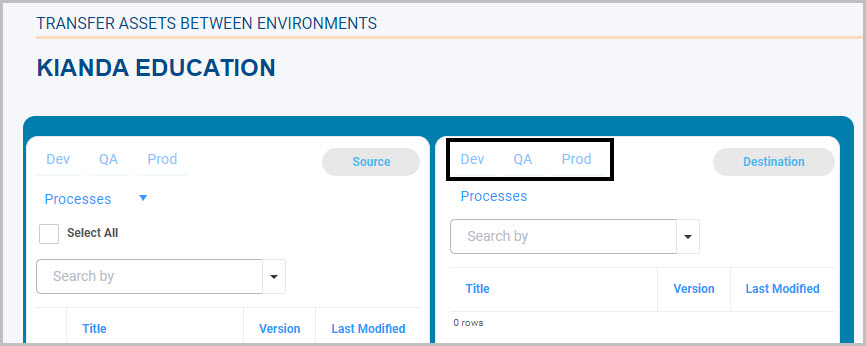
The screen is divided into two sides, left side is the source and right is the destination. You will always transfer assets from source (left) screen to destination (right).
-
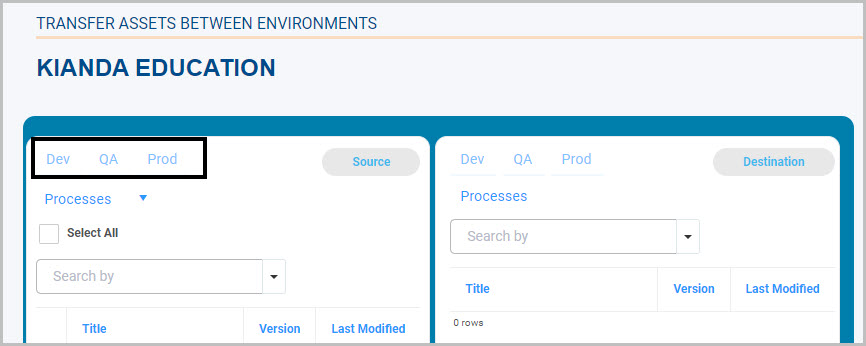
Choose the source environment from which you want to transfer assets. This can be selected on the source (left) side in the top left.
-
Now choose the destination environment which can be found in the same place on the destination (right) side.
-
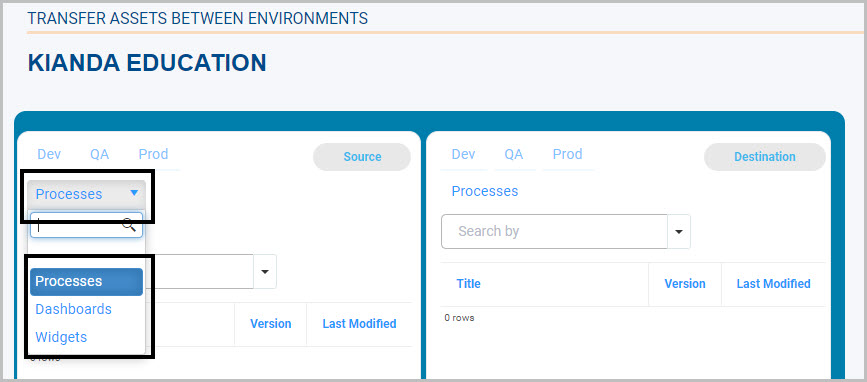
Next, you need to choose the type of assets you want to transfer. Select from processes, dashboards or widgets in the drop-down provided on the source (left) side.
-
Finally, select the specific assets you want to transfer from the source to destination environment and click on the Transfer Assets
 .
. -
The transfer assets will appear that they were create/modified as your user. You can switch user by clicking on
 button.